

TL;DR
- PowerPoint looping lets your slideshow progress from one slide to the next automatically, creating a seamless, hands-free display perfect for events, kiosks, and continuous presentations.
- To loop a presentation on Windows, go to Slide Show → Set Up Slide Show, check Loop continuously until ‘Esc’.
- On Mac, open Set Up Show via Slide Show, enable looping, and assign auto-advance times for each slide.
- For looping animations, go to Animations → Effect Options → Timing and set the repeat option.
- If you face issues, review timing settings, kiosk mode, animation repeat, and audio loop options.
- For advanced results, use custom slide shows, seamless transitions, background audio, and kiosk mode optimization.
- Export your presentation as an MP4 for continuous playback on TVs or signage.
Picture this: You’re mid-event, your Microsoft PowerPoint deck is running on the big screen, and just as the crowd’s attention peaks, the final slide appears… and stays there. No smooth return to the first slide, no seamless flow; just an awkward pause while someone scrambles to hit the next slide. Frustrating, right?
This is where PowerPoint looping becomes your secret weapon. Whether you’re running a trade show booth, creating a looped slideshow for a lobby, or setting up a custom slideshow for a kiosk, a smooth, self-running setup can save you time and stress.
In this blog, we’ll show you exactly how to loop a PowerPoint presentation in 2025, plus pro tips and troubleshooting options, so your entire presentation plays flawlessly from first slide to last slide and back again.
How Do I Get a PowerPoint Presentation to Loop? (on Windows)
Looping PowerPoint on Windows is easier than you think, and it can transform your deck into a smooth, hands-free display. Follow the steps below to keep your slides playing seamlessly without interruptions.
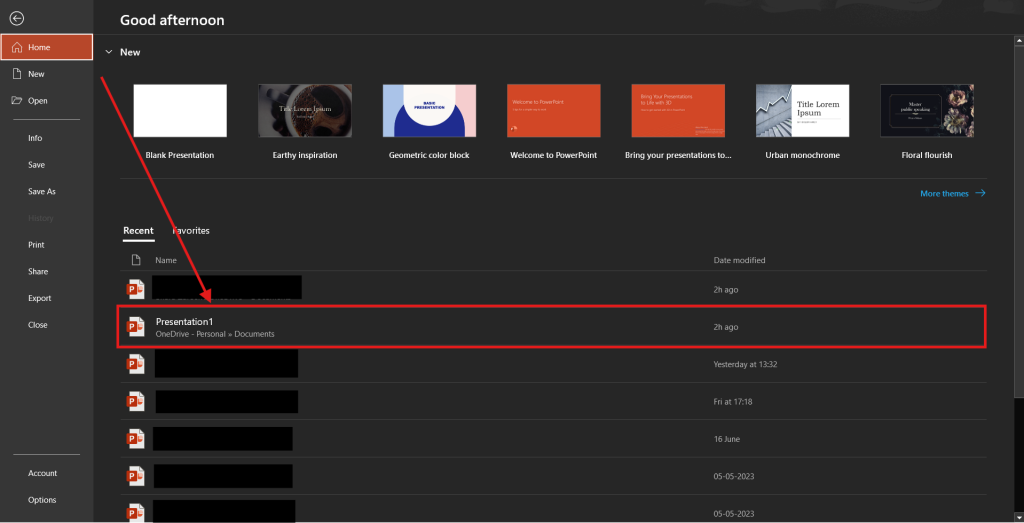
Step 1: Launch Microsoft PowerPoint and open the file you want to loop. Ensure all slides, images, and media are finalized, as looping will repeatedly display the current content in order.
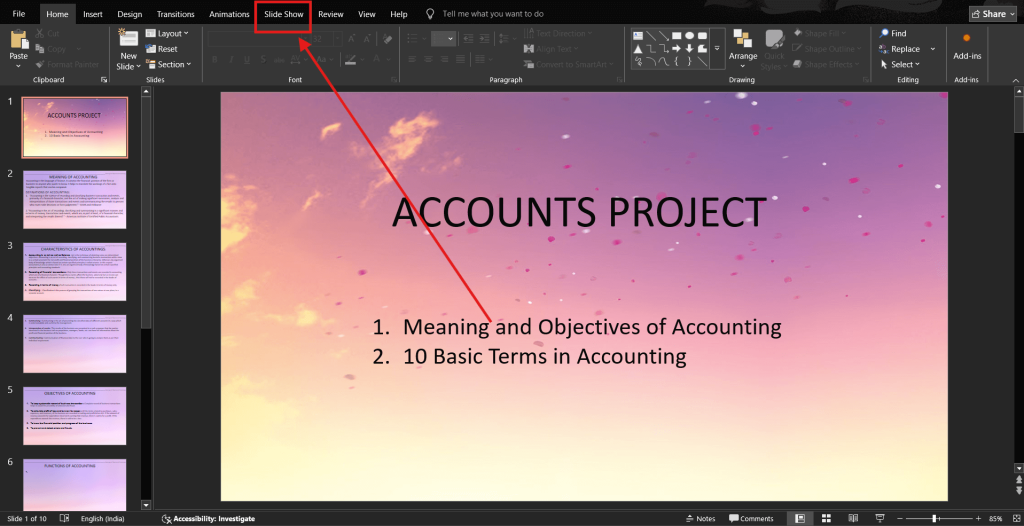
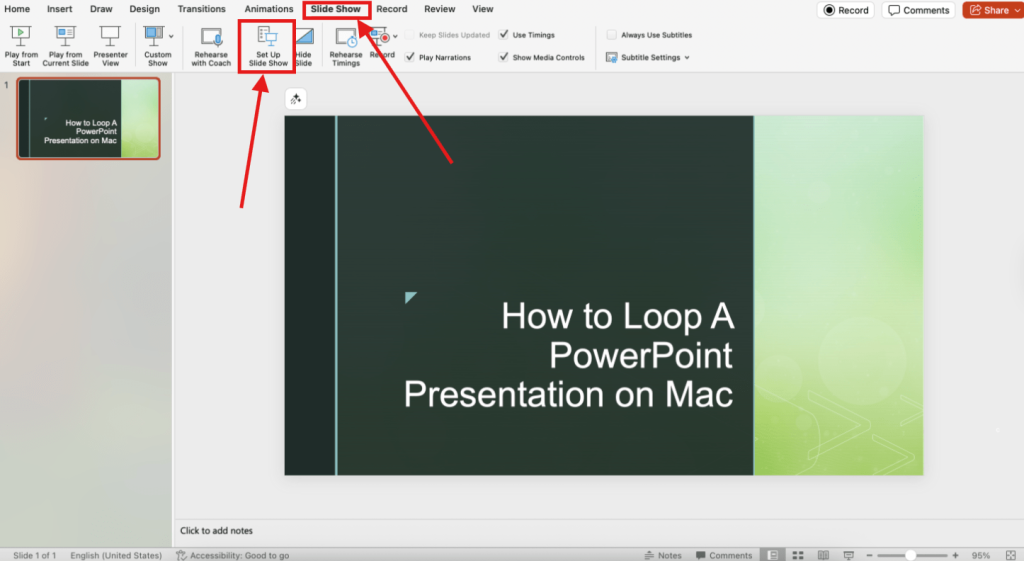
Step 2: In the top menu bar, locate and click the Slide Show tab. This section contains all playback, looping, and display controls to make your presentation run automatically from start to finish.
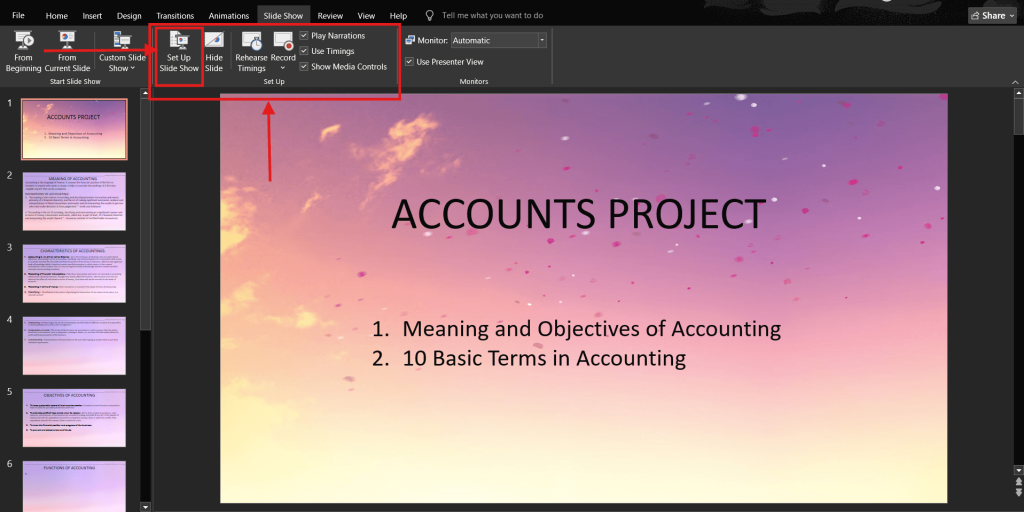
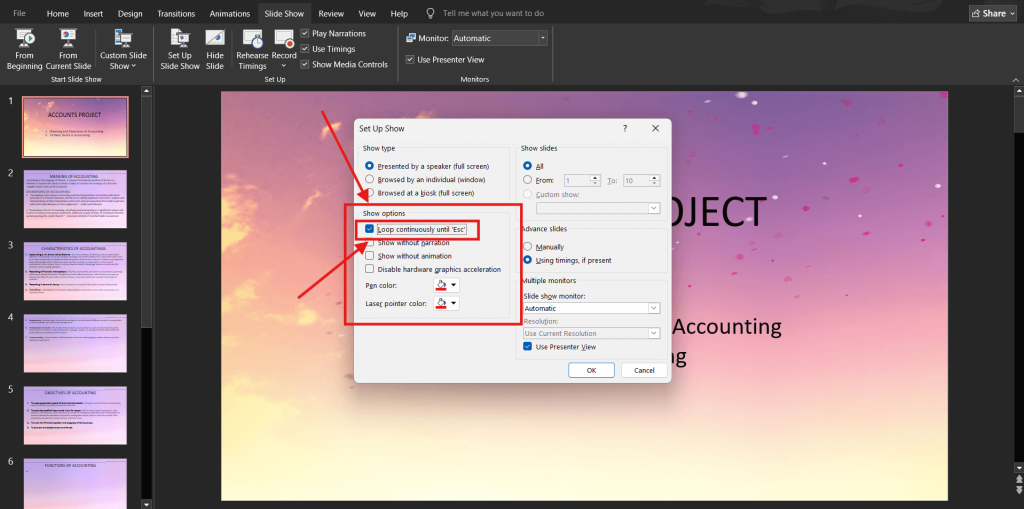
Step 3: Within the Slide Show tab, find the Set Up groupand click the first option, Set Up Slide Show. This opens a dialog box with options to control playback behavior, including looping and kiosk settings.
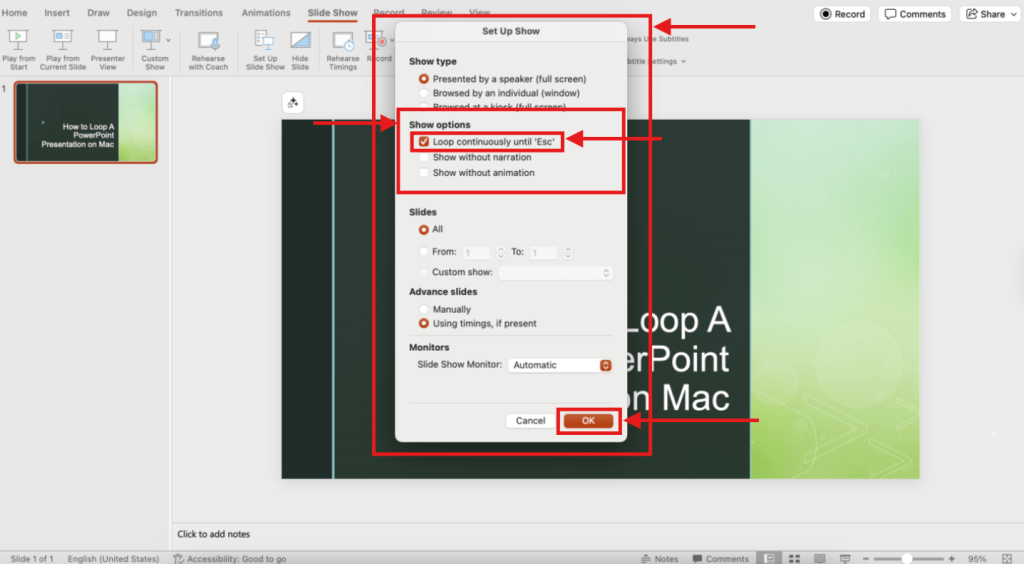
Step 4: In the Show options section of the dialog box, check the box labeled Loop continuously until ‘Esc’. This ensures the entire presentation restarts from the first slide after reaching the last slide.
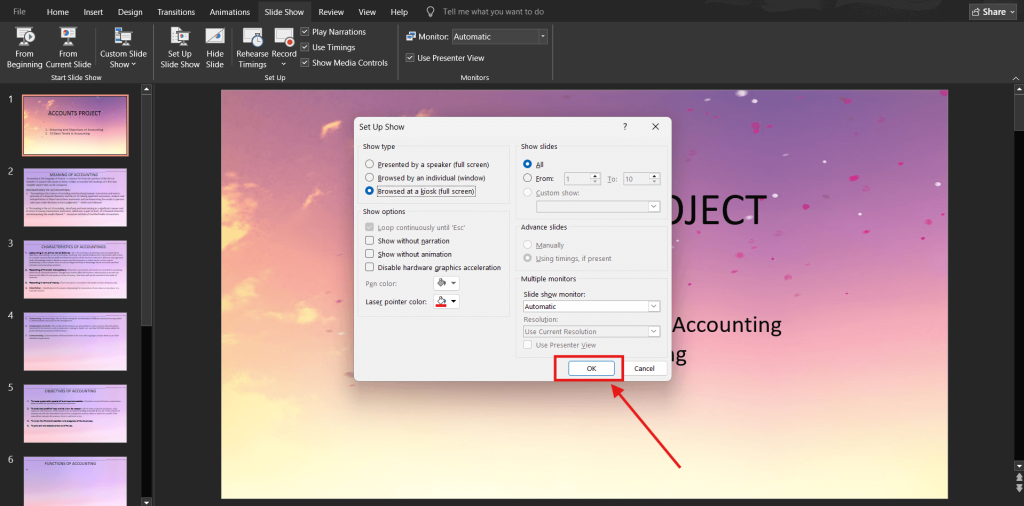
Step 5: If your slideshow will play without a presenter, select Browsed at a kiosk (full screen) under Show type. This automatically loops slides and disables manual navigation via keyboard or mouse click.

Step 6: After choosing your desired looping options, click OK to save the configuration. This applies the looping behavior to your slideshow until you manually change the settings again later.
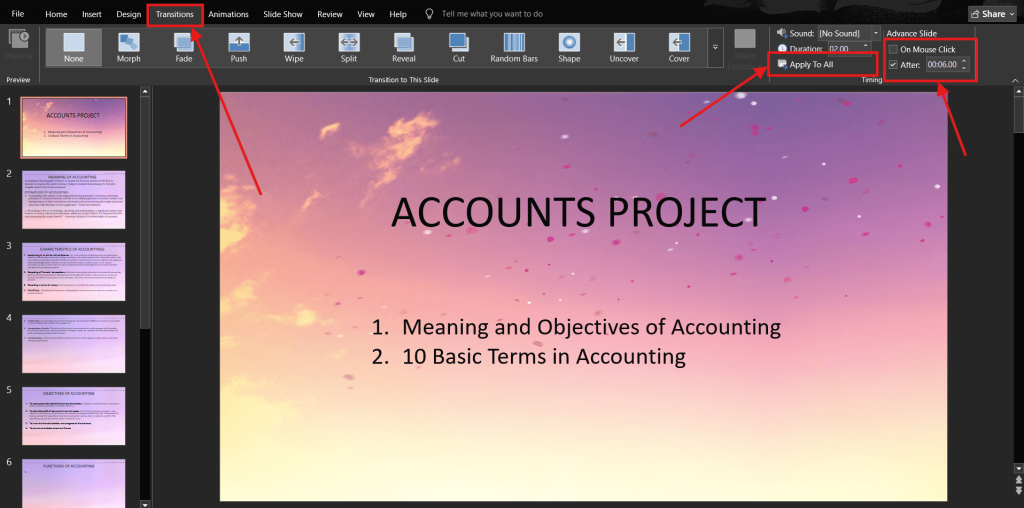
Step 7: To set slides to advance automatically,go to the Transitions tab. In the right corner of the drop-down, uncheck On Mouse Click, check After, and enter a duration for each slide. For uniform timing, click Apply to All so all slides use the same timing.
Now that you know how to loop a PowerPoint slideshow on Windows, let’s walk through how to do it on a Mac, step by step.
Also Read: 15 AI Tools to Improve Your PowerPoint Presentation
How to Loop a PowerPoint on Mac?
If you’re using Microsoft PowerPoint for Mac, enabling a looped slideshow works similarly to Windows, but some menu names and options are slightly different. Here’s how to auto loop a PowerPoint on Mac for a smooth, uninterrupted looped slideshow:
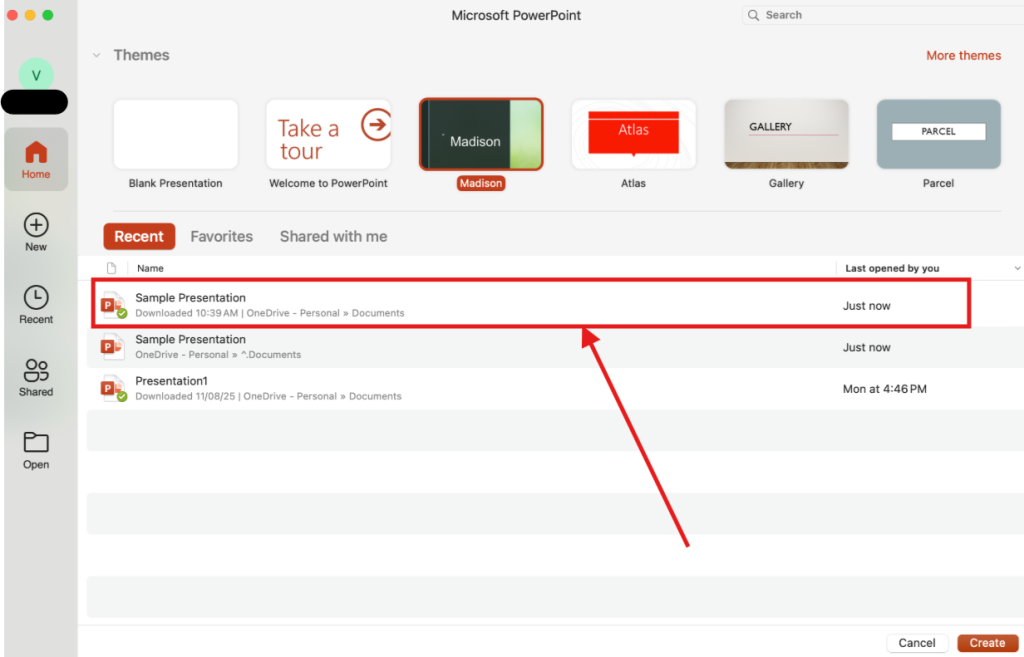
Step 1: Open your presentation and make sure every slide, animation, and media file is ready for prime time. Loops will replay everything exactly as it is.
Step 2: In the menu bar, click Slide Show, then choose Set Up Slide Show from the dropdown.
Step 3: In the Set Up Show dialog box, go to Show options, and select Loop continuously until ‘Esc’. This setting ensures your slideshow cycles back to the first slide after the final slide without stopping. Click OK at the bottom of the dialog boxto save your preferences.
Step 4: To keep it hands-free, set automatic slide timings. Go to Transitions. At the top right corner, find and disable On Mouse Click, enable After, and enter your preferred display time. Select Apply to All slides if needed.

Also Read: Top 5 Websites for Professional PowerPoint Templates
How to Loop a PowerPoint Animation?
Sometimes you don’t need the entire presentation to loop, just a specific animation, like a spinning logo, pulsing arrow, or moving background. PowerPoint lets you loop animations independently so they repeat while the slide is displayed. Here’s how to do it:
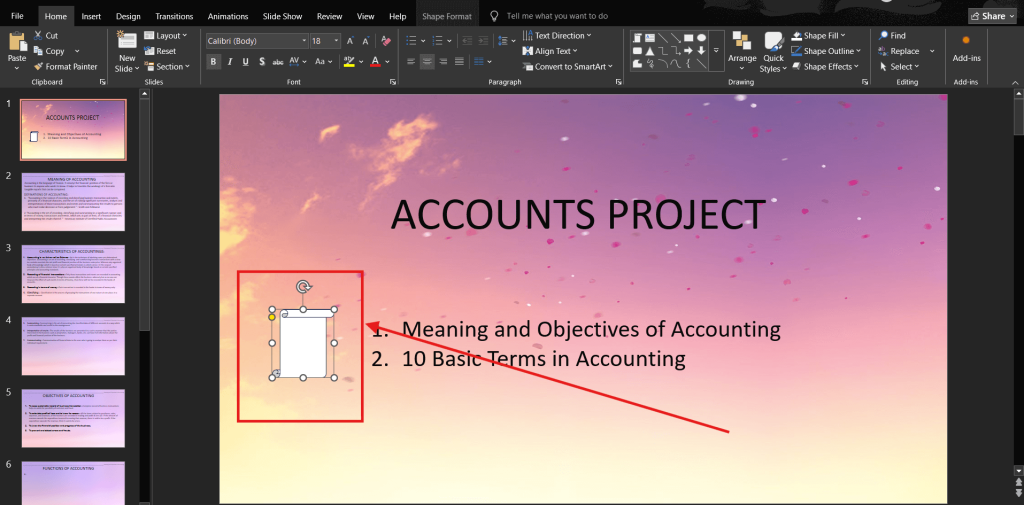
Step 1: Select the object on your slide that will have the animation.
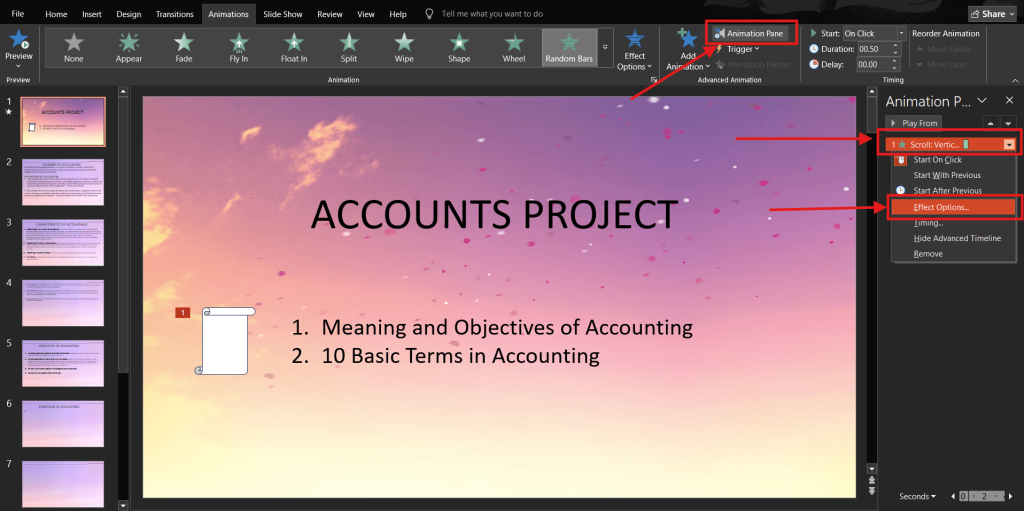
Step 2: Go to the Animations taband apply your desired effect, or select the existing one from the Animation Pane.
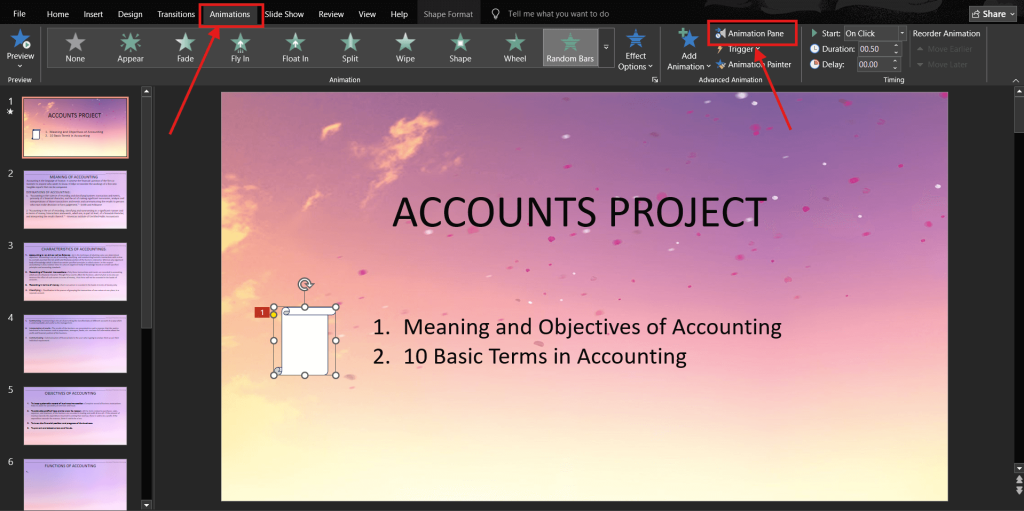
Step 3: Click to open the Animation Pane (if not already visible) and right-click the animation (here, Scroll: Vertical) in the list. Choose Effect Options from the drop-down.
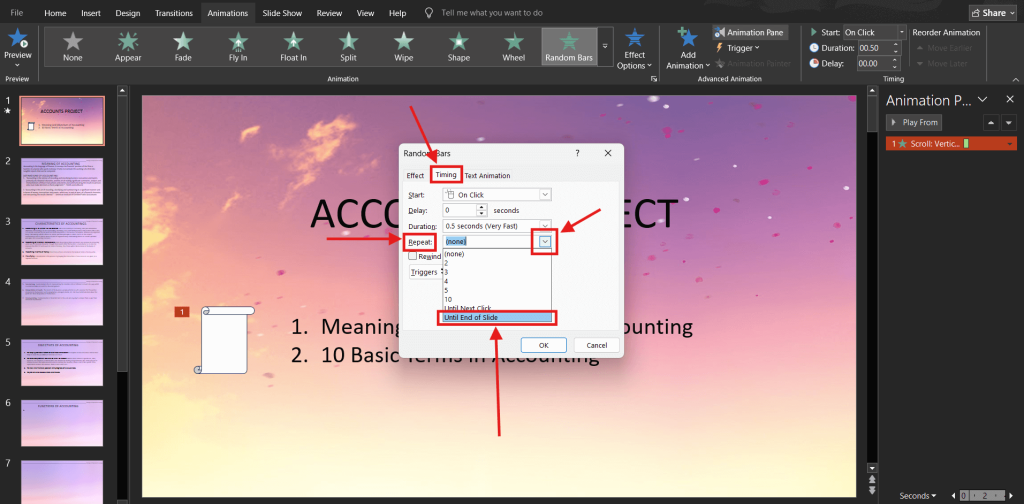
Step 4: In the dialog box, go to the Timing tab. Under Repeat, select how many times you want the animation to loop. Choose Until End of Slide from the dropdown for continuous playback.
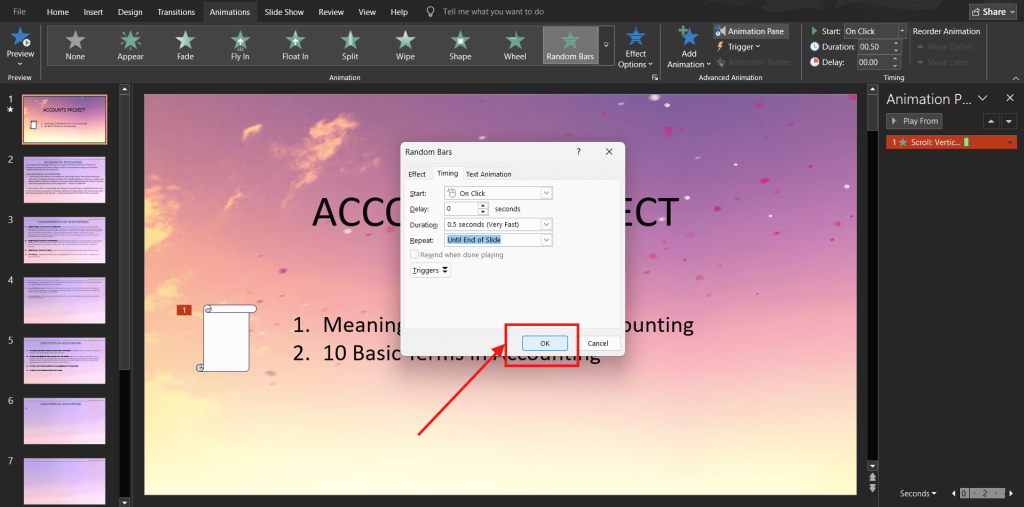
Step 5: Click OK to save your settings, then preview the slide (F5 on Windows or Command + Shift + Return on Mac) to make sure the animation loops as intended.
Pro Tip: Looping animations work best with subtle effects that don’t distract from your main content. They’re perfect for kiosks, background visuals, or drawing attention to key elements without restarting the whole deck.
Also Read: Best Tools to Animate Presentations with AI
What Are the Most Common PowerPoint Looping Problems (and How Can You Fix Them)?
Even with looping enabled, PowerPoint may not always behave the way you expect. Here are some common issues and how to fix them quickly:
- Looping Doesn’t Start at All: Make sure Loop Continuously Until Esc is checked under the Set Up Slide Show dialog in the Slide Show tab. Without this, your presentation will stop after one cycle.
- Slides Don’t Advance Automatically: Check that each slide has a set Advance Slide time under the Transitions tab, and uncheck On Mouse Click if you want a fully automated loop.
- Presentation Exits Full Screen After Looping: Confirm your Show Type is set to Browsed at a kiosk (full screen) in the Set Up Show options so it stays in slideshow mode.
- Animations Don’t Replay on Loop: In the animation settings, ensure the effect is set to repeat or trigger automatically, not just on mouse click.
- Audio Stops After First Cycle: Reinsert the audio and set it to Loop Until Stopped in the Audio Tools Playback tab so it continues across slides.
- Only Certain Slides Loop, But Not the Full Deck: Check if a Custom Show is applied. Either adjust the custom show’s slide range or disable it to loop the entire presentation.
- Slideshow Lags or Stutters: Optimize your media by compressing large images and videos, or use a more powerful computer to handle heavy file sizes smoothly.
Addressing these quick fixes ensures your PowerPoint loop runs seamlessly, whether it’s for a trade show, kiosk, or self-running presentation. A few minutes of setup can save you from on-the-spot frustration.
Also Read: Top 5 Free AI Presentation Makers in 2025
What Are the Best Advanced Tips & Pro Tricks for PowerPoint Looping?
If you want your looping slideshow to look polished and professional, these advanced techniques can make a big difference:
1. Use Custom Slide Shows
Instead of looping your entire deck, create custom slide shows from the Slide Show tab to loop only selected slides for different purposes, such as a sales pitch, event schedule, or training highlight reel, without duplicating your file
2. Add Seamless Transitions
Head to the Transitions tab and apply smooth, consistent effects across all slides. Adjust the duration so timing feels natural. Uniform transitions help avoid jarring cuts and keep the loop feeling continuous rather than start-stop.
3. Incorporate Background Audio
Select a soundtrack or narration that loops naturally. Under Playback settings, choose “Play in Background” so it runs through the entire slideshow without restarting on each slide. This is perfect for delivering pre-recorded commentary.
4. Optimize for Kiosk Mode
Enable kiosk mode in Set Up Slide Show to allow interaction only through specific navigation buttons or hyperlinks you design. This is ideal for trade shows, touchscreens, or museum displays where you want controlled navigation.
5. Mix Static & Animated Elements
Blend static visuals with subtle looping animations (like a gently moving logo) to add life without overwhelming viewers. Adjust animation settings to “Repeat until End of Slide” for smooth, ongoing motion.
6. Test on the Actual Device
Run your loop on the intended computer, projector, or large display. This helps you verify resolution, check slide timings, and ensure fonts, images, and transitions display correctly in real-world conditions.
7. Export as a Video File
Save your looping slideshow as an MP4. This format works on TVs, monitors, and digital signage without needing PowerPoint, making it perfect for sharing or running unattended at events.
When used together, these pro tips not only make your looped presentation run flawlessly but also elevate its visual impact, keeping your audience engaged through every cycle.
Also Read: How To Generate AI Videos From Presentations
Final Words
Mastering PowerPoint looping isn’t just about avoiding awkward pauses; it’s about making your presentation work seamlessly for you. Once set up, it acts like a silent assistant, ensuring your message plays exactly as intended, over and over again.
From setting it up on Windows or Mac to looping animations, troubleshooting, and applying advanced tips, you now have everything you need to keep your content flowing smoothly without interruptions. When done right, looping delivers your message consistently and keeps your audience engaged, without the need for constant manual control.
Next time you present, imagine your slideshow running effortlessly in the background, capturing attention, reinforcing your key points, and letting you focus on what truly matters: connecting with your audience.
Frequently Asked Questions
Can a PowerPoint loop only certain pages?
Yes. Create a Custom Slide Show (Slide Show → Custom Slide Show) with the selected slides, then enable Loop continuously until ‘Esc’ in Set Up Slide Show. Only those chosen slides will repeat until you stop the loop.
Can you loop a PowerPoint on iPad?
Yes, you can loop a PowerPoint presentation on an iPad. While it lacks some desktop features, you can enable looping in the PowerPoint app or export the file as a video and loop it using the iPad’s Photos app.
How do you make a PowerPoint loop continuously?
Go to Slide Show → Set Up Slide Show, check Loop continuously until ‘Esc’, then set slide timings under Transitions by unchecking On Mouse Click and enabling After. The slideshow will repeat until you press Esc.
How to loop a PowerPoint Office 365?
If using the desktop app, go to the Slide Show tab > Set Up Slide Show > Loop continuously until ‘Esc’. In the web version, looping isn’t supported. Export as a looping video or open the file in the desktop version to set looping.
What settings do I need to adjust in PowerPoint to create a self-running looping slideshow for an event or kiosk?
Enable Loop continuously until ‘Esc’, select Browsed at a kiosk (full screen) under Show type, and set slide timings in Transitions. This creates a self-running, hands-free loop ideal for unattended displays.
How do I save or export a looping PowerPoint slideshow as a video file for sharing or display purposes?
Go to File → Export → Create a Video, choose quality and timing options, then save as an MP4. Video players or signage software can be set to loop the file for continuous playback.
How to play a PowerPoint on loop?
Once looping is enabled and slide timings are set, start the slideshow by pressing F5 on Windows or Command + Shift + Return on Mac. Your presentation will keep cycling until you press Esc to stop it.