

TL;DR
- Google Slides has a built-in recording tool, but it’s only available to certain Google Workspace users.
- No built-in tool? No problem. Use Loom, Screencastify, or Vimeo Record, all Chrome extensions that let you record your slides, voice, and webcam.
- Loom is best for fast sharing with webcam overlay.
- Screencastify is perfect for educators, with annotation tools and Google Drive integration.
- Vimeo Record is ideal for polished videos with editing and advanced privacy settings.
- Troubleshooting issues? Check browser permissions, use HD settings, and test your mic before recording.
- Once recorded, you can share via link, download as MP4, or upload to YouTube, Google Docs, or PowerPoint.
Whether you’re teaching a class, sharing a pitch, or delivering a training session, there’s a good chance someone will ask, “Can you send me the recording?”
The problem is, Google Slides doesn’t always make recording as obvious as you’d expect, and the built-in recording feature is only available to some Google Workspace users.
The good news? You don’t have to miss out.
With a few simple tools, you can capture your Google Slides presentation complete with audio, video, and even your webcam feed, no matter what device or account you’re using.
In this guide, we’ll cover the best extensions for how to pre record a presentation on Google Slides, walk you through how to record step by step, and show you how the built-in option works if you have it.
What are the 3 Most Used Extensions for Recording Google Slides?
Extensions let you record your slides with audio and webcam, even if you don’t have Google Slides’ built-in recording feature. Here are three of the best options.
1. Loom
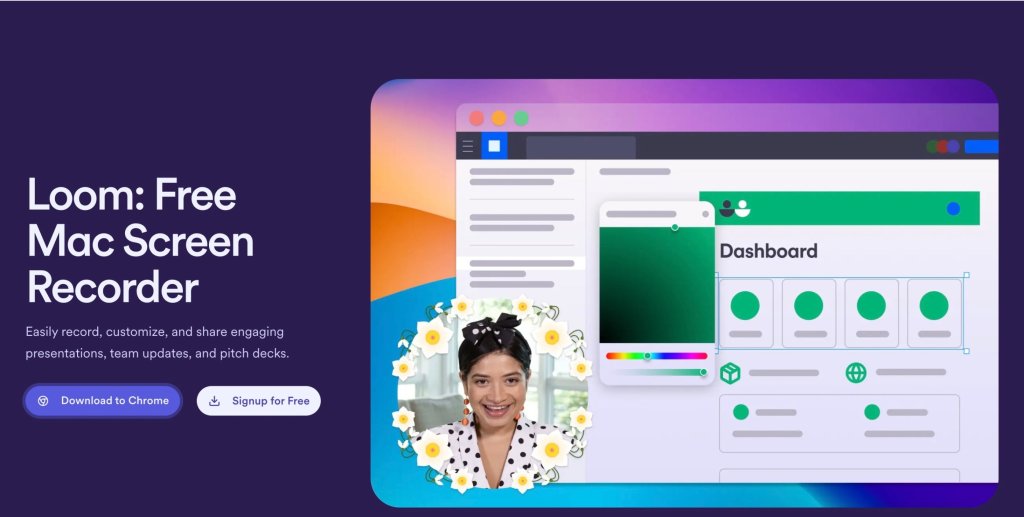
Loom is a Chrome-based screen recording platform that lets you capture your screen and webcam in HD, edit on the fly, then instantly share via link.
Best for: Instant sharing and quick recording with webcam overlay.
Pricing: Free basic starter plan available.
What We Liked About Loom:
- Record screen + camera and microphone with a single click.
- Pause, rewind, and trim during recording with “Live Rewind.”
- Share recordings instantly via link; stored in your Loom library.
How Does Loom Work?
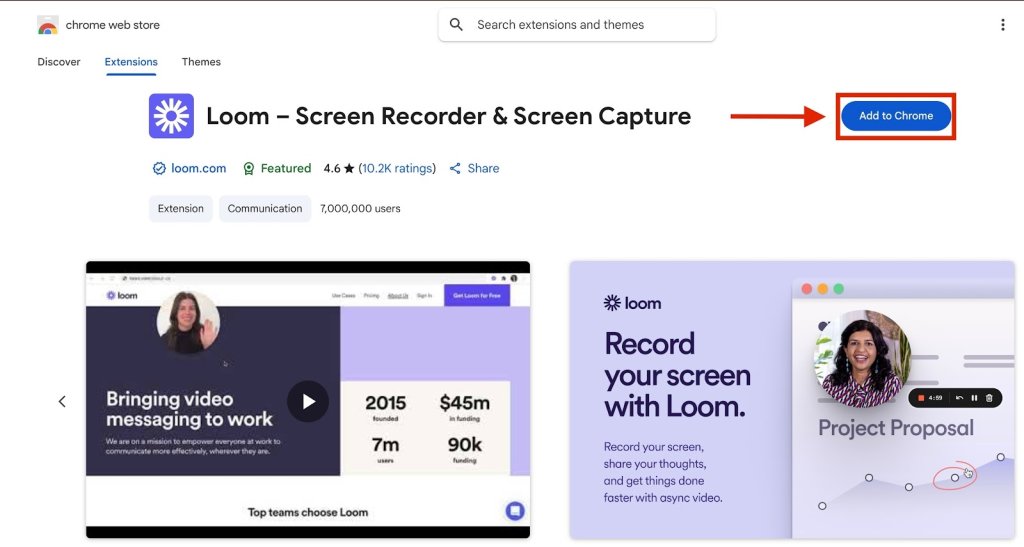
Step 1: Go to the Loom extension page in the Chrome Web Store and click Add to Chrome.
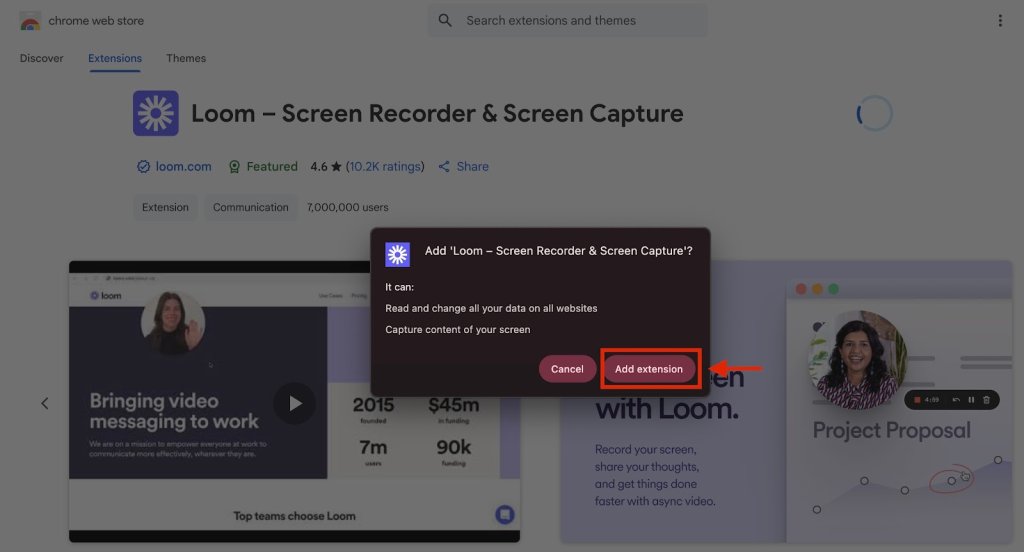
Step 2: When prompted, click Add Extension.
Step 3: Switch to your Google Slides tab and click the Extensions icon in the top-right corner of your Chrome browser. Select Loom from the list of extensions.

Step 4: Toggle your microphone and camera on or off according to your preference.
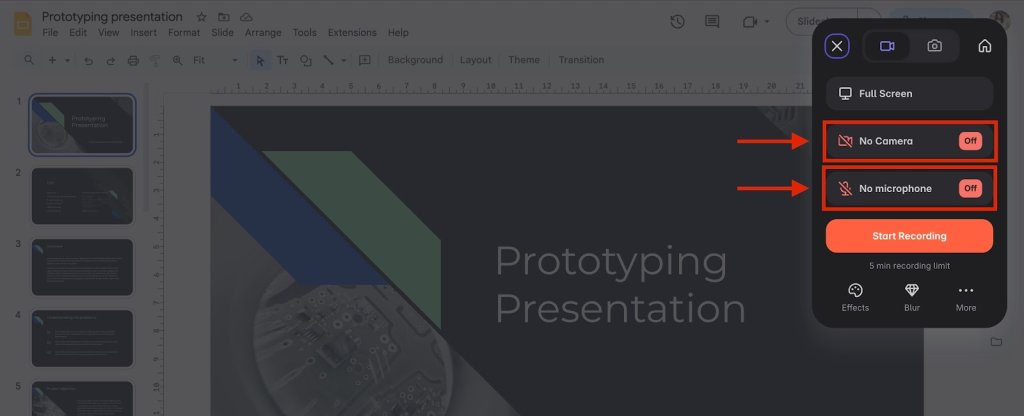
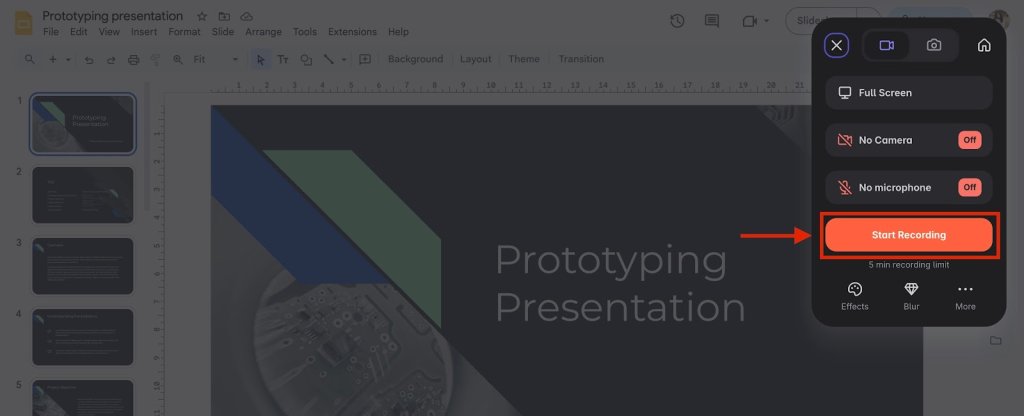
Step 5: Click Start Recording in the Loom menu.
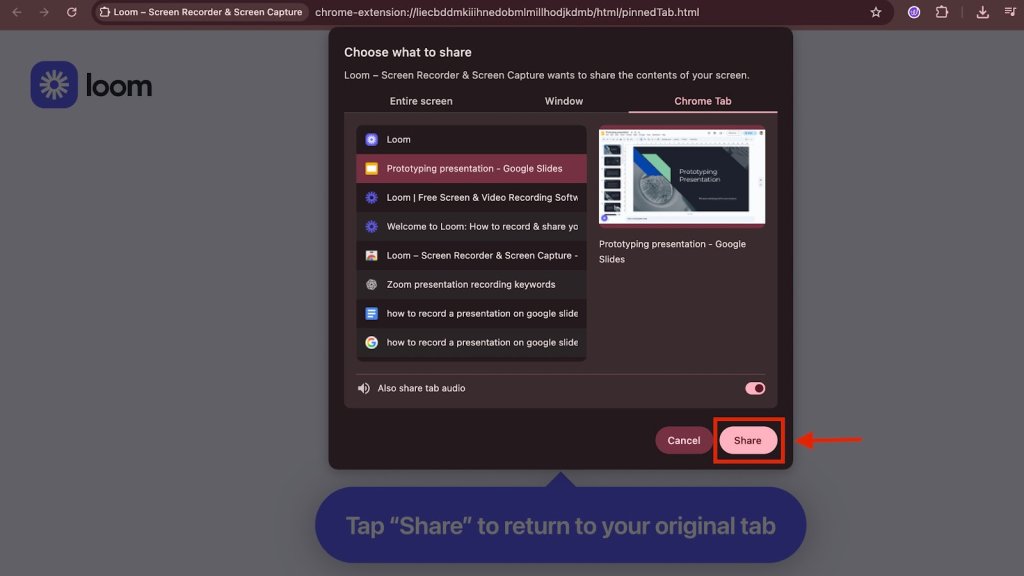
Step 6: From the options, select your Google Slides tab under Chrome Tab.
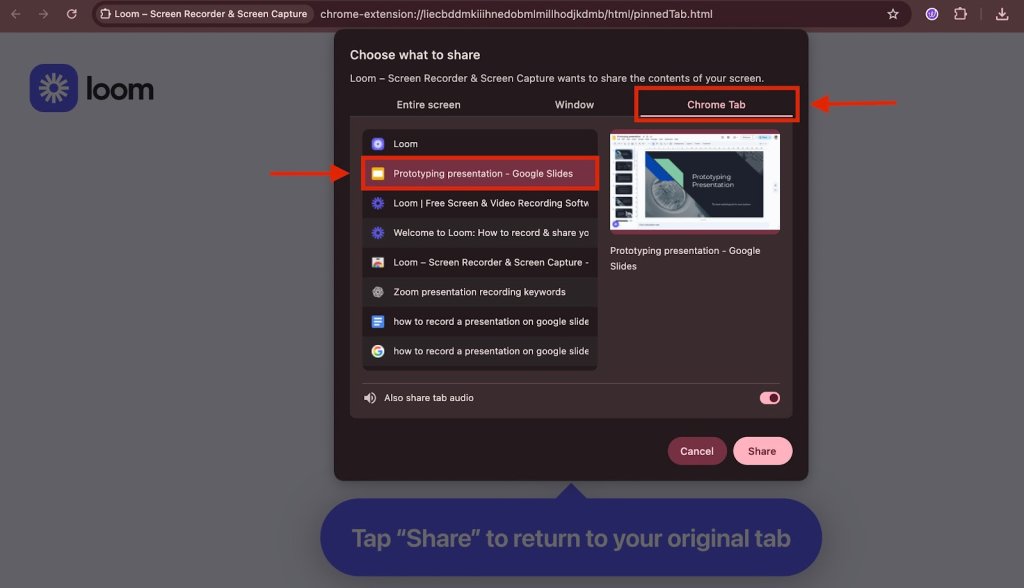
Step 7: Click Share to allow Loom to capture your slides.
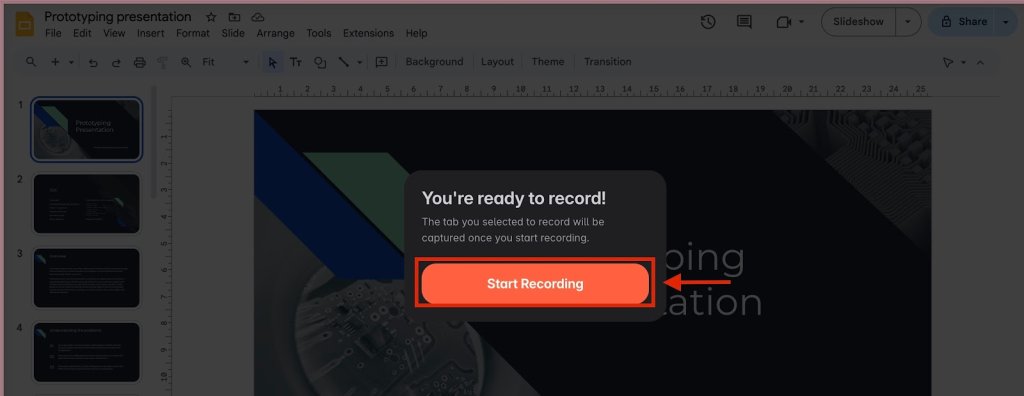
Step 8: Click Start Recording to begin capturing your session.
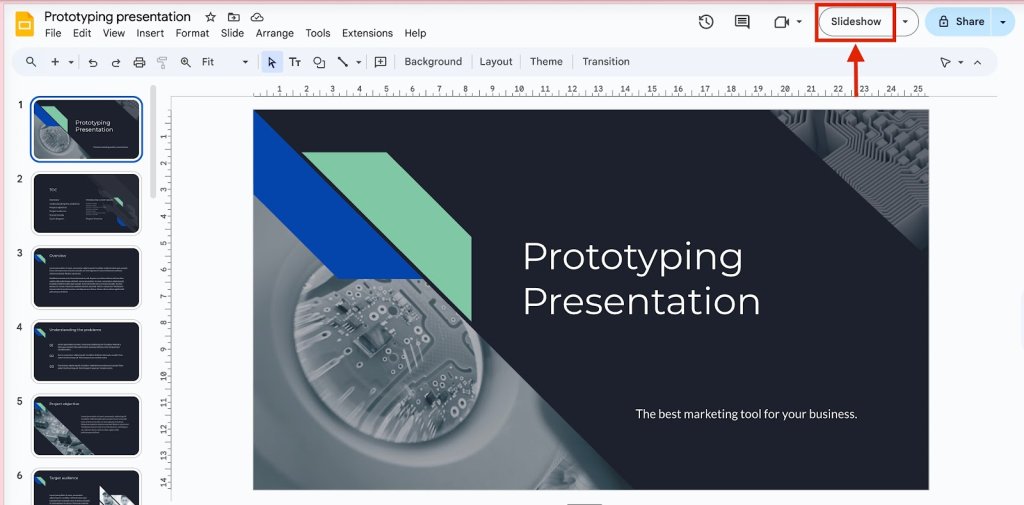
Step 9: Once recording starts, click Slideshow in the upper-right corner of Google Slides to present in full screen.
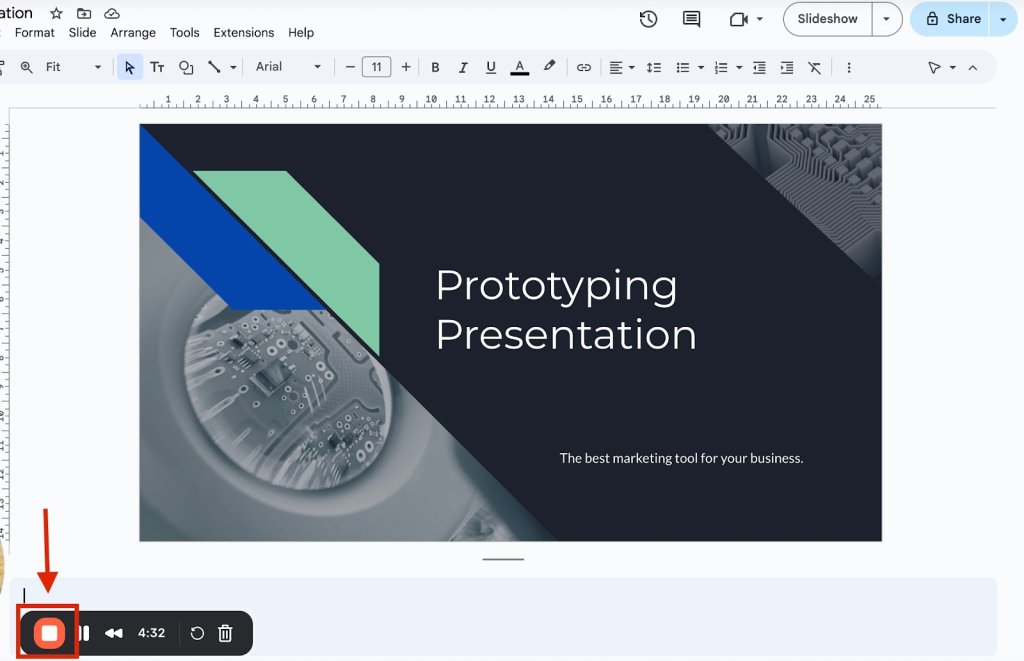
Step 10: When you’re finished presenting, click the red Stop Recording button at the bottom left of your screen.
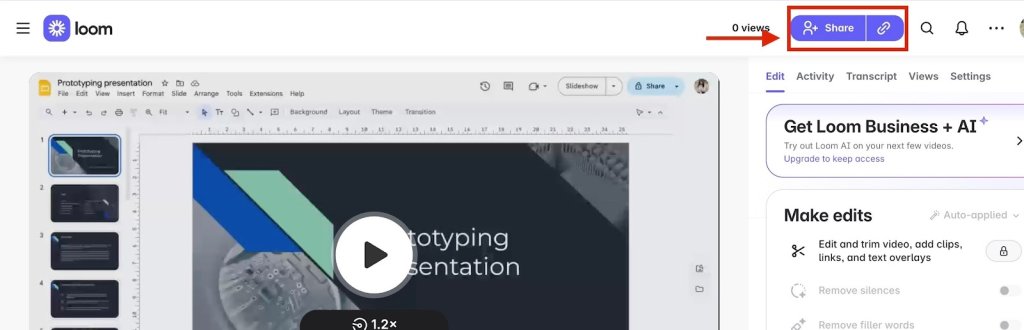
Step 11: You’ll be redirected to the Loom video page, where you can review your recording. Click Share to copy a link and send it to others.
Already have your Google Slides recording ready? Now see how to save even more prep time with the best AI plugins for PowerPoint.
The Top 5 PowerPoint Plugins with AI – Which Save You the Most Time?
2. Screencastify
Screencastify is a Chrome extension that captures your desktop, browser tab, and webcam, with intuitive in-browser editing.
Best for: Educators and Google Drive integration with editing tools.
Pricing: Free starter plan available.
What We Liked About Screencastify:
- Record your tab, desktop, or webcam with narration.
- Annotate in real time (draw, highlight), trim recordings, and add interactivity.
- Auto-save to Google Drive, with options to export as MP4, GIF, or share via YouTube/Classroom.
How Does Screencastify Work?
Step 1: Go to the Screencastify extension page and click Add to Chrome.
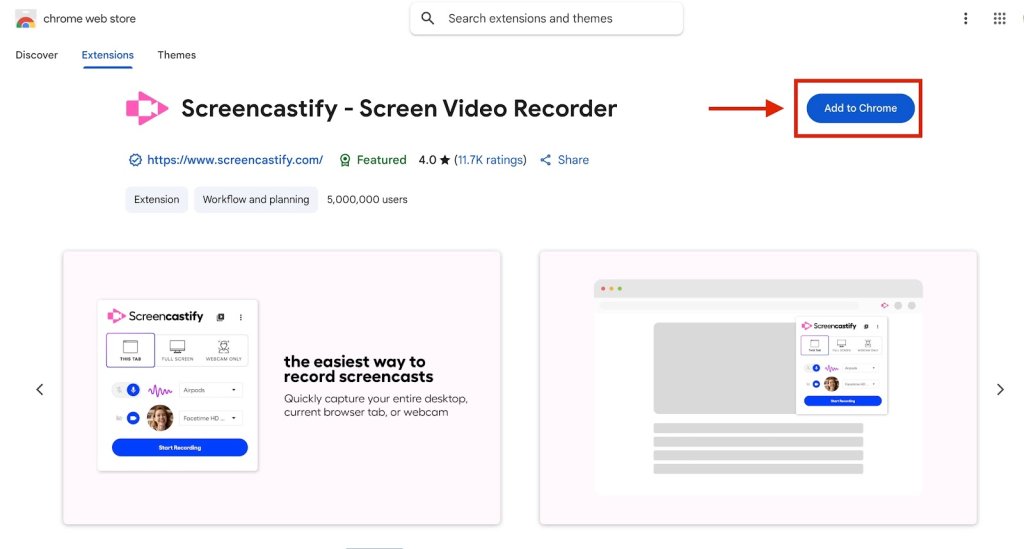
Step 2: When prompted, click Add Extension.

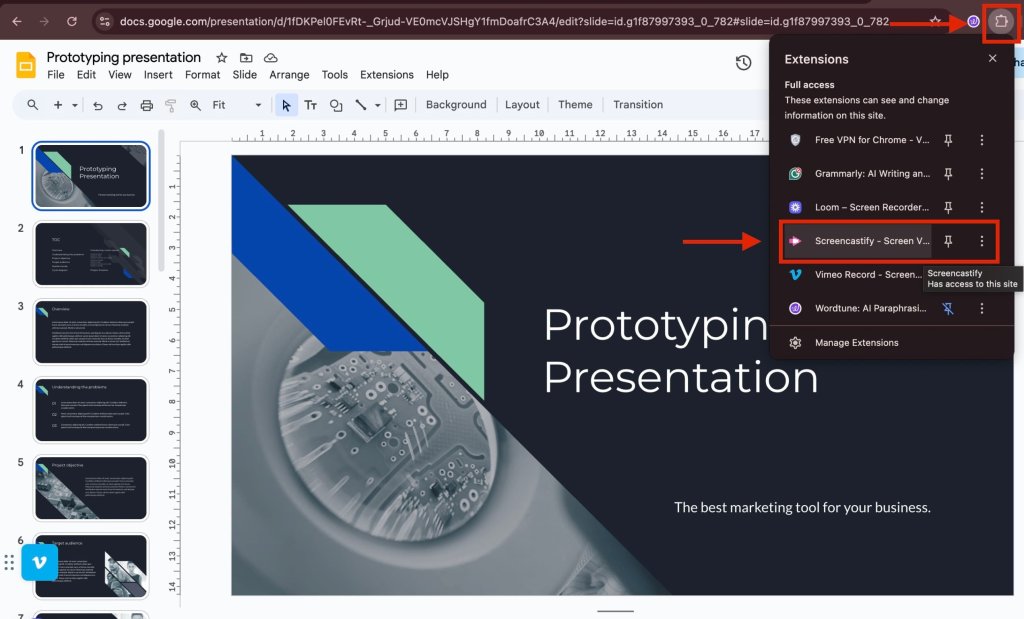
Step 3: Once installed, switch back to your Google Slides tab. Click the Extensions icon in the top-right of your Chrome browser and select Screencastify.
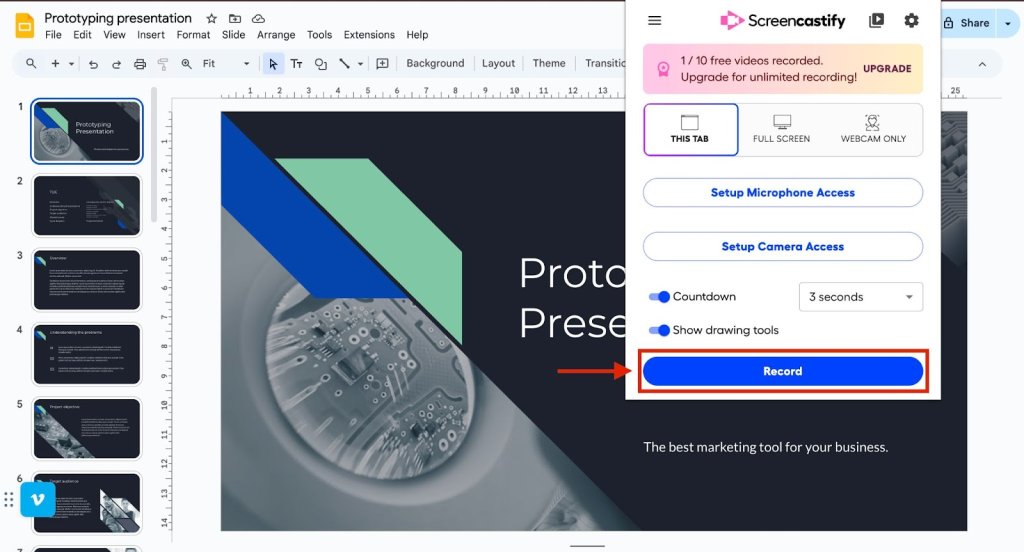
Step 4: Choose This Tab to share your Google Slides tab, then set up your microphone and webcam according to your preference.
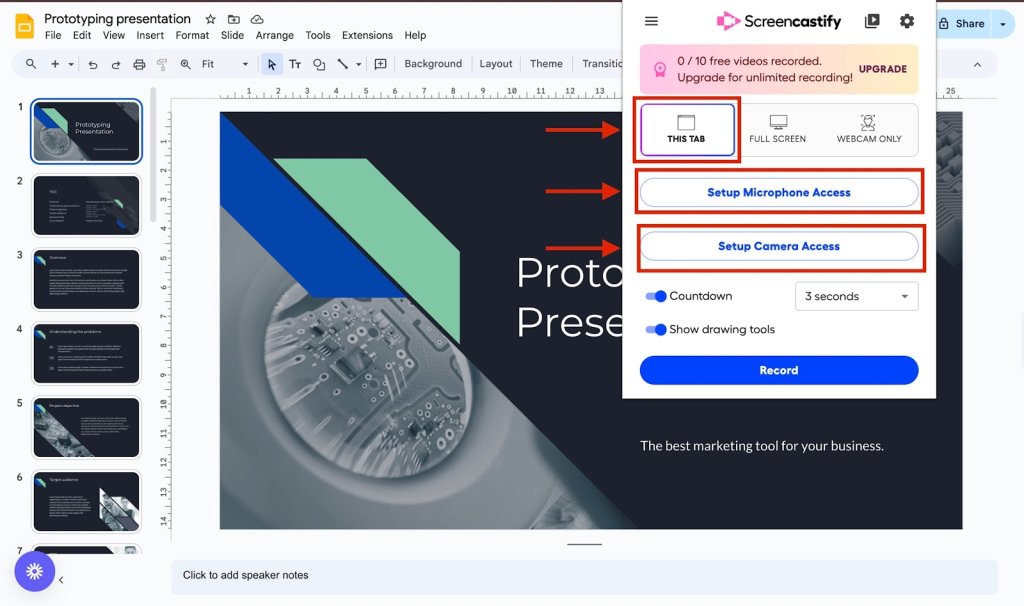
Step 5: Click Record to begin capturing your presentation.
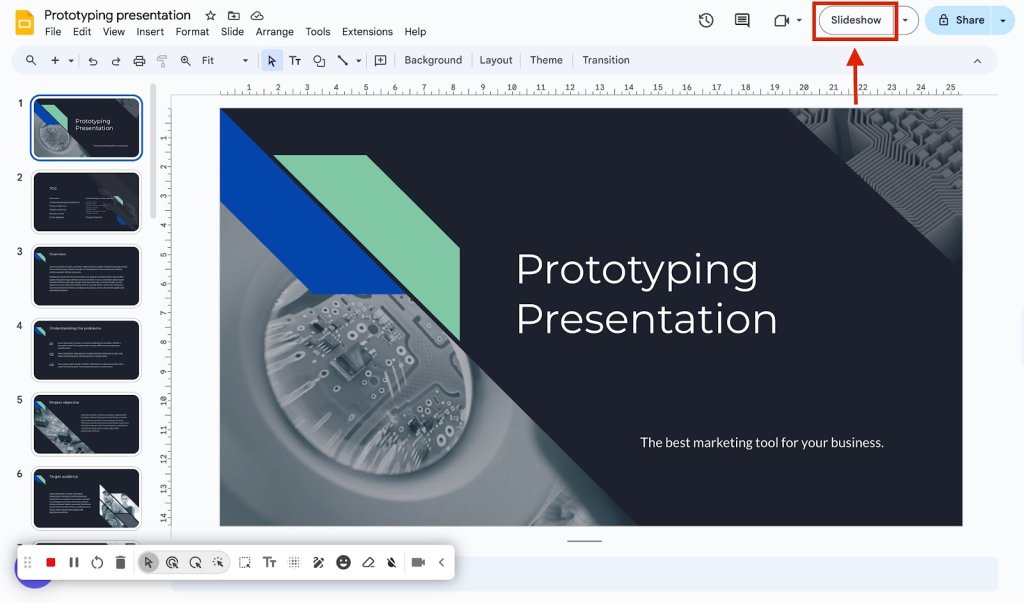
Step 6: In Google Slides, click the Slideshow button in the top-right to present in full screen.
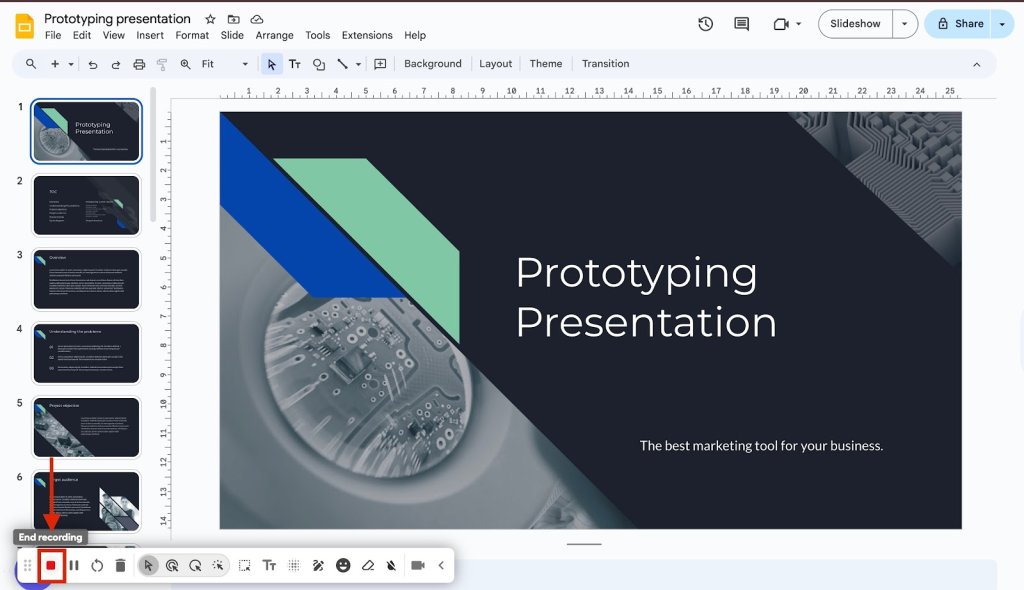
Step 7: When you’re done, click the red record button to stop Recording in the bottom-left corner.
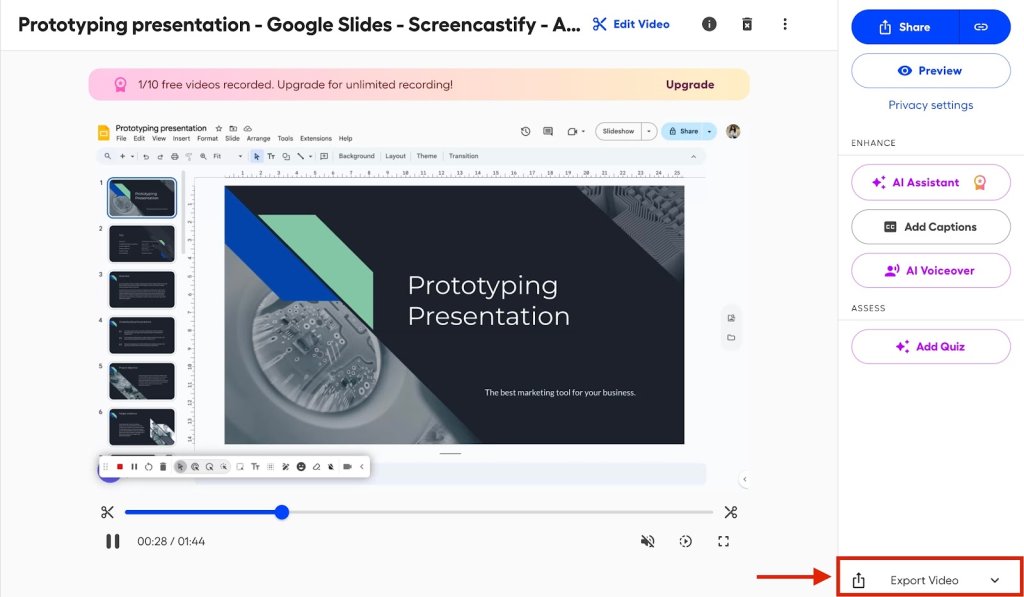
Step 8: You’ll be redirected to the Screencastify video page, where you can review your recording. Click Export Video to save it in your preferred format.
Want your recorded slides to look as good as they sound? These AI tools can help you design, polish, and enhance your presentations effortlessly.
15 AI Tools to Improve Your PowerPoint Presentation
3. Vimeo Record
Vimeo is a Chrome extension that launches Vimeo’s “Record Studio” for screen and webcam capture, with enhanced editing and sharing options.
Best for: High-quality recordings with editing and advanced sharing tools.
Pricing: Basic plan starts from around $8, with free trials available.
What We Liked About Vimeo:
- Record your screen, webcam, or both in a new browser tab.
- Built-in teleprompter and AI script tools (on certain plans).
- Instantly upload to Vimeo: get analytics, privacy controls, and organized video management.
How Does Vimeo Work?
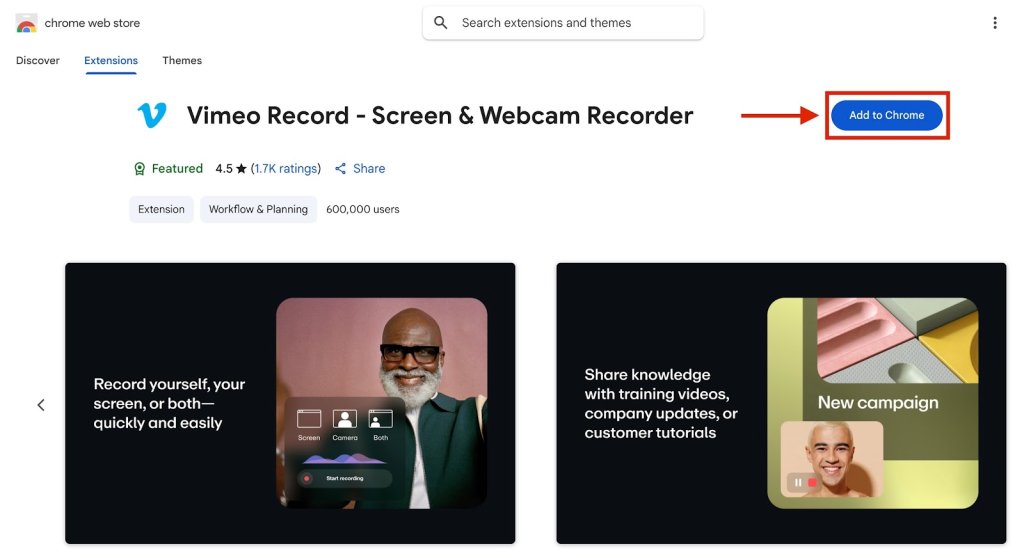
Step 1: Go to the Vimeo Record extension page in the Chrome Web Store and click Add to Chrome.
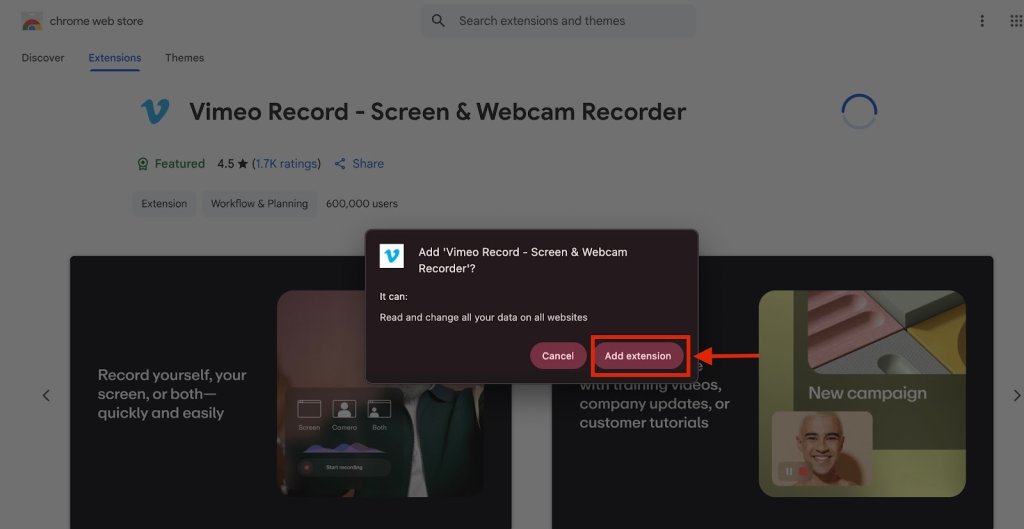
Step 2: When prompted, click Add Extension.
Step 3: Switch back to your Google Slides tab. From the Extensions icon in the top-right of your browser, open Vimeo Record.

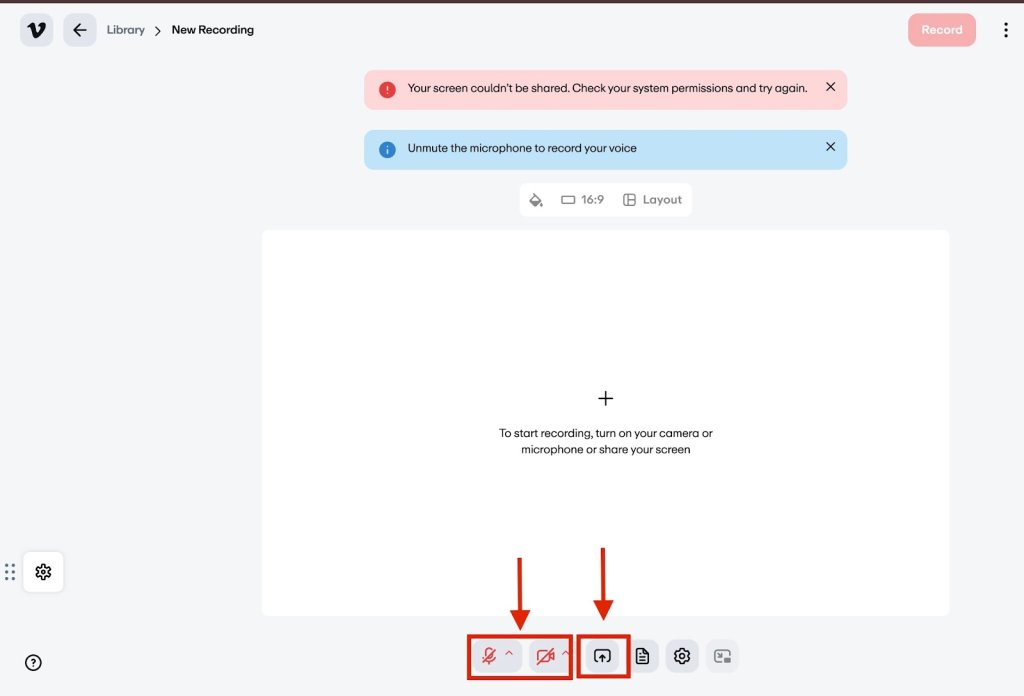
Step 4: You’ll be redirected to the Vimeo tab. In the options at the bottom, set your audio and video preferences, then click the Share button next to them.
Step 5: Under the Chrome Tab section, choose your Google Slides tab and click Share.
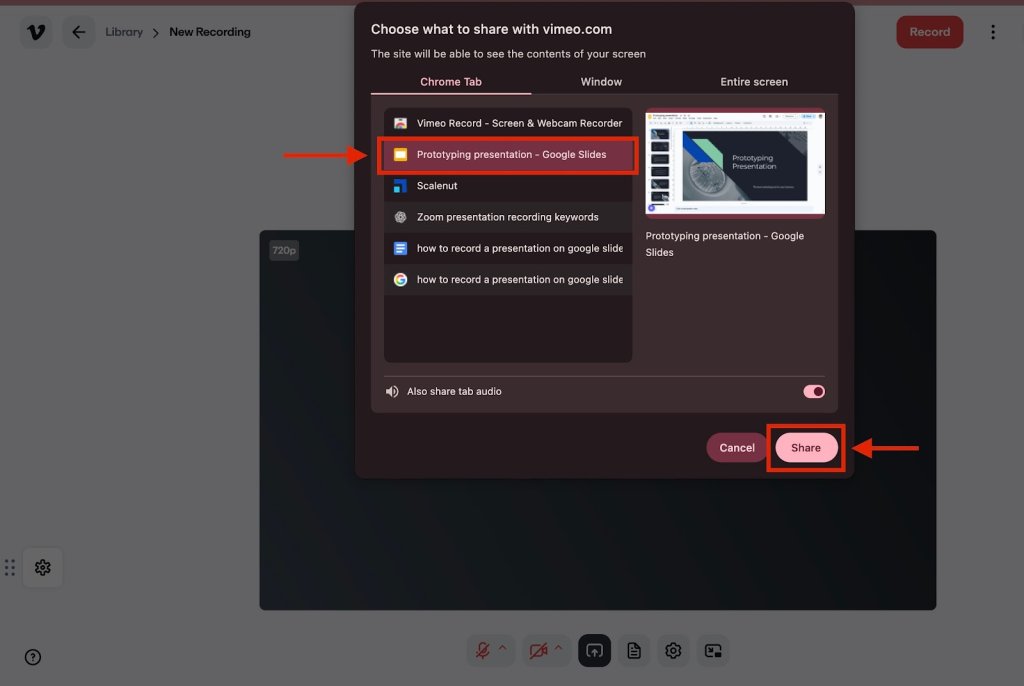
Step 6: Once your tab appears, click the Record button in the small Vimeo recording window at the bottom right of your screen.

Step 7: Switch back to your Google Slides tab and click Slideshow to start presenting.

Step 8: When you finish presenting, click the red Stop Recording button.

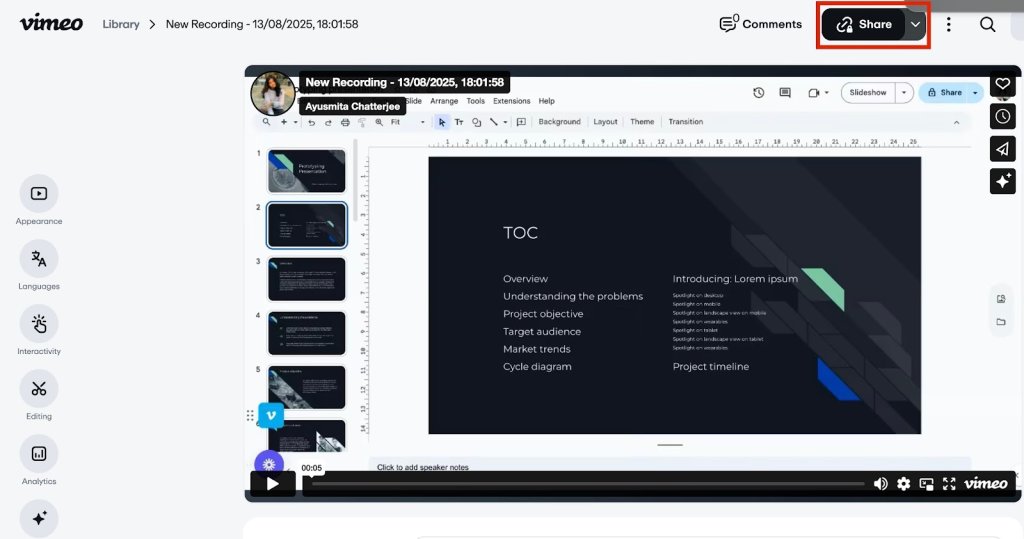
Step 9: Switch back to the Vimeo tab to access your recorded presentation. Click the Share button in the top-right corner to copy a shareable link.
Google Slides now offers a built-in Slides recording feature, but it’s only available to select Google Workspace users, specifically Business Standard, Business Plus, Enterprise, and Education Plus accounts.
When available, you’ll notice a Record (Rec) button located in the top-right corner of the Slides editor when using Google Chrome or Microsoft Edge.
There are some important limitations to note:
- Recording time is capped at 30 minutes per session.
- This feature only works in Chrome or Edge on desktop, not on mobile or other browsers.
- It’s not available to users with standard (non-Workspace) Google accounts and requires editing access to the slide deck.
Before you even hit record, imagine creating a full, polished slide deck from just an idea or document. These Top 3 AI Generators for Google Slides make it possible.
How Do I Troubleshoot Common Issues When Trying to Record a Google Slides Presentation?
Even the best recording setup can run into hiccups. Here are a few quick fixes to common problems:
- Screen not recording properly: Make sure your browser permissions allow screen recording. In Chrome, check under Settings > Privacy and Security > Site Settings. Restart your app or extension if the problem persists, and confirm you’ve selected the correct tab in presentation mode.
- Audio not recording: If your voiceovers aren’t being captured, double-check your microphone input in the recording settings of your chosen screen recorder software. Also, ensure your mic isn’t muted at the browser or system level.
- Low quality video or lag: Close unnecessary tabs and apps to free up system resources. Switch to HD in your recording settings if the platform allows, and test with a short clip before your full Google Slides deck.
- Missing the record option in Google Slides: The built-in recording platform is only available to some Google Workspace accounts. If you don’t see a Record button, use third-party screen recording software like Loom or Screencastify as a great option.
Wrapping Up
How to record a Google Slides presentation with audio is easier than ever. Whether you’re using the built-in recording option available to certain Google Workspace accounts or relying on versatile Chrome extensions like Loom, Screencastify, or Vimeo Record. The right choice comes down to your needs: quick sharing, advanced editing, or education-focused tools.
With the right setup, you can capture your slides, your voice, and even your face in a polished format ready to share, revisit, or repurpose, without missing a single detail of your presentation, ensuring ease of use.
Frequently Asked Questions
Can you walk me through the steps to record a presentation directly within Google Slides?
Yes. If you have a Workspace account with access to the built-in recording platform, enter presentation mode in your Google Slides deck, click the Record button on the top right, adjust your microphone and webcam in the recording studio, and press Get Started. When you finish, the recording is saved automatically in your Drive folder.
What are the best tools or extensions for recording myself while presenting Google Slides?
The best way to record a Google Slides presentation is Loom, Screencastify, and Vimeo Record. These are great ways to combine screen recording with webcam video for superior video footage. They work well on PC, Mac, and Chromebook, and let you view recordings instantly or download video files for sharing.
How do I add a voiceover narration to my Google Slides and then export the presentation as a video?
Use a screen recorder software such as Clipchamp, QuickTime Player (Mac), or the Windows Camera app. Open your Slides in presentation mode, start your chosen app, and record while narrating. You can then export the captured video file and add voiceovers in editing if needed.
Is there a built-in feature in Google Slides for recording video presentations, or do I need third-party software?
Some Google Workspace accounts have the built-in Record Google Slides feature, which is a great option for quick recordings. If you don’t see the button, you’ll need screen recording software such as Riverside, Loom, or VLC Media Player.
What settings should I adjust to ensure high-quality audio and video when recording a Google Slides presentation?
For how to record a Google Slides presentation with your face, before you hit record, check your recording settings in the app or extension you’re using. Choose HD or higher resolution, test your mic, use an external mic for better voiceovers, and make sure your toolbar and templates are set for a clean display.
How can I share or download my recorded Google Slides presentation as a video file for others to view?
After recording, locate the video in your Drive folder or your recording platform’s library. You can share a link directly or download the video file to upload to YouTube, Google Docs, or Microsoft PowerPoint.
Why can’t I find the record button on Google Slides?
The record button only appears for certain Google Workspace accounts. If you’re using a personal account, you’ll need a third-party screen recorder software.
How to record a presentation for school?
For school projects, Loom and Screencastify are a great way for how to record a presentation on Google Slides with webcam and screen, add voiceovers, and quickly share links with your teacher.
Is there a time limit for recording a Google Slides presentation?
Yes. The built-in Workspace feature has a 30-minute limit. Most third-party tools for how to record audio over a Google Slides presentation, like Clipchamp or QuickTime Player, have different settings and can record longer, depending on your storage space.