


TL;DR
- PowerPoint’s built-in screen recording lets you capture slides, narration, and on-screen actions, no extra software needed.
- Works on Windows (Insert > Screen Recording) and Mac (Slide Show > Record).
- You can record your live presentations with tools like Xbox Game Bar or third-party recorders.
- Add text overlays and use editing tools in PowerPoint to trim, format, and polish.
- Export as MP4/MOV for easy sharing.
Ever found yourself giving the same presentation again and again, or wishing you could share it with people who couldn’t attend?
If so, you know how repetitive and limiting that can feel. That’s where PowerPoint Screen Recording comes in. With just a few clicks, you can capture your slides, voice, and even on-screen actions, turning them into a polished video you can share anytime.
This blog is your step-by-step guide to mastering screen recording in PowerPoint, from basic setup on Windows and Mac to advanced editing tricks. By the end, you’ll be ready to create professional, share-ready presentations that engage audiences anytime, anywhere.
How to Screen Record PowerPoint on Windows?
If you’re using Microsoft PowerPoint on Windows, the built-in screen recorder makes it simple to capture your slides, narration, and on-screen actions without extra software. Here’s how:
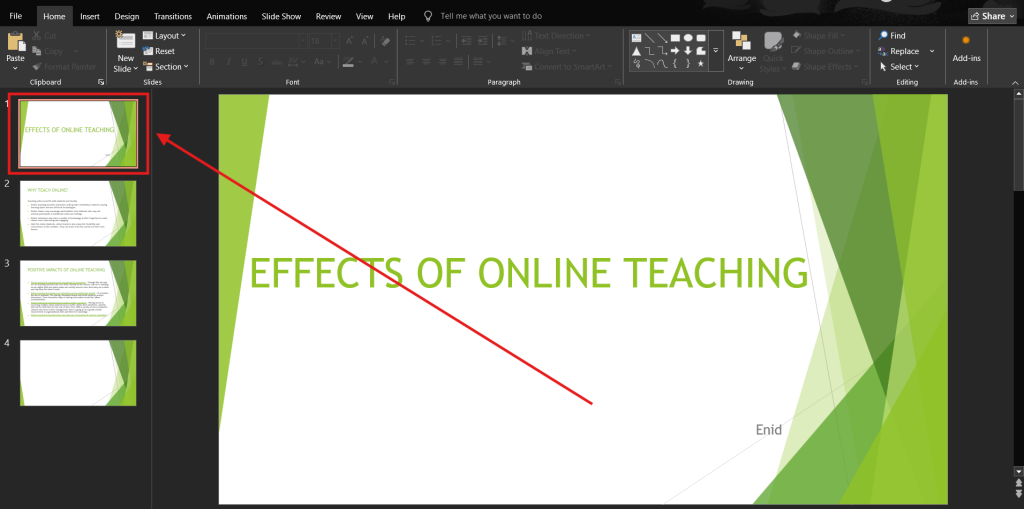
Step 1: Open your presentation and navigate to the current slide where you want the video recording to appear.
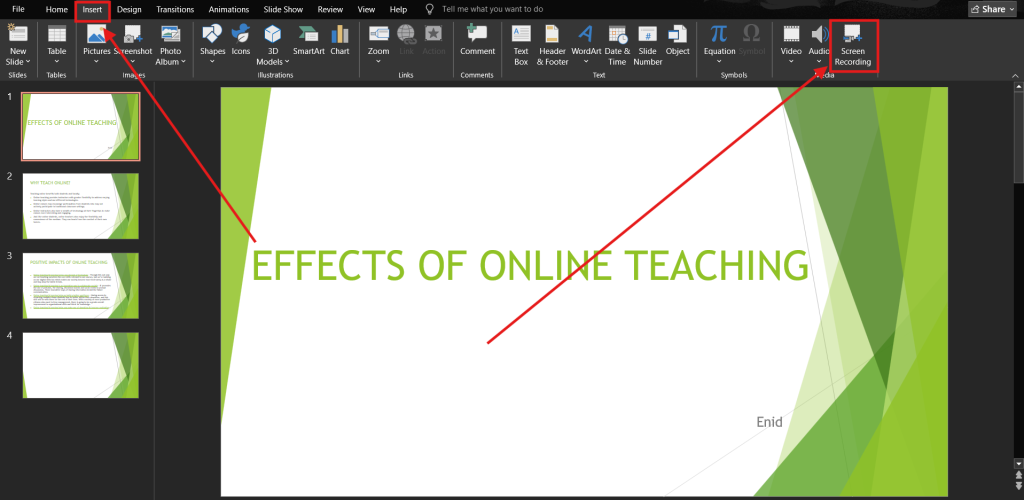
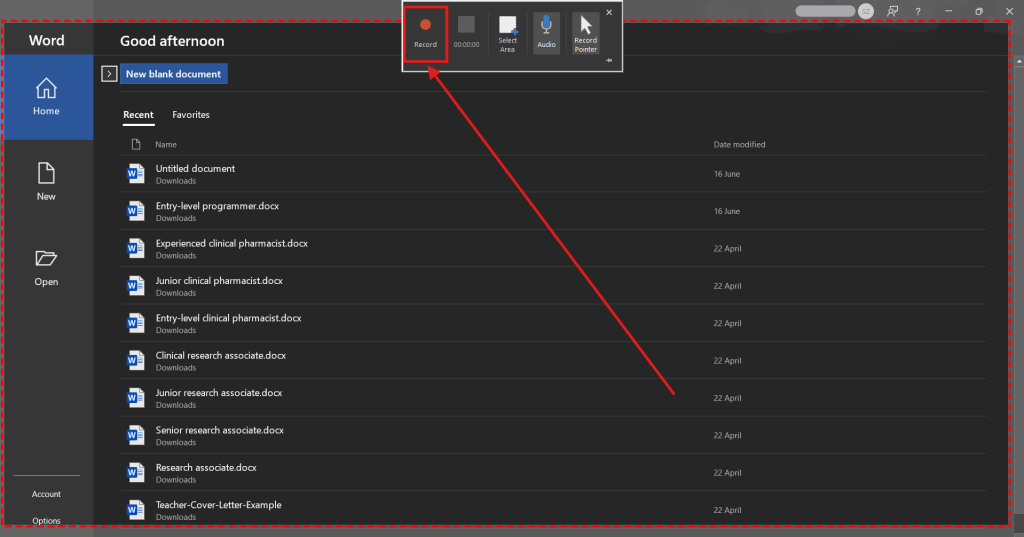
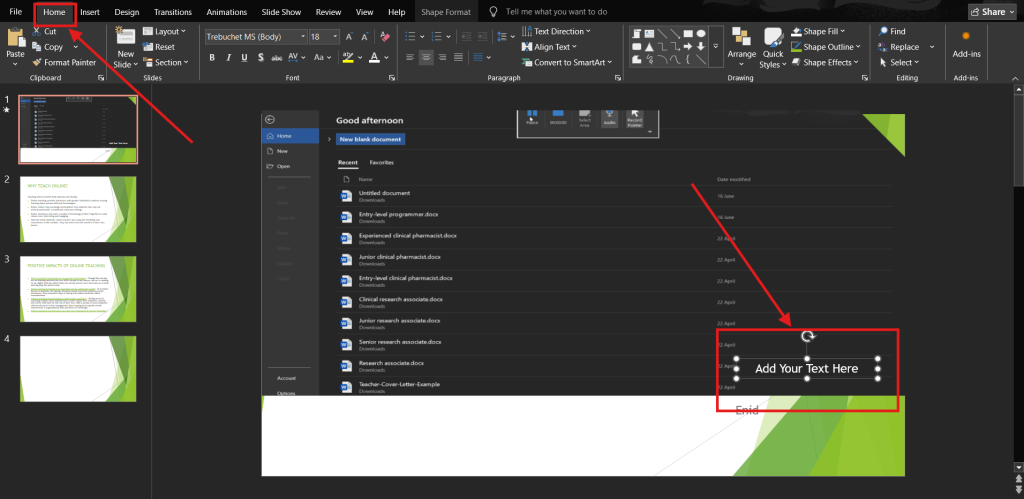
Step 2: Go to the Insert tab on the ribbon and select Screen Recording at the top right corner.
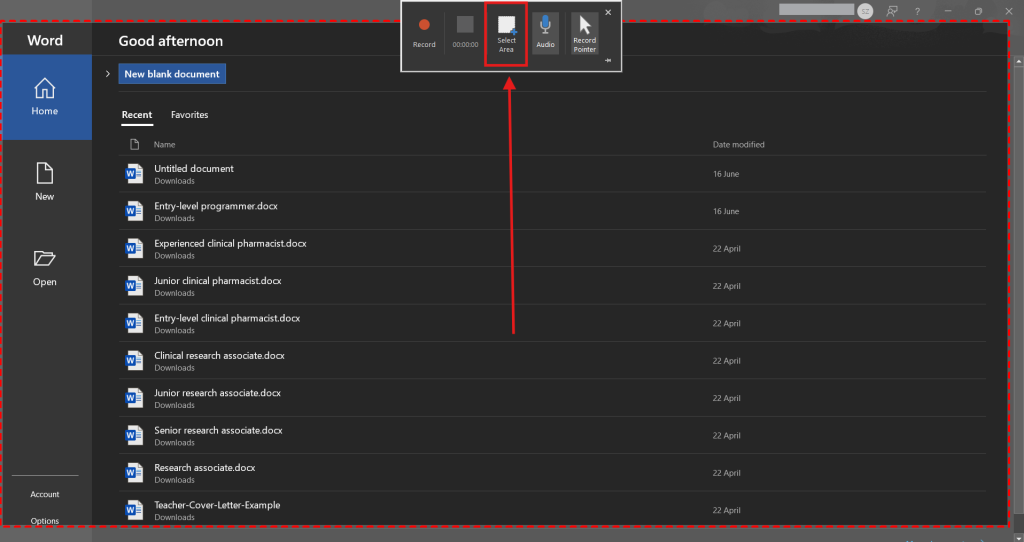
Step 3: The control dock will appear at the top of the screen. Click Select Area and drag to choose the portion of your computer screen you want to capture.
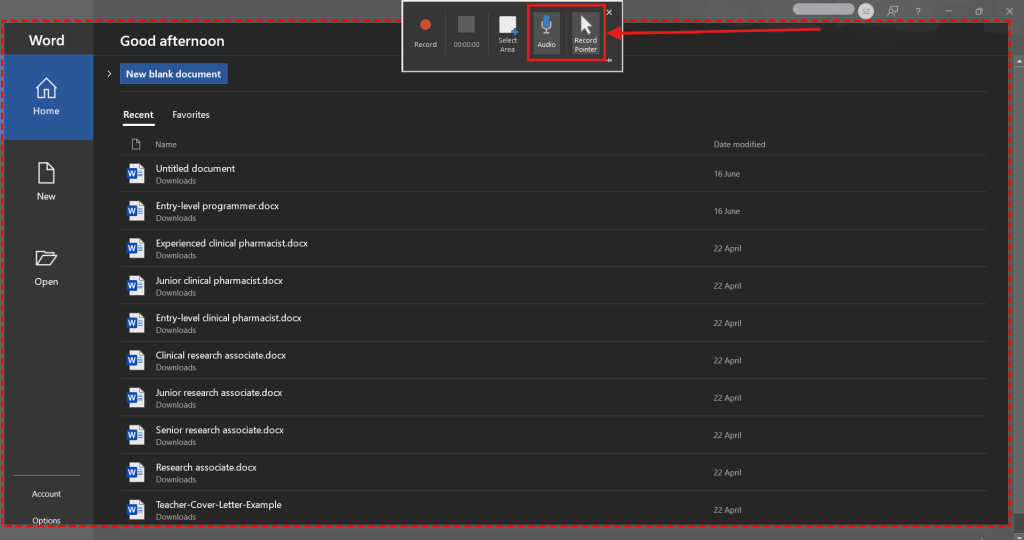
Step 4: Select the boxes for Record Pointer (to show the mouse cursor) and Audio (to include your voice or system audio) if needed.
Step 5: Click the Record button (red circle) to start screen recording.
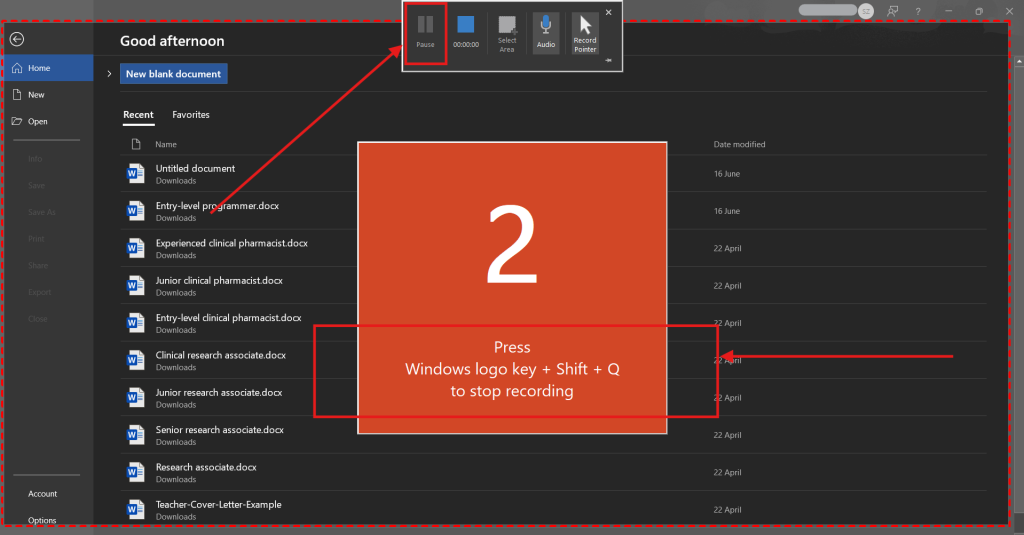
Step 6: Use the pause button on the control dock if you need a break, or press Windows logo key + Shift + Q to stop.
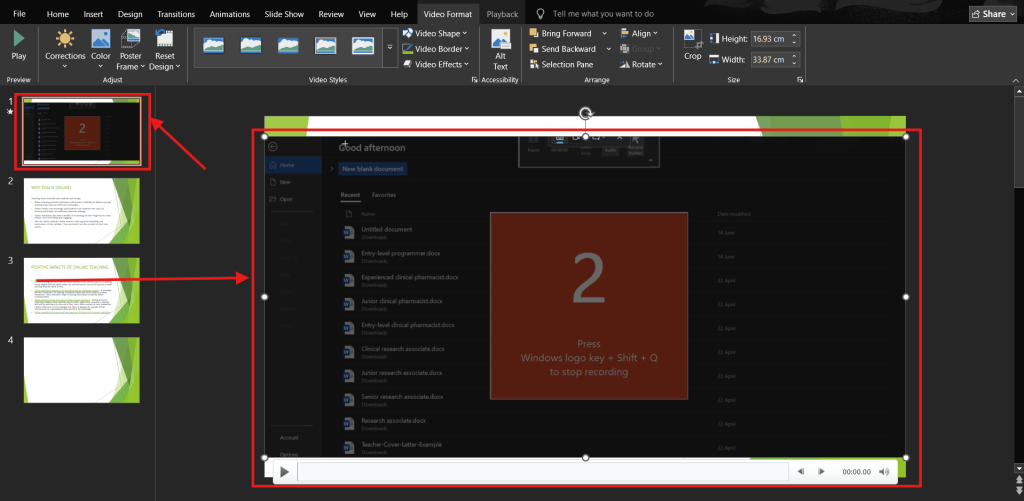
Step 7: Your recorded video will be automatically inserted into the current slide as a video frame.
Step 8: To reuse it elsewhere, right-click the video and select Save Media As to export it as a separate file in your chosen video format.
Note: Be sure to right-click directly on the video. Right-clicking anywhere else will not show the Save Media As option.

Also Read: The Top 5 PowerPoint Plugins with AI
How to Screen Record a PowerPoint Presentation on Mac?
Want to create professional, shareable presentations with ease? Here’s how to use PowerPoint’s built-in screen recording tools on Mac to capture slides. Optionally, you can also record your narration and even your webcam:
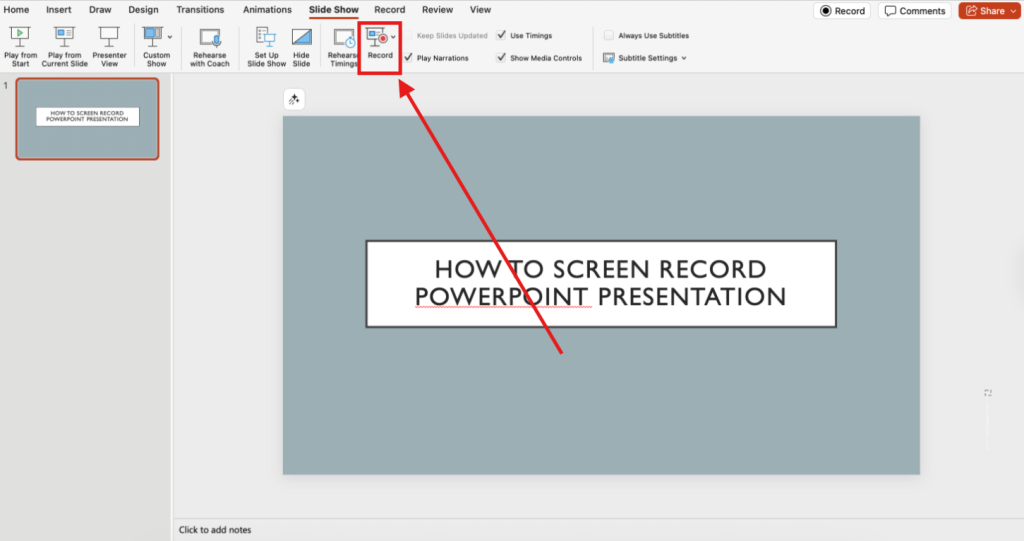
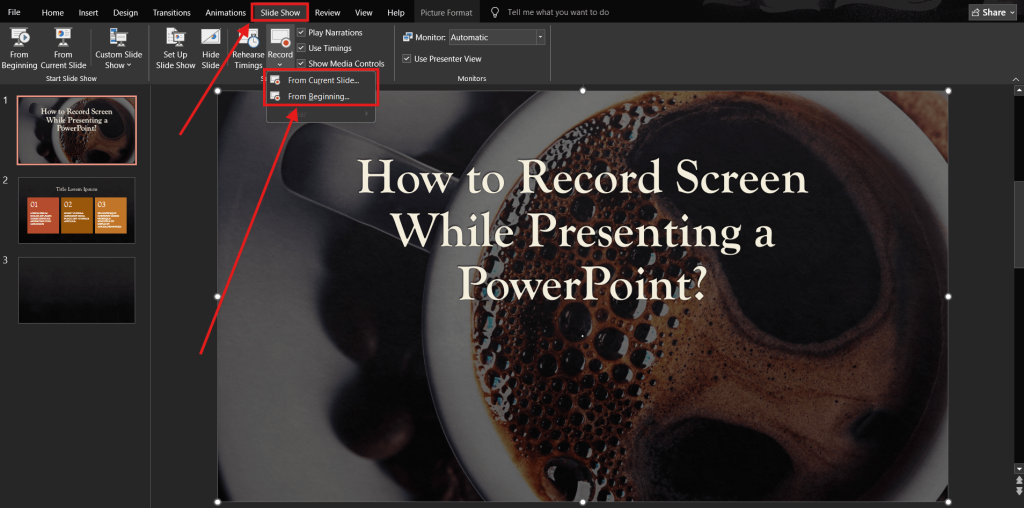
Step 1: Open your PowerPoint presentation and go to the Slide Show tab on the ribbon.
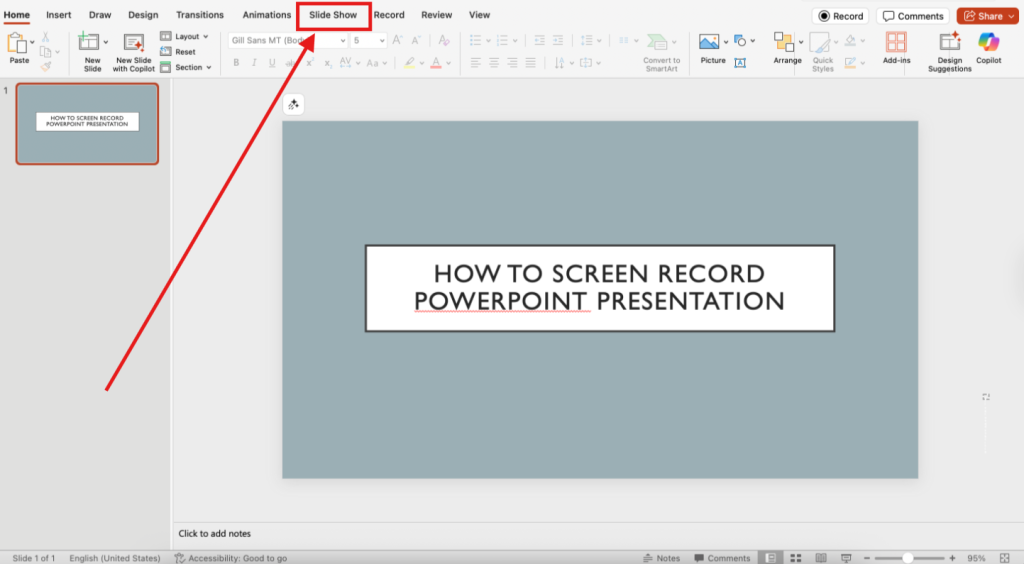
Step 2: Click the Record option.
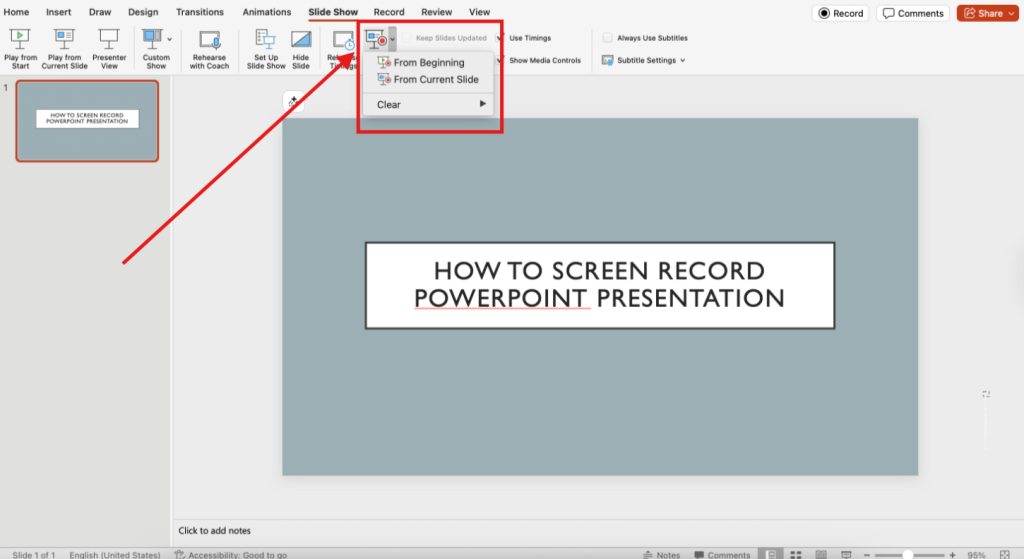
Step 3: From the drop-down, you can choose to record From Beginning or From Current Slide.
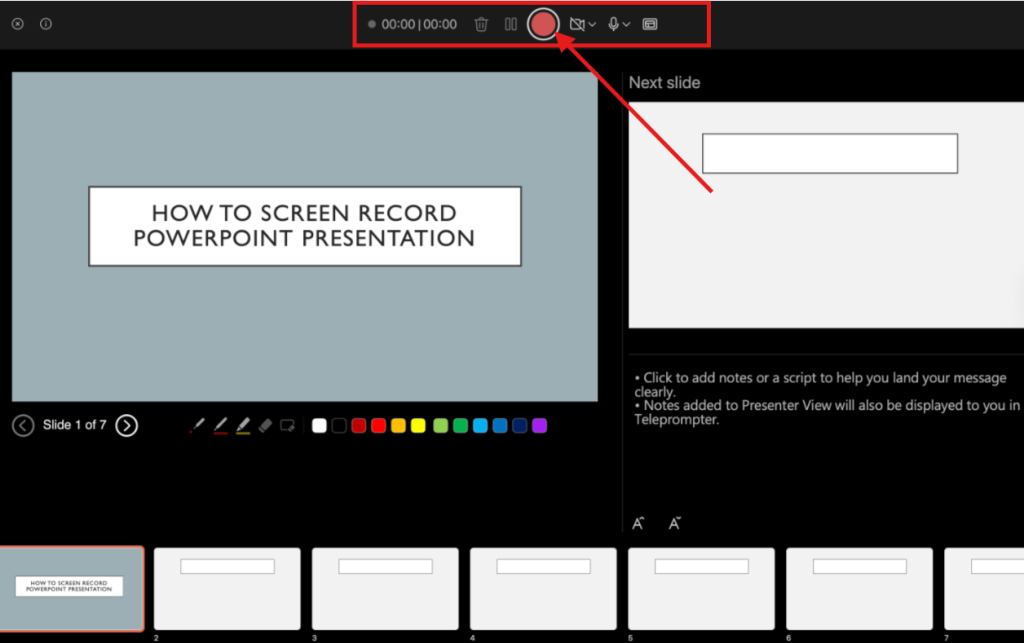
Step 4: The recording interface will open, showing Presenter View with your slides, a camera feed (if enabled), and controls for recorded narration. Press the red circle (Record button) to start recording.
Step 5: Use the toolbar to toggle the ink gestures if you want to draw during your presentation.
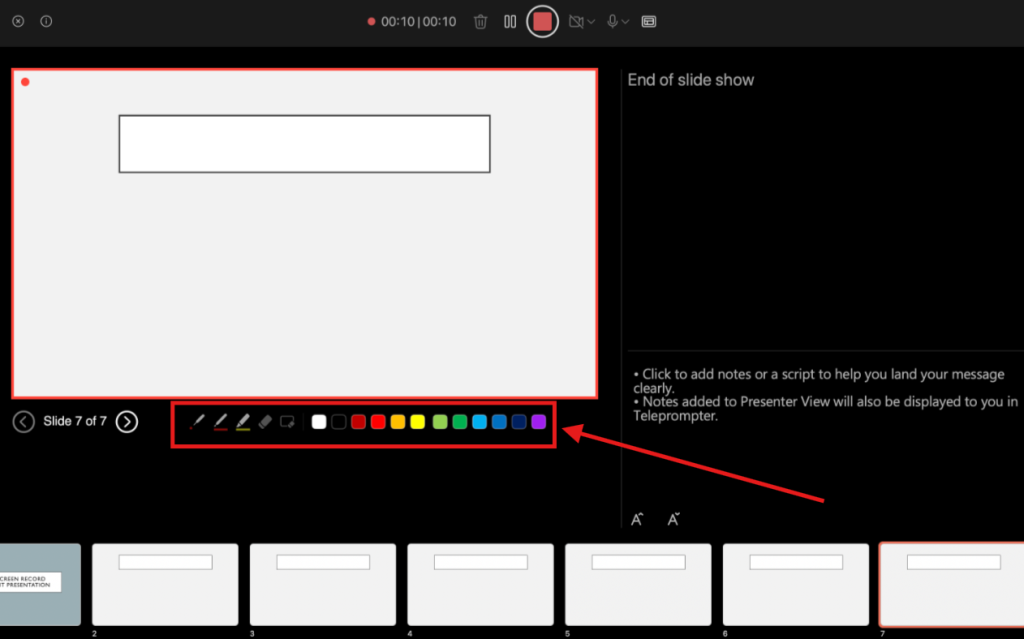
Step 6: When finished, click on the cross to stop recording. Your recorded narration and timing are now saved within each PowerPoint slide.
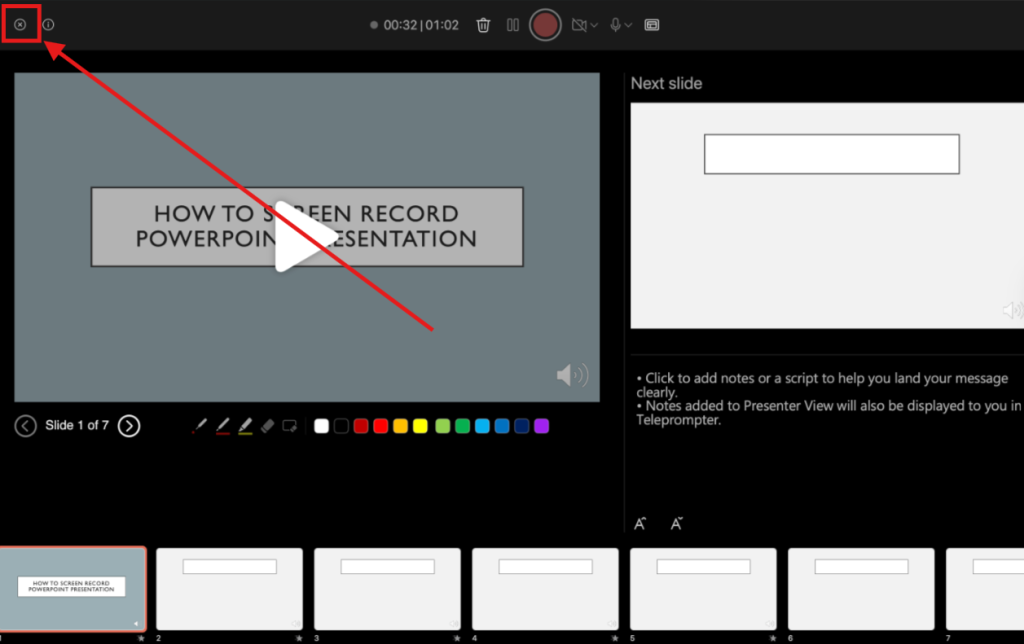
Step 7: Click on the sound icon at the bottom right corner of your slide to use the Playback tab for light video editing, such as trimming, or do an easy retake for specific slides without re-recording everything.
Note: To reuse the recording outside PowerPoint, go to File > Export, choose MP4 or MOV in the export window, and save the video file.
Also Read: How to Download Videos from a PowerPoint File
Step-by-Step Guide to Recording While Presenting, Adding Text, and Editing Your Presentation
Whether you want to record while presenting, add texts, or edit your presentation, we have got you covered. Let’s walk you through everything you need to create polished, professional presentations that make an impact.
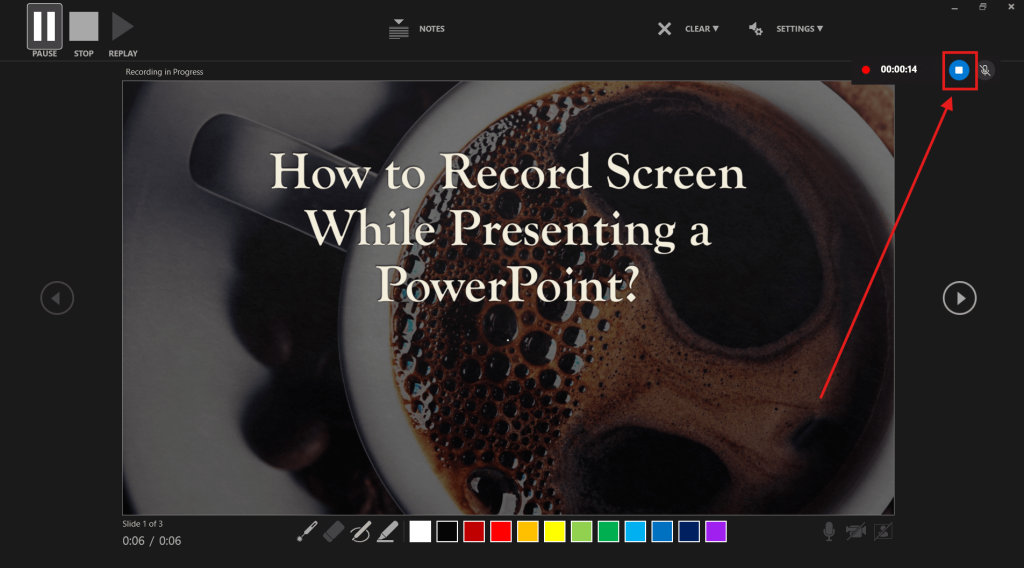
How to Record Screen While Presenting a PowerPoint?
If you want to capture your live presentation, including Presenter View, animations, and possibly a webcam feed, you’ll need to record your screen as you deliver it, rather than embedding the video into a slide. Here’s how to do it:
Step 1: Open your PowerPoint presentation and click the Slide Show tab, then choose From Beginning or From Current Slide to start presenting.
Step 2: Launch a screen recording tool (e.g., Xbox Game Bar on Windows by pressing Windows + G, or any third-party screen recorder) before you begin speaking.
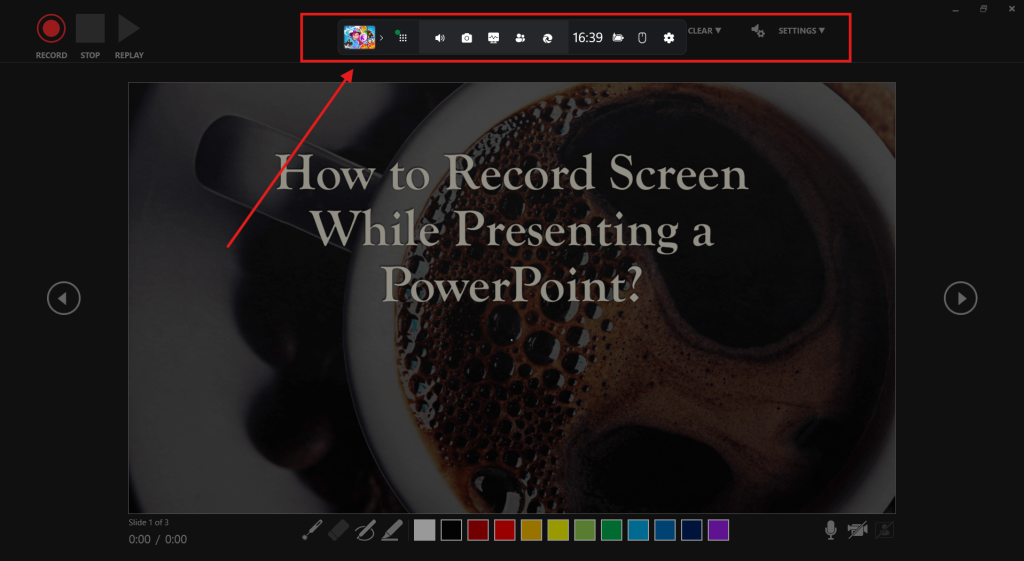
Step 3: Press Windows + Alt + R to start recording your entire screen. Make sure your microphone is enabled if you want narration.

Step 4: Deliver your presentation as usual. Presenter View, slide transitions, and mouse pointer movements will all be captured in real time. Press Windows + Alt + R again (or click the stop recording button in your chosen tool) once you finish.
Also Read: Generate PowerPoint with AI from any Word Document
How to Add Text to Screen Recording in PowerPoint?
Enhancing your screen recording with text can make your presentation more engaging and easier to follow. Here’s how to do it:
Step 1: Insert your screen recording into a slide (via Insert > Video > Video on My PC) if it’s not already there.
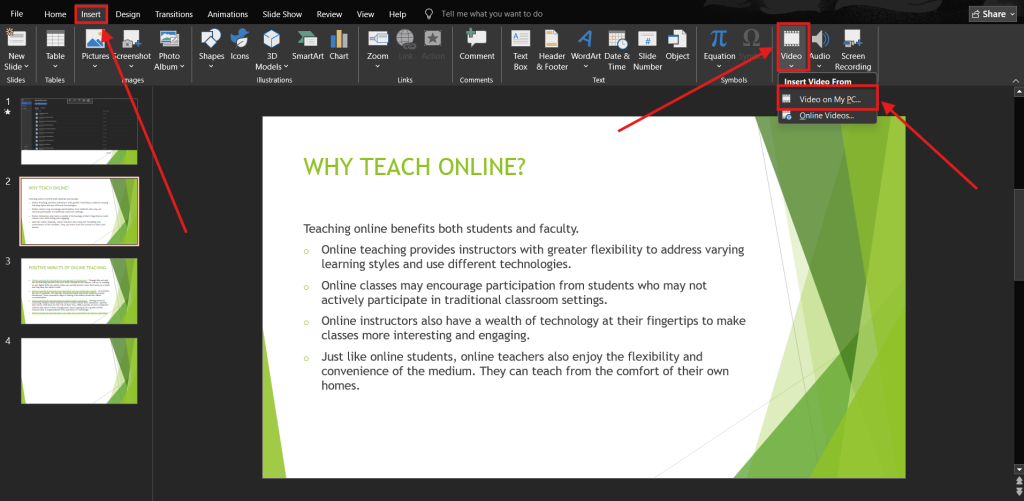
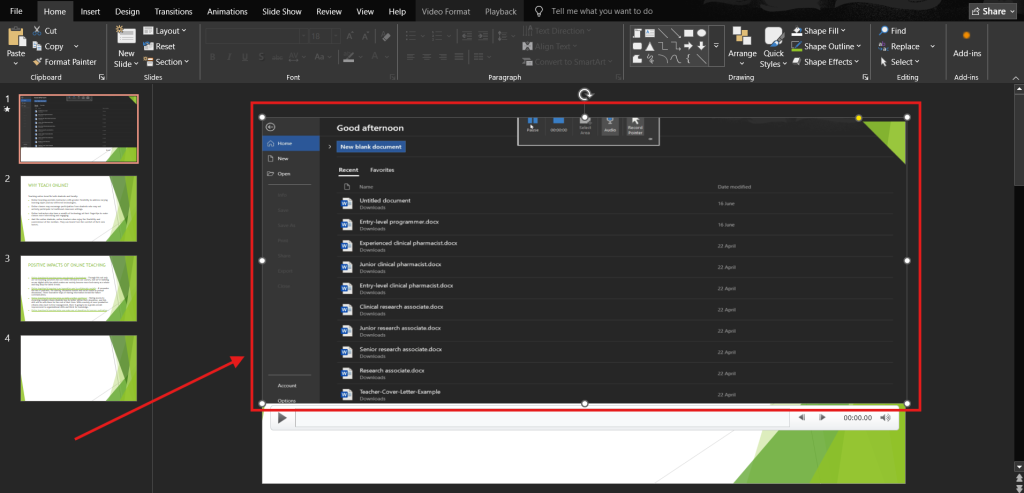
Step 2: Select the video frame on your slide to ensure the text appears over it.
Step 3: Go to the Insert tab and click Text Box.
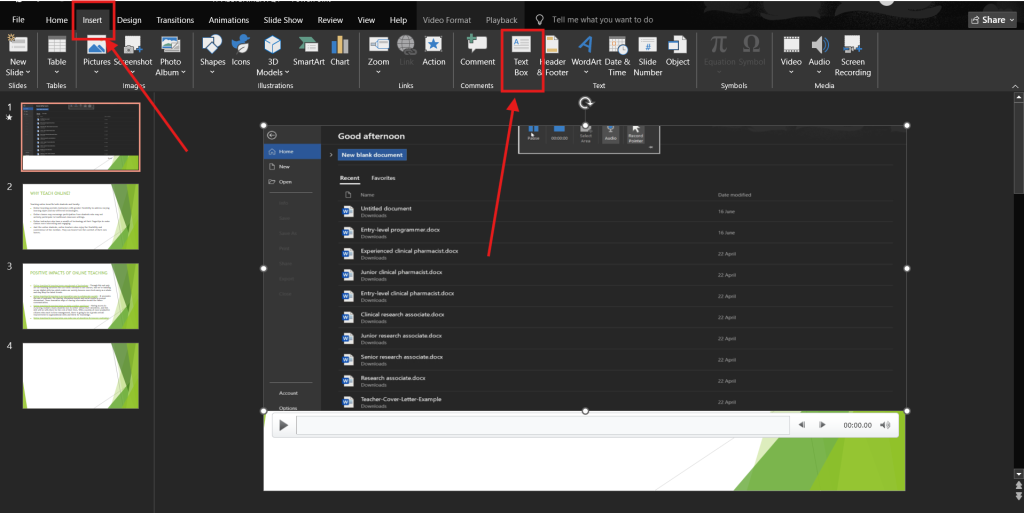
Step 4: Draw the text box where you want the text to appear on top of the recording. Type your text, then use the Home tab to format the font, size, and color for better visibility.
Note: If you want the text to appear or disappear at specific times, select the text box, go to the Animations tab, and apply an Entrance or Exit animation. Then adjust timing in the Animation Pane to sync with the video.
Also Read: How to Password Protect a Presentation on a Website for Free
How to Edit Screen Recording in PowerPoint?
Once you’ve captured your screen, you can refine the recording directly within PowerPoint to make it more polished and presentation-ready. Here’s how to edit PowerPoint screen recording:
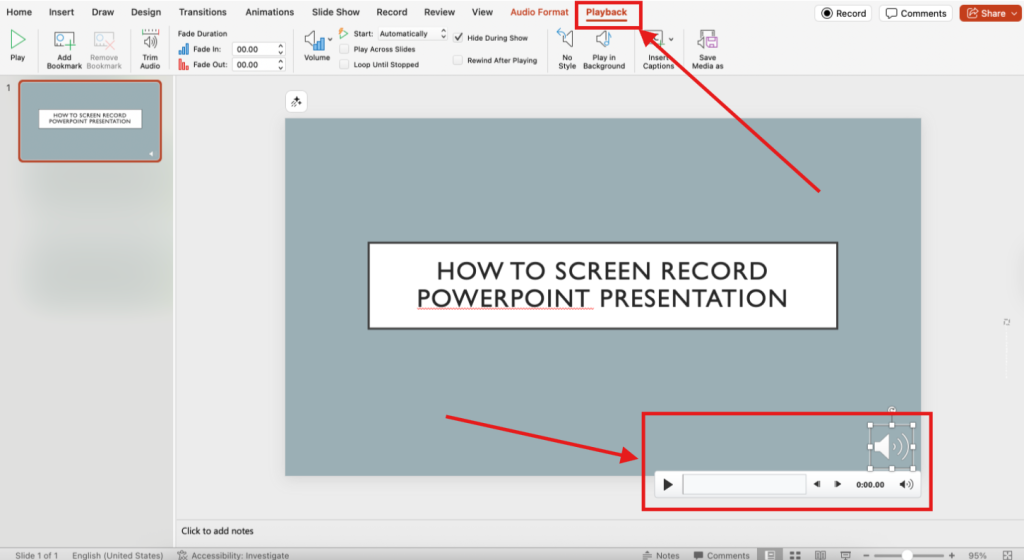
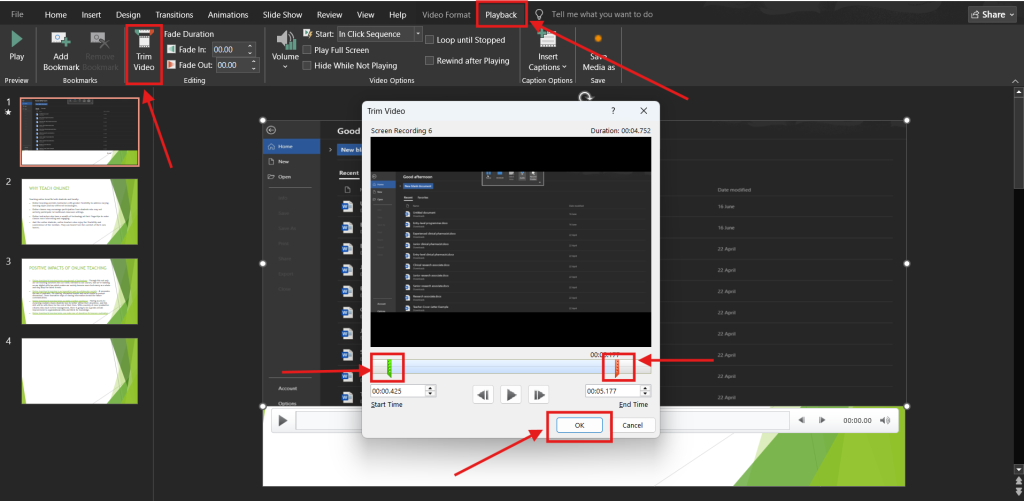
Step 1: To trim unwanted parts, click on the screen recording to select the video frame.

Step 2: Go to the Playback tab, and click Trim Video. Drag the green handle to set the start point and the red handle to set the end point, then click OK.
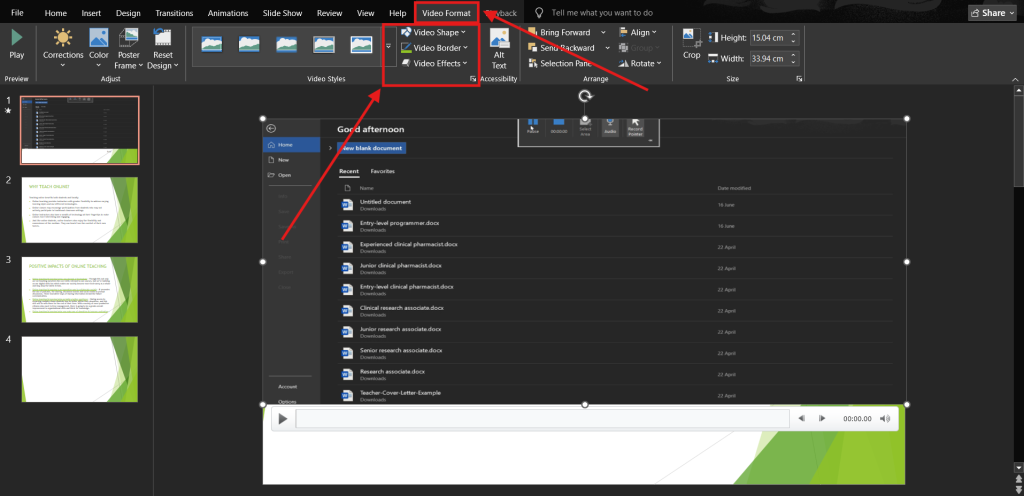
Step 3: Click on the Video Format tab to style your recording, change video shape, add border, or video effects.
Note: You can also use the Playback tab to choose whether the video plays automatically, on click, or in a loop. If needed, adjust volume, fade in/out effects, or add bookmarks to cue animations and captions.
Also Read: 15 AI Tools to Improve Your PowerPoint Presentation
Wrapping Up
PowerPoint screen recording is a game-changing feature for presenters, educators, and creators who want to share their message anytime, anywhere.
Imagine this: you deliver your best presentation once, and it’s ready to replay for students, clients, or your online audience anytime. No rushing to repeat yourself, no worrying about missed details. That’s the power of PowerPoint screen recording.
With the step-by-step process we’ve explored for Windows and Mac, plus pro tips for editing and audio, you’ve got everything you need to turn your slides into a dynamic video that works for you 24/7. So, open PowerPoint, hit record, and start creating content because your message deserves more than just one live showing.
Frequently Asked Questions
Does PowerPoint screen recording record audio?
Yes. PowerPoint’s screen recording feature can capture audio from your microphone or system sound. Ensure the “Audio” option is selected before starting to record, so both your narration and any on-screen audio are saved with the video file.
How to stop PowerPoint screen recording?
To stop recording, hover at the top of your screen until the control dock appears, then click the Stop button. PowerPoint automatically inserts the recorded video into the current slide for immediate preview and editing.
How to exit screen recording in PowerPoint?
After stopping the recording, simply press Esc or close the recording toolbar. Your screen recording will appear in the active slide, and you can edit, move, or delete it directly within your presentation.
How to record presentation on Mac and screen share PowerPoint?
On Mac, open your PowerPoint presentation, start a Record Slide Show, and enable microphone input. If you’re using Zoom or Teams for screen sharing, choose either your presentation window or your entire screen to share while you record your narration and slides at the same time.
How to put your screen recordings in reverse on PowerPoint?
PowerPoint doesn’t have a built-in reverse playback feature. Export the video file from your slide, use a video editing tool like Adobe Premiere Pro or iMovie to reverse it, then reinsert it into your slide.
How to record PowerPoint presentation without full screen?
Choose Record Slide Show from the Slide Show tab, but select a windowed mode by resizing PowerPoint before recording. This allows you to present and record without entering full-screen mode, useful for multitasking or showing other apps.
What are the differences between recording a slide show with narration and using the screen recording feature in PowerPoint?
Recording a slide show captures your narration, slide timings, and ink gestures for playback in presentation mode. Screen recording captures everything on your screen, including non-PowerPoint content, but doesn’t record slide-specific timings or animations in the same way.
Are there any tips for improving the quality of my PowerPoint screen recording, such as resolution, microphone, or background noise reduction?
Use a high-quality microphone, enable Audio in screen recording, close unnecessary apps, and record in a quiet room. Increase display resolution for sharper visuals, and consider using noise reduction software to eliminate background hum or clicks.
Is it possible to record just a portion of my screen in PowerPoint, not the entire screen? If so, how?
Yes. When you click Screen Recording, drag to select the specific area you want to capture. PowerPoint will only record within that rectangle, allowing you to focus on a single app, slide section, or training demo.
What should I do if the PowerPoint screen recording function is missing or greyed out on my device?
Ensure you’re using an updated Microsoft 365 or PowerPoint 2019+ version, as older versions lack this feature. Also, check if your device’s graphics settings or admin restrictions are disabling screen capture capabilities.
How long can PowerPoint screen record?
There’s no fixed time limit, but recordings are constrained by your computer’s available memory and storage. For smoother performance, keep recordings under an hour and compress large video files before saving or sharing.
What is the advantage of using the recording feature in PowerPoint presentations?
It lets you create engaging, self-contained presentations with video, narration, and gestures directly inside PowerPoint, eliminating the need for third-party tools and making it easy to share a polished file with students, clients, or colleagues.
How to screen record a PowerPoint presentation with audio?
Click Insert > Screen Recording, select the area, enable Audio, and start recording. Narrate as you present your slides, then stop the recording. PowerPoint automatically embeds the video, complete with your voice, into your slide deck.
Are there alternative tools or add-ins that integrate with PowerPoint for enhanced screen recording features?
Yes, Several tools and add-ins, such as Camtasia, Loom, and OBS Studio, integrate with PowerPoint to enhance screen recording. They provide advanced features like webcam overlays, annotations, and higher-quality output than PowerPoint’s built-in recorder.