

TL;DR
- PowerPoint add‑ins make timelines faster, cleaner, and more professional than manual shapes.
- The right plugin saves hours by automating design, alignment, and formatting.
- Lucidchart – Best for collaborative, cloud‑synced timelines with rich templates and real‑time editing.
- SuperJane – Perfect for sleek, on‑brand timelines and Gantt charts built entirely inside PowerPoint.
- Project Plan – Ideal for complex project schedules with milestones, dependencies, and cross‑platform sync.
- Slides365 – Quickest way to drop polished, theme‑matching timeline templates into your deck.
- Choosing the right tool depends on whether you need speed, complexity, collaboration, or visual polish.
PowerPoint has come a long way since the days of manually stacking shapes and lines to create timelines. After years of perfecting slide design the hard way, I’ve realized that built-in add-ins now make the process ridiculously faster, cleaner, and almost foolproof.
Don’t spend years doing what I did.
In this blog, I’m sharing my top 4 add-ins for designing professional timelines. Plus, a step‑by‑step walkthrough for how to make a timeline in PowerPoint, so you can pick the one that fits your style and start creating instantly.
1. Lucidchart Diagrams for PowerPoint
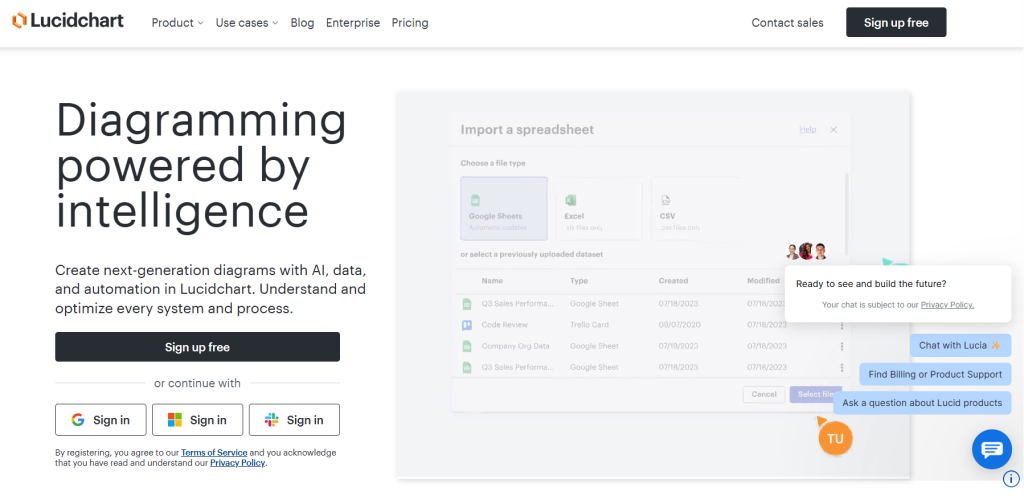
Lucidchart is a cloud-based diagramming platform with over 15 million users, widely used for creating flowcharts, org charts, wireframes, mind maps, and more. The PowerPoint add-in allows you to insert and refresh visuals directly within your slides while preserving alignment with your source diagram in Lucidchart.
Why Choose Lucidchart for Your PowerPoint Timelines?
- Direct Slide Embedding- Insert Lucidchart timelines, flowcharts, and diagrams straight into PowerPoint. Refresh updates in one click.
- Real-Time Collaboration- Work with classmates or teammates at the same time with live cursors, comments, and version history.
- Rich Template Library- Access ready‑to‑use templates for timelines, process flows, org charts, and project visuals.
- Smart Layout Tools- Auto‑spacing, connectors, and drag‑and‑drop tools keep diagrams clean without manual tweaking.
- Data‑Driven Diagrams- Import spreadsheets or structured data to auto‑create org charts and project timelines.
- Fast Drag‑and‑Drop Interface- Build, move, and edit shapes quickly with intuitive controls and shortcuts.
Pricing
- Available via free trial (limited to basic documents and up to 60 objects).
- Paid plans start at $9/month.
What Users Say About Lucidchart
From Capterra:
“Building flowcharts is easy with the help of a limitless amount of templates.” Emilia N, Communications coordinator.
“There should be a guide on how to utilize this software because for first time users, it can get confusing.“ Theresa L, Software Engineer.
What are the Pros and Cons of Lucidchart?
| Pros | Cons |
|---|---|
| Real-time collaboration and simultaneous editing | Free plan object limits (60 objects) |
| Extensive template and shape libraries with easy customization | Challenging document navigation when diagrams grow complex |
| Drag and drop interface with a low learning curve | Occasional complaints about billing transparency |
| Wide integration support (Teams, Slack, Jira, Google Workspace, Office 365) | Requires internet access; offline editing is limited |
How Does Lucidchart Work?
Step 1: Install the Lucidchart Add‑in
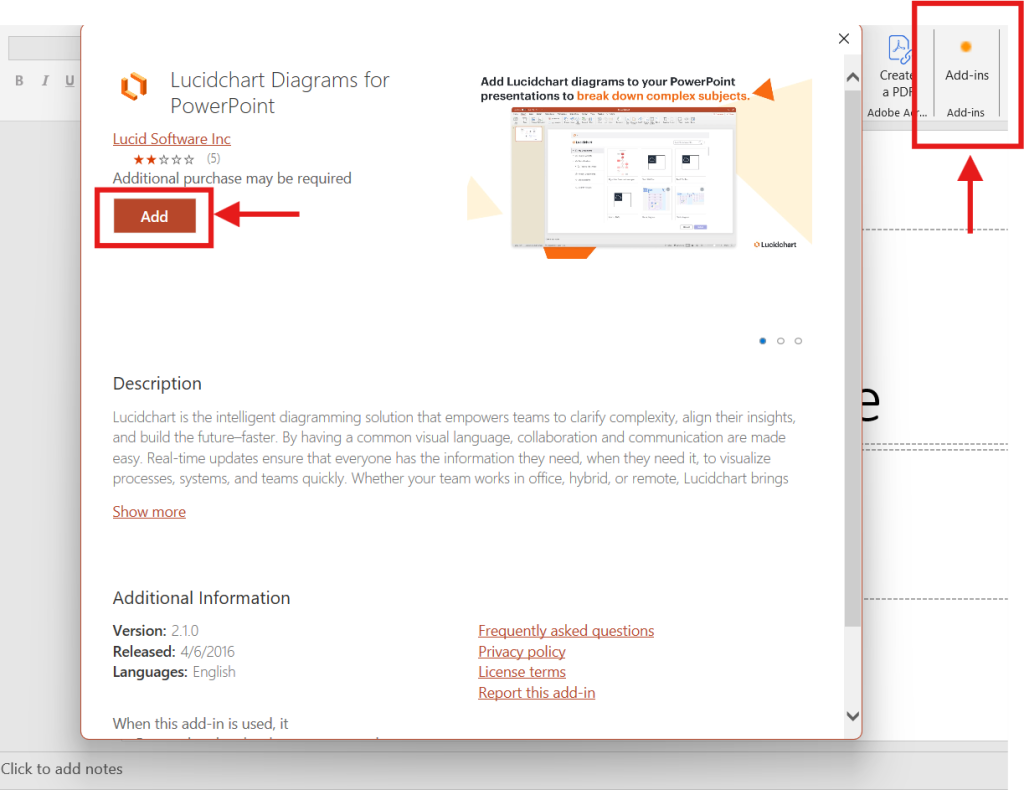
- Open PowerPoint and go to Add‑ins and search for Lucidchart.
- Click Add and follow the prompt to integrate it with PowerPoint.
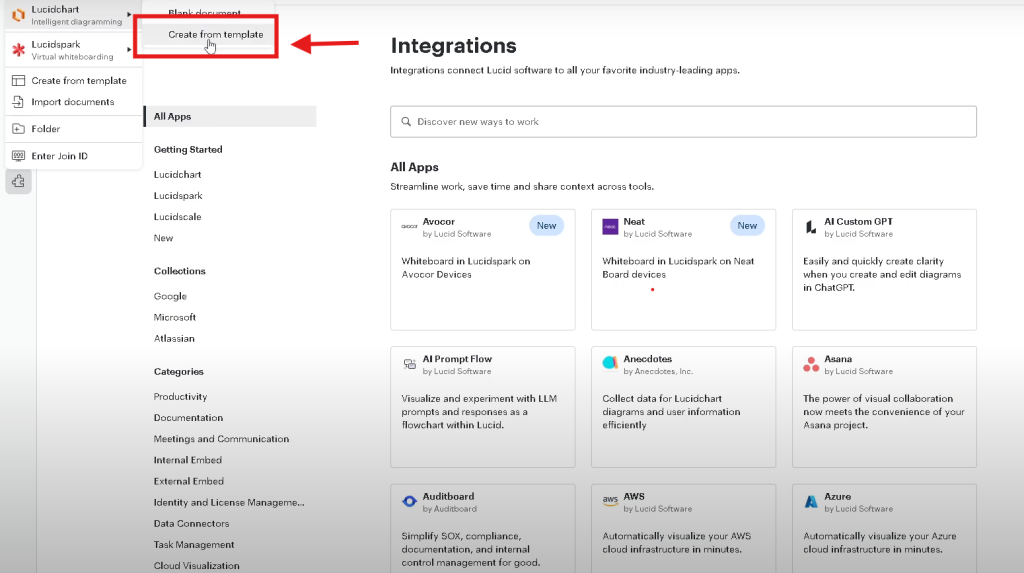
Step 2: Start with a Template
- Once integrated, select Create from Template to explore ready‑made timeline designs.
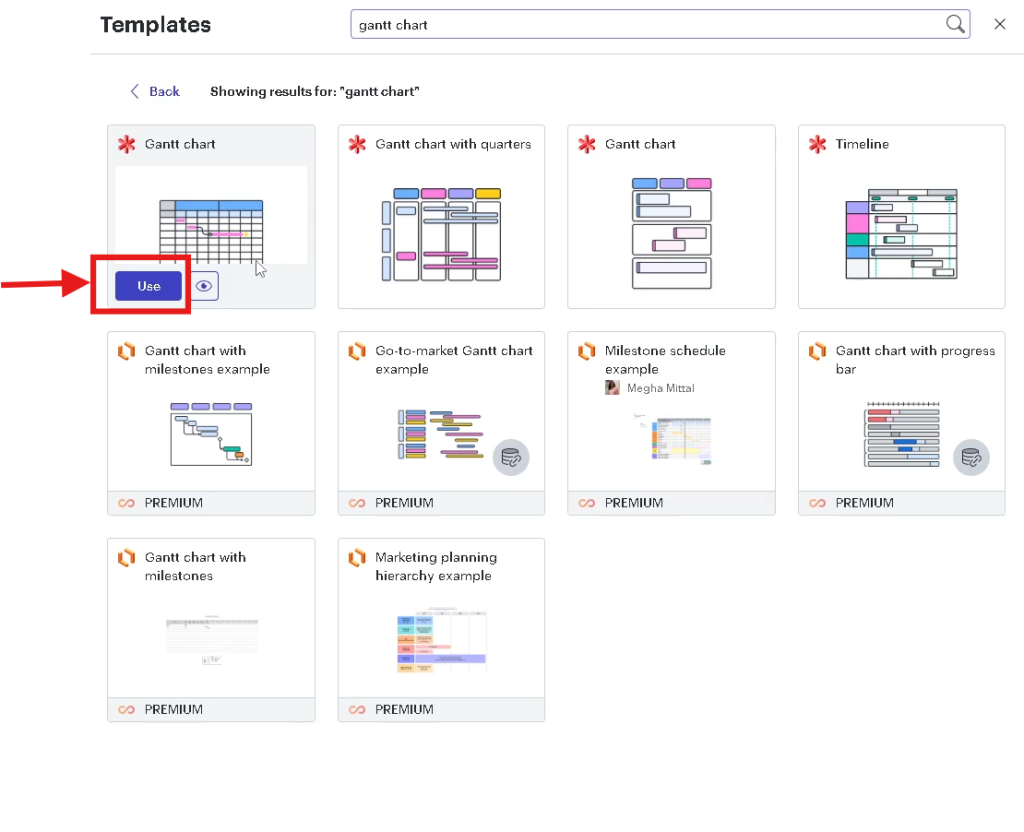
Step 3: Pick Your Timeline Design
- Search for a desired template or browse the existing template library.
- Hover over your chosen template and click Use to load it.
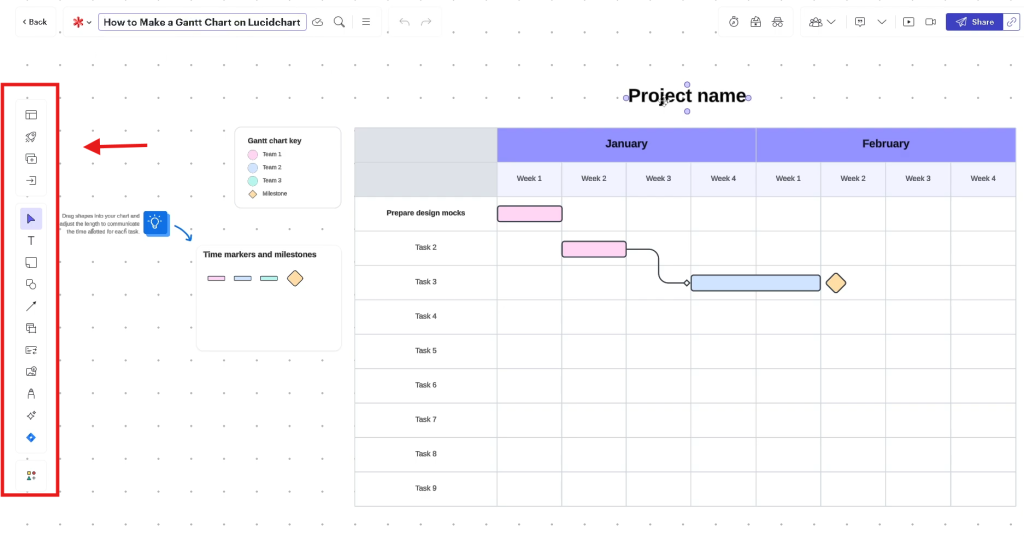
Step 4: Customize Your Timeline
- Adjust text, colors, and milestones using the taskbar on the left.
- Your editable timeline is now ready to insert into your PowerPoint slide.
Take your slides up by a notch. Read our blog on The Top 5 PowerPoint Plugins with AI – Which save you the most time?
2. SuperJane (Jane – Charts done right)

SuperJane is a Microsoft AppSource add-in that lets users insert polished timelines and Gantt charts directly inside PowerPoint. With this tool, you stay within PowerPoint, and all content remains local to your presentation, eliminating the need for external tools or online editing.
Why Choose SuperJane for Your PowerPoint Timelines?
- Create fully styled timelines and Gantt charts in just a few clicks
- Built-in template library that adapts automatically to your PowerPoint theme (colors, fonts, layout)
- Drag and drop editing of tasks, durations, dependencies, and resizing without breaking the chart layout
- Templates available for roadmaps, project plans, event schedules, and workload management
Pricing
- Free to try with a trial period
- Contact Superjane for subscription-based pricing
What Users Say About SuperJane
From Microsoft AppSource:
“In just a couple of clicks, I get beautiful charts I’d spent hours or days creating. It is super intuitive, the auto-resize feature is awesome when adding/editing tasks, and the drag-and-drop is smooth. Great for productivity and creating astonishing slides!”
What are the Pros and Cons of SuperJane?
| Pros | Cons |
|---|---|
| Embed timelines and Gantt charts directly in PowerPoint, no external tools needed | No support yet for importing from Excel or other tools (feature pending) |
| Charts automatically match slide theme for seamless design integration | Paid subscription required after trial, pricing higher for Microsoft 365 add-in edition |
| Drag and drop editing and auto-resizing reduce manual layout adjustments | Currently limited to timelines and Gantt charts only; other chart types (e.g. pie, table) to come |
| All data stays in the slide, ensuring privacy and compliance with local content storage |
How Does SuperJane Work?
Step 1: Install SuperJane
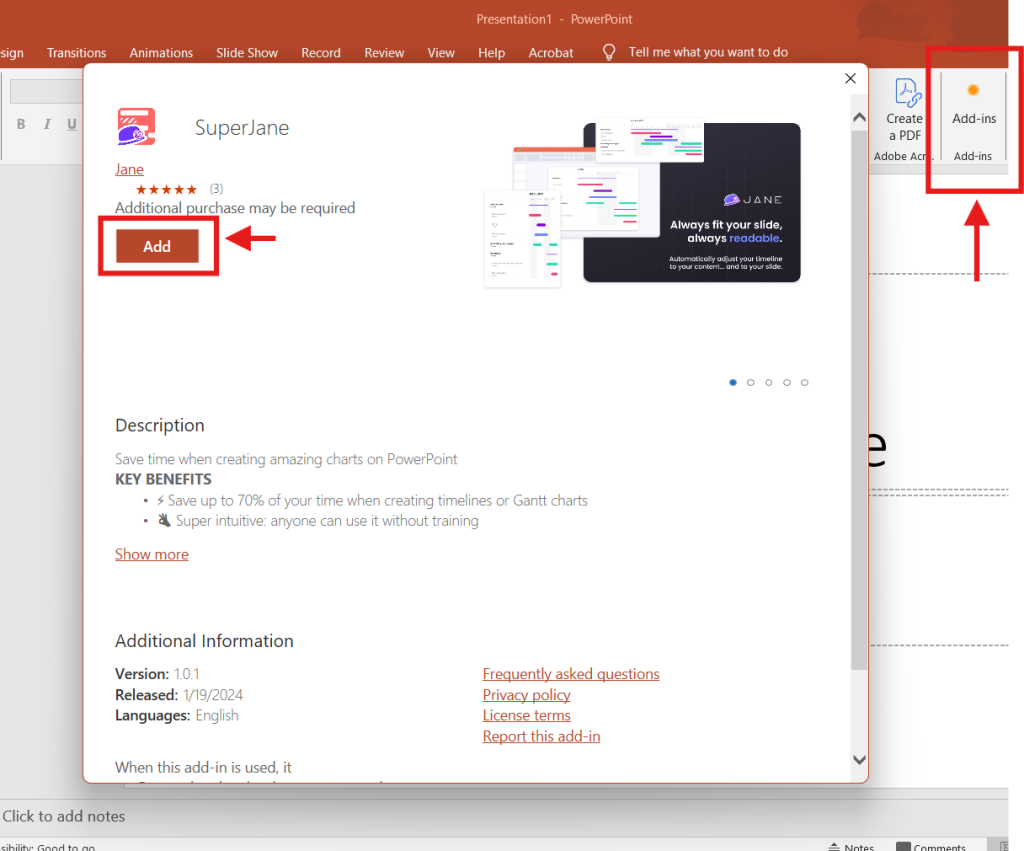
- In PowerPoint, go to the Add‑ins option.
- Search for SuperJane and click Add to integrate it into your PowerPoint ribbon.
Step 2: Start Your Project
- Launch SuperJane and name your project, and click Next.
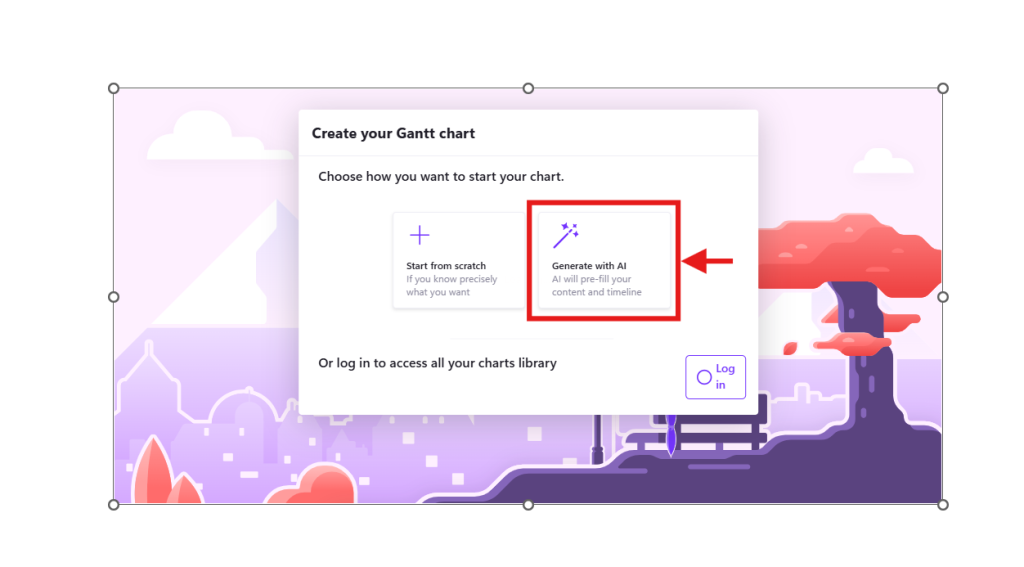
Step 3: Choose Your Workflow
- Select either Create from Scratch or Build with AI.
- For this example, choose Build with AI for faster timeline creation.
Step 4: Input Project Details
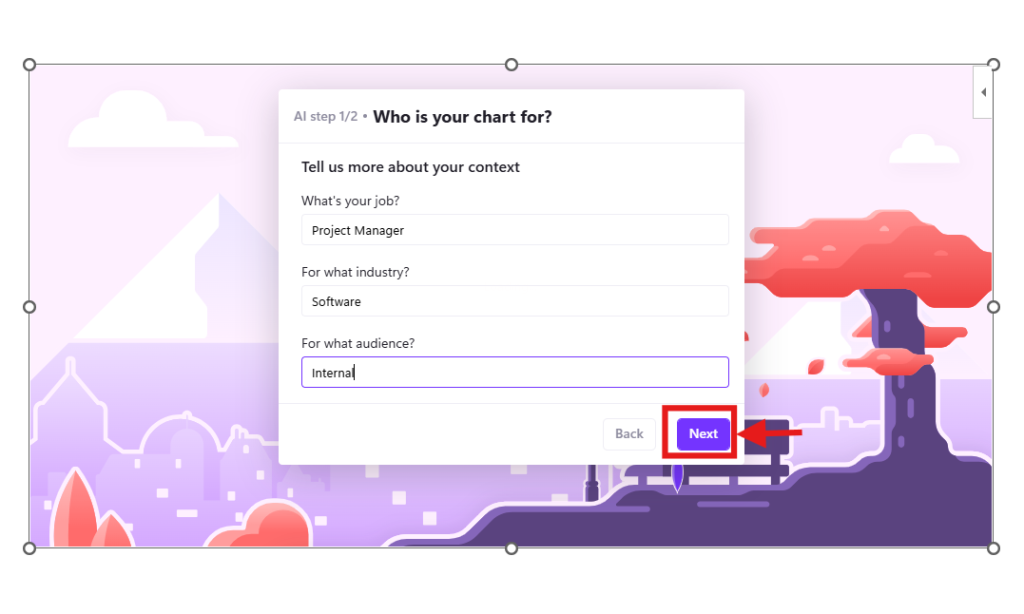
- Fill in your job role, industry, and audience fields.
- Click Next to continue.
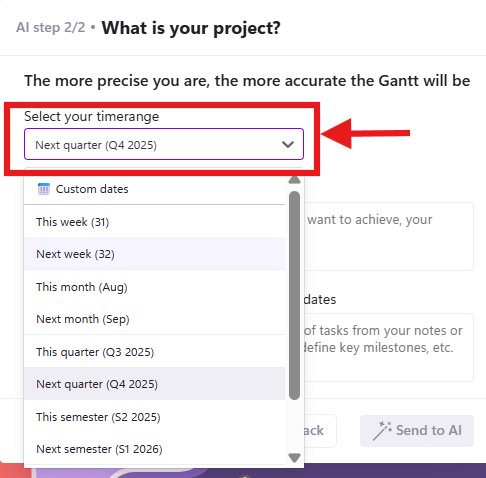
Step 5: Select Your Timeline Period
- Use the dropdown to choose your desired quarter or timeframe.
Step 6: Describe Your Project
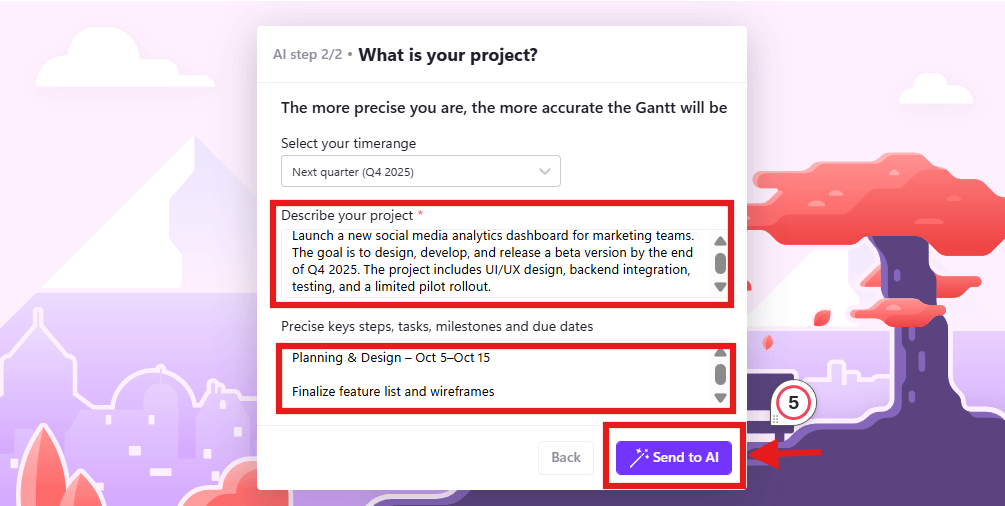
- Enter your project description and list key steps or milestones in the designated boxes.
- Click Send to AI to generate your timeline.
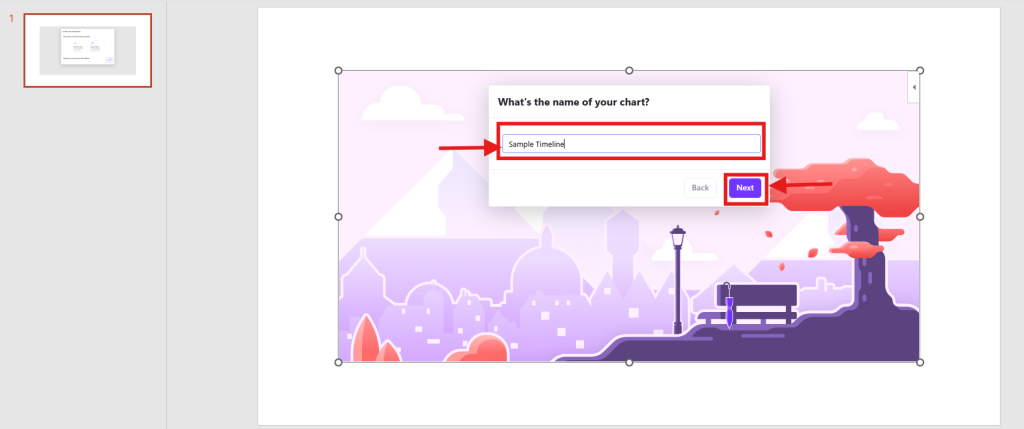
Step 7: Finalize Your Chart

- Name your chart and click Next to create it.
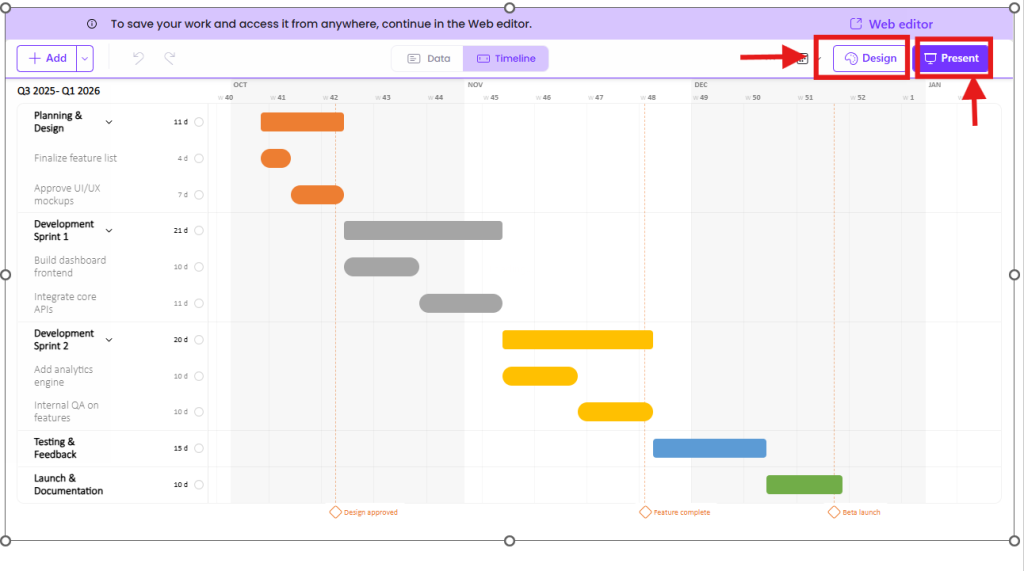
Step 8: Customize and Present
- Use the Design option to style your timeline.
- Click Present to lock the design and remove editing features for a polished delivery.
Want to go a step Beyond Charts? Here are the Top Think-cell Alternatives with AI!
3. Project Plan (by Cherryware)
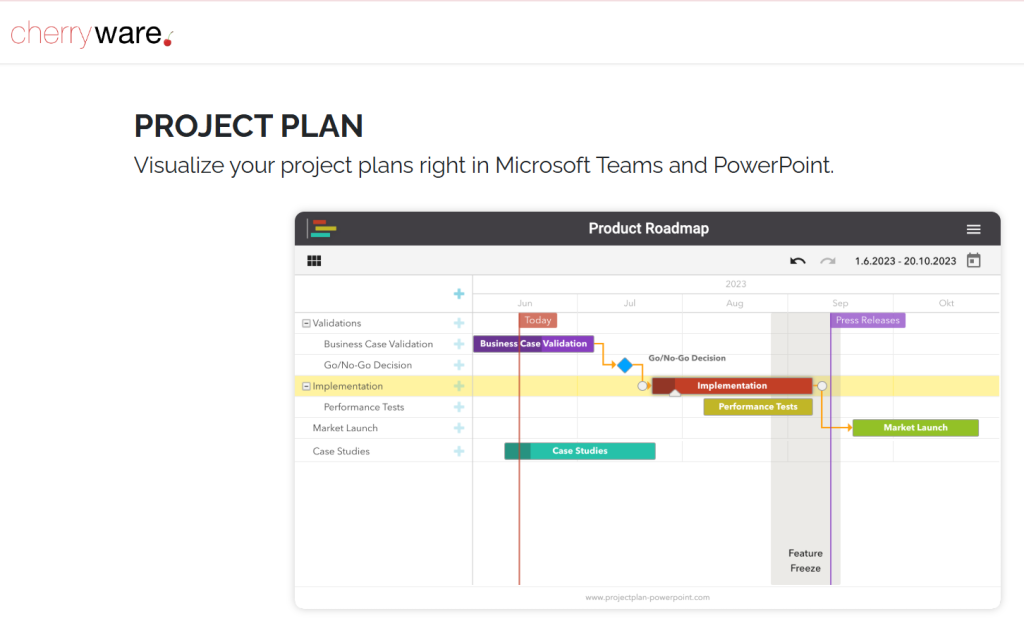
Project Plan is an AppSource add-in that enables users to create Gantt charts, timelines, roadmaps, and full project plans directly within PowerPoint. It works seamlessly across PowerPoint, Excel, and Microsoft Teams, using cloud-sync so the same plan stays consistent everywhere it is embedded.
Why Choose Project Plan for Your PowerPoint Timelines?
- Generate Gantt charts, timelines, roadmaps and project plans with tasks, milestones, dependencies
- Task and subtask management with a tree view and progress tracking
- Dependency management by drawing lines between items to show relationships
- Resource assignment and filtering so you can allocate teams or individuals to tasks
- Calendar control, zoomable time scale, and weekend highlighting Embed plans in Microsoft Teams, SharePoint, Confluence and keep them in sync across platforms
Pricing
- Free for small projects with up to 9 project items
- Unlimited projects, items and full editing rights require a paid license
- Pricing starts at around $90/year per user
What Users Say about Project Plan
“It is easy to install and offers all the features I expect from a project planner. I especially like the seamless integration with Microsoft Teams.”
— Getapp user review
They gave Project Plan perfect scores in value, ease of use, features, and support, and reported no notable drawbacks.
What are the Pros and Cons of Project Plan?
| Pros | Cons |
|---|---|
| Create timelines and Gantt charts entirely within PowerPoint, without external tools | Create and edit limited to 9 items in free mode; editing larger projects requires a license |
| Plans sync automatically across PowerPoint, Excel, and Microsoft Teams | Costs more for Microsoft 365 add-in edition; license per user applies to all platforms |
| Quick setup, you can build a project plan in under a minute | No built-in chart types beyond timelines and Gantt; no offline-only mode |
| Cloud sync ensures consistency across shared decks and stakeholder views | Requires internet access as plans are cloud-synced |
How Does Project Plan Work?
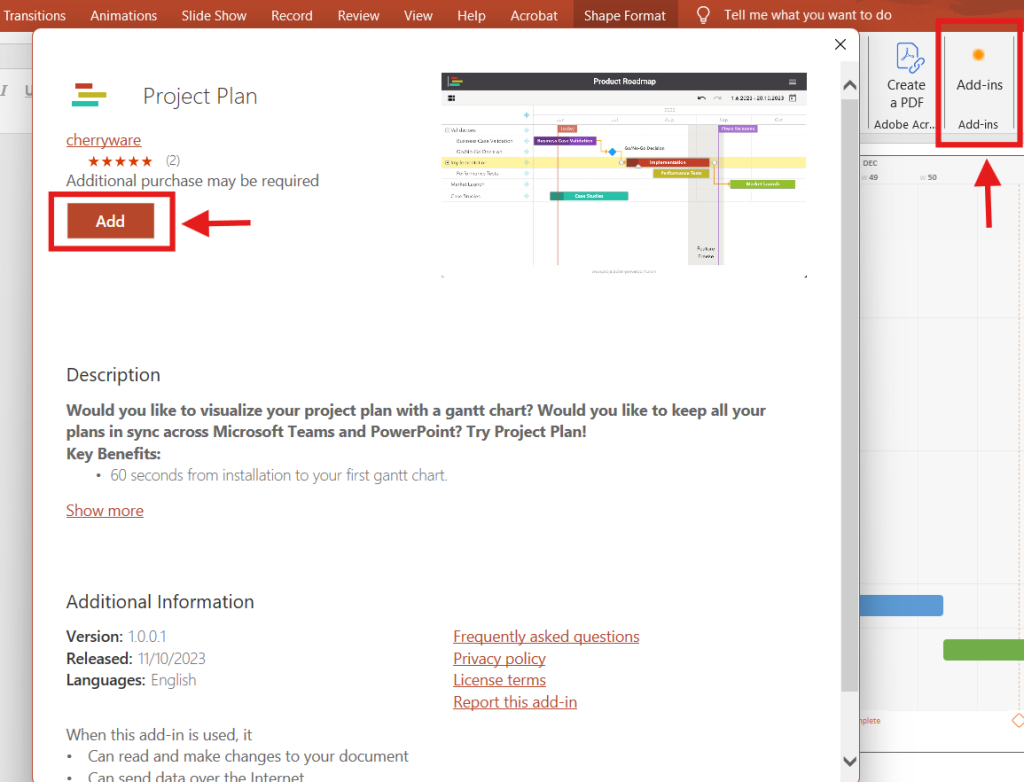
Step 1: Install Project Plan
- In PowerPoint, go to the Add‑ins option.
- Search for Project Plan and click Add to integrate it into your ribbon.
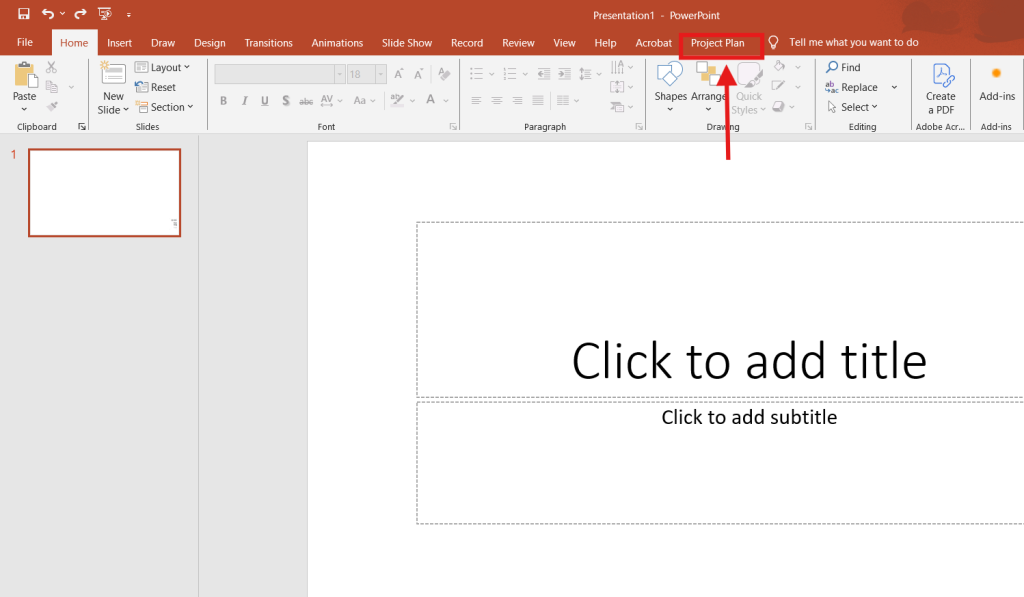
Step 2: Open Project Plan
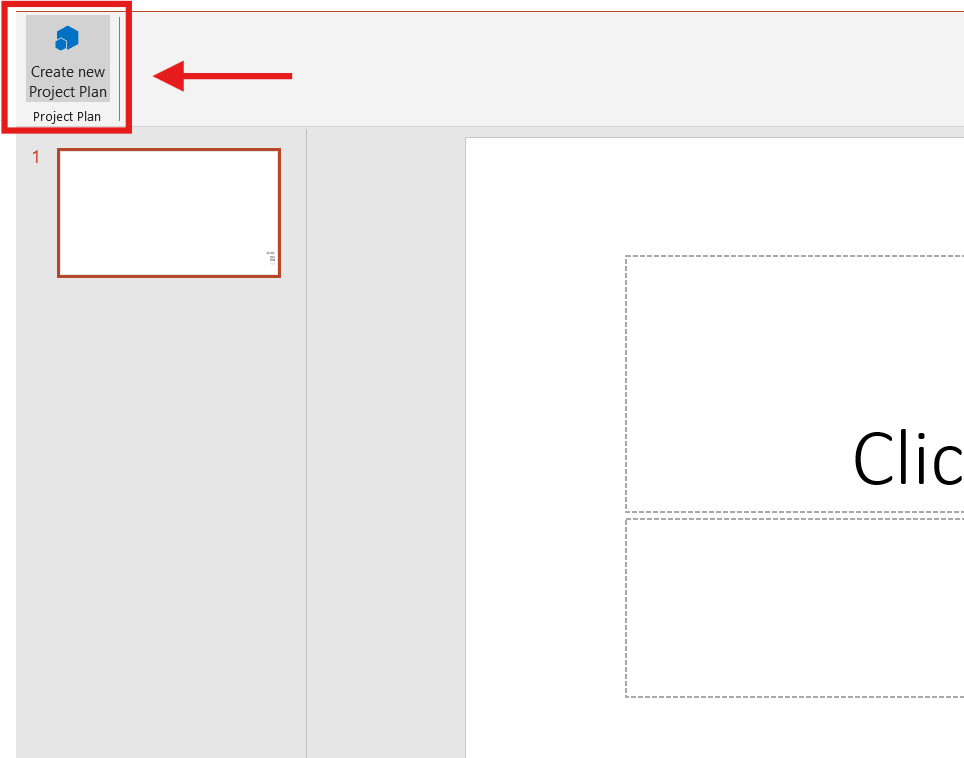
- Click Project Plan from the PowerPoint top ribbon to launch the tool.
Step 3: Create a New Project Plan
- From the top left corner, select Create a New Project Plan.
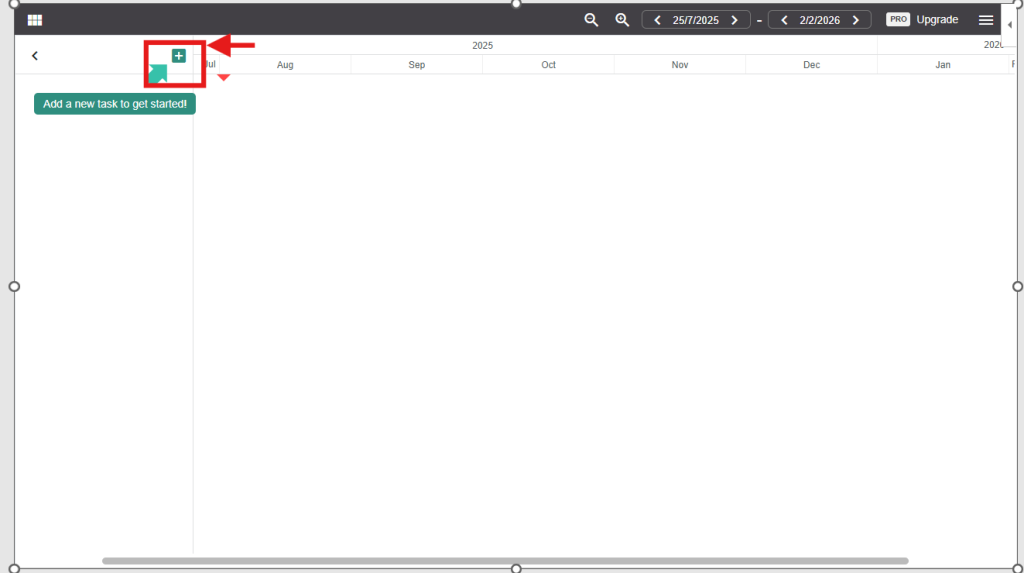
Step 4: Choose Your Starting Point
- Click the green plus icon to start adding tasks manually.
- You can begin with:
- An empty plan from scratch
- An existing template
- An example plan (for this guide, we’re mirroring an existing plan)
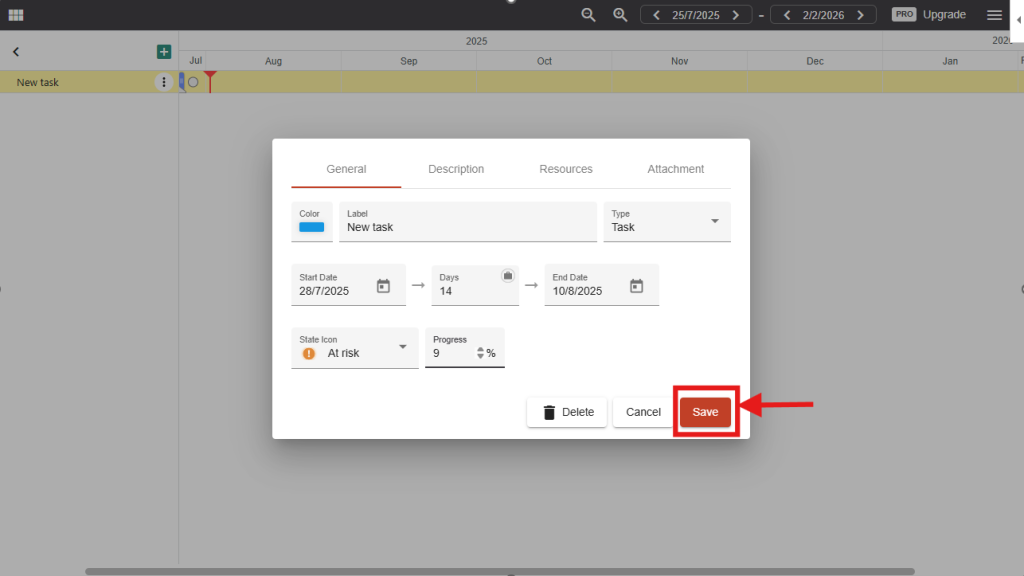
Step 5: Add Your First Task
- Fill in the task name, details, and status.
- Click Save to add it to your timeline.
Step 6: Build Out the Timeline
- Continue adding tasks and their status one by one, as in Step 5.
- Your project timeline will grow dynamically as you add each milestone and you can finally add a timeline to PowerPoint.

But that’s not all that AI integration has to offer in PPTs. Read our blog on Best Tools to Animate Presentations with AI.
4. Slides365 (PowerPoint Add-in)
Slides365 helps you build professional presentations quickly using curated slide layouts, timeline and roadmap designs, icons, and industry-specific visuals.
Why Choose Slides365 for Your PowerPoint Timelines?
- AI-guided slide suggestions with support for timeline slides (weekly, monthly, quarterly)
- Pre-designed timeline and roadmap templates that auto-adapt to your PowerPoint theme
- Large library of industry-specific icons and slide templates
- Specialized slides for domains like Cloud, Big Data, IoT, digital transformation, healthcare, and insurance
Pricing
- You can purchase custom slides or themes through their service.
What Users Say About Slides365
Slides365 scores 4.4 out of 5 from 18 ratings on Microsoft AppSource.
Users appreciate its ability to quickly assemble polished timelines and business presentation slides directly within PowerPoint.
What are the Pros and Cons of Slides365?
| Pros | Cons |
|---|---|
| Installable via Office Add-ins without external installers | Slides are static and do not offer dynamic timeline automation |
| Timeline templates for different time spans (weekly to quarterly) | Lacks data-driven or Excel-linked timeline generation |
| Auto-adapts to PowerPoint themes (colors, fonts, layout) | Pricing may be higher than manual template approaches |
| Supports industry-specific visuals and slide libraries | Limited user reviews outside AppSource |
How Does Slides365 Work?
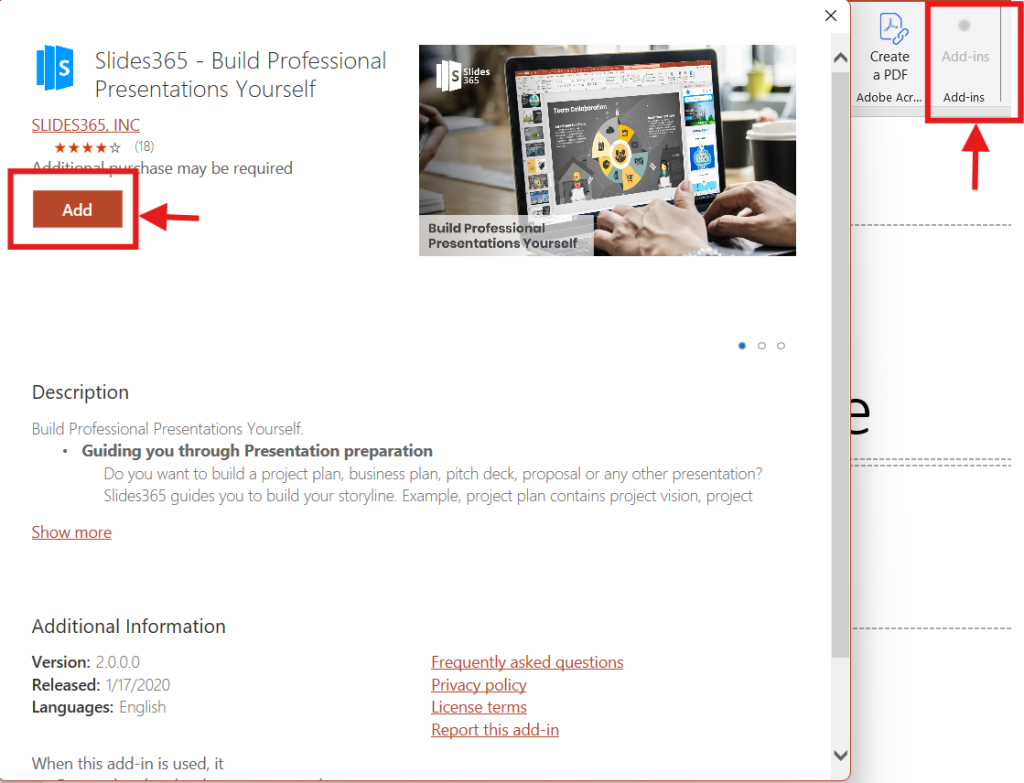
Step 1: Install Slides365
- In PowerPoint, go to the Add‑ins option.
- Search for Slides365 and click Add to integrate it with your PowerPoint ribbon.
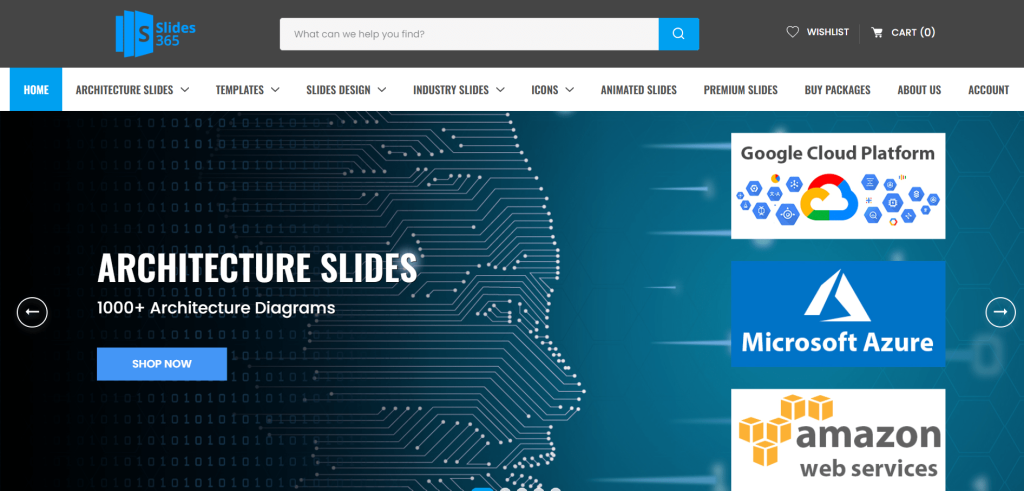
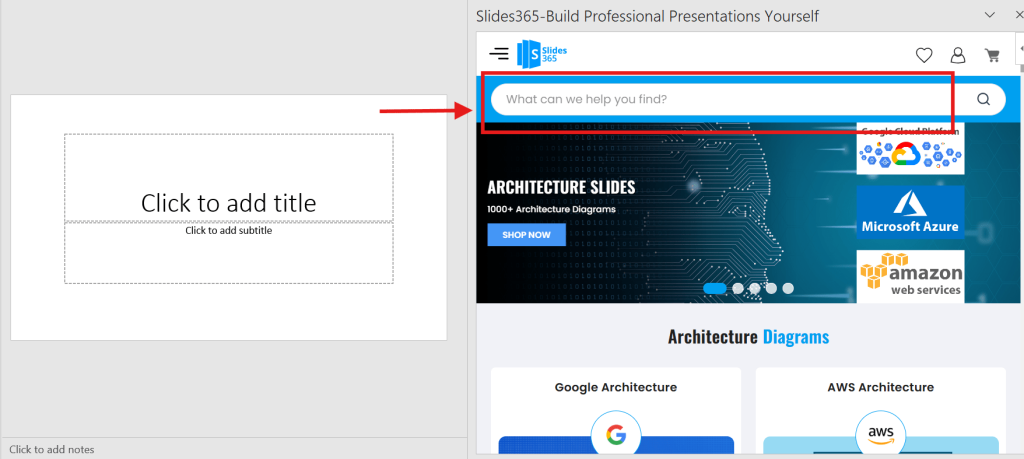
Step 2: Search for a Template
- From the Slides365 home page, use the search bar to find your desired timeline template.
Step 3: Select a Timeline Template
Browse through the available options and choose your preferred timeline template.
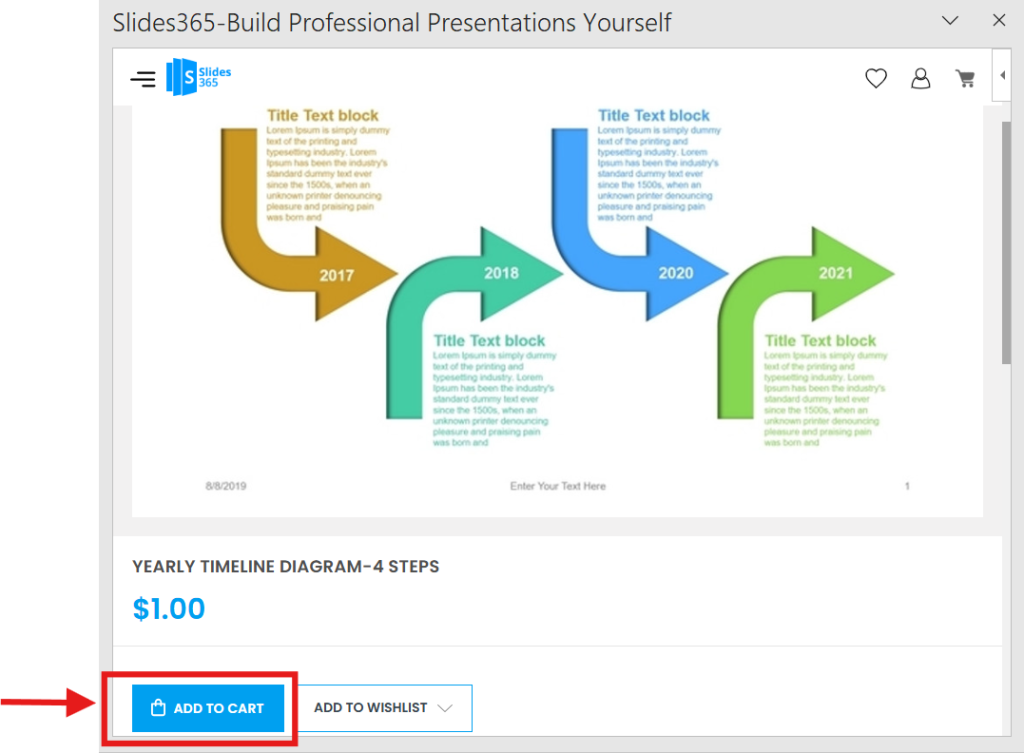
Step 4: Preview and Download
- Preview the template to see how it will look in your slide deck.
- Click Add to Cart to complete the purchase and download your customizable timeline template ready for editing in PowerPoint.
Not a Plugin, but a Power Platform: Try SlideSpeak for Instant Timelines Without Add-ins
Let’s be honest, sometimes even the best PowerPoint plugins can feel like overkill. They require installations, Office permissions, ribbon juggling, or internet access at the wrong time. If you’re looking for a faster, frictionless way to create timeline slides without the plugins or fiddling inside PowerPoint, there’s a smarter solution.
Whether you’re a consultant building pitch decks, a manager planning roadmaps, or a student organizing project timelines, SlideSpeak simplifies the whole process. Just upload your content or prompt, and SlideSpeak’s AI handles the rest.
Here’s what makes SlideSpeak different:
- No Add-ins Required
- Timeline in Seconds
- Brand-Ready Designs
- Built for Speed & Simplicity
- Flexible Export to PPTX, PDF, & Google Slides
How to Create a Timeline with SlideSpeak?
Creating a polished timeline slide with SlideSpeak is as easy as copy, paste, and export. Here’s how:
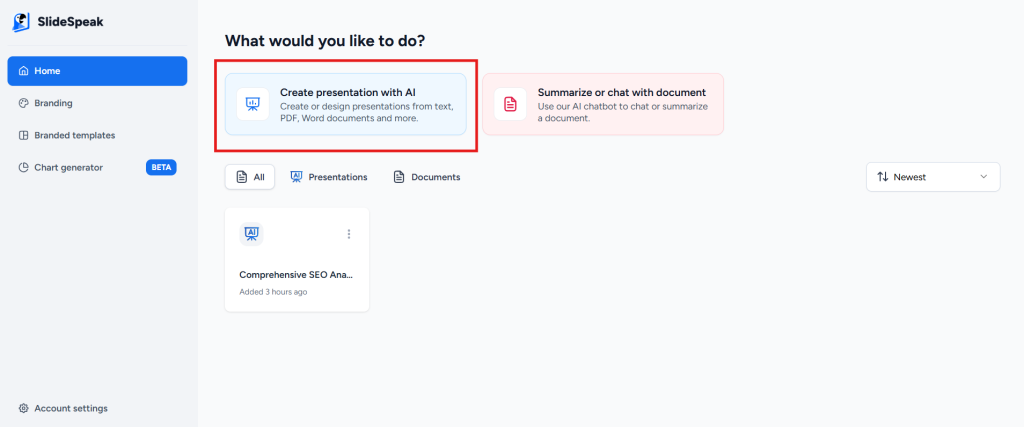
Step 1: Choose “Create presentation with AI”.
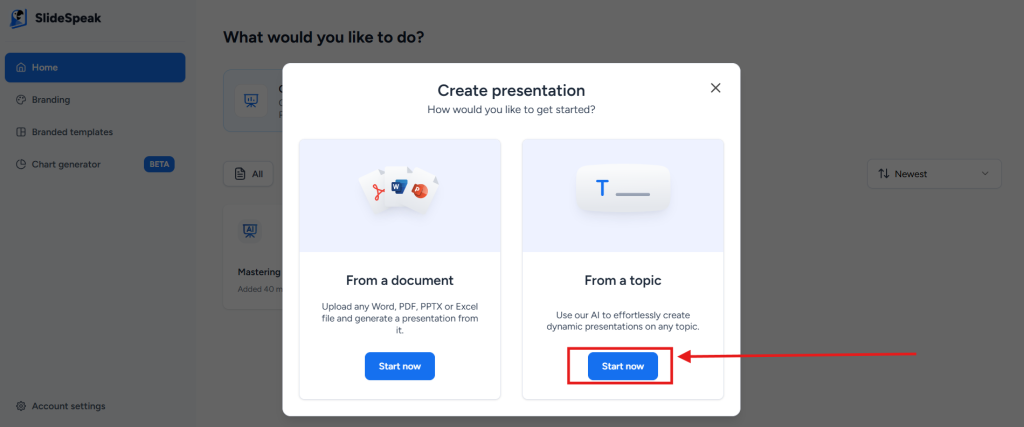
Step 2: Choose the “From a topic” option to create a presentation using SlideSpeak’s AI.
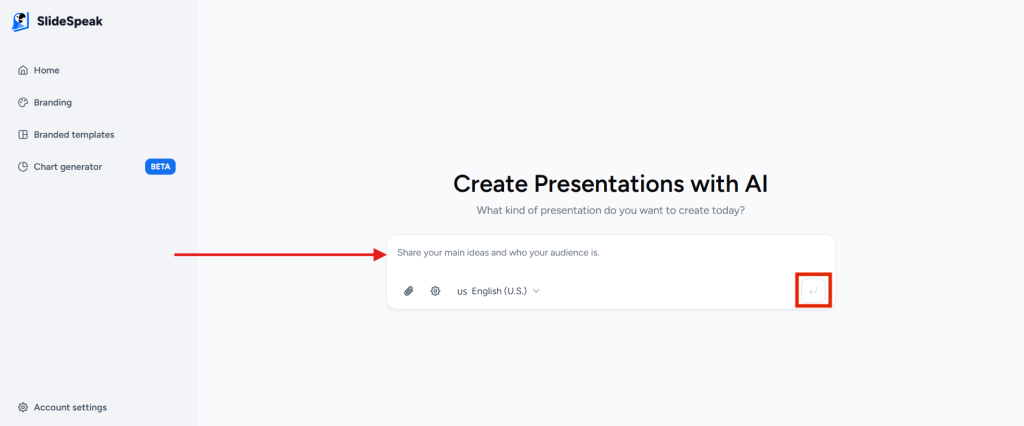
Step 3: Enter your prompt in the text box provided and click Enter.
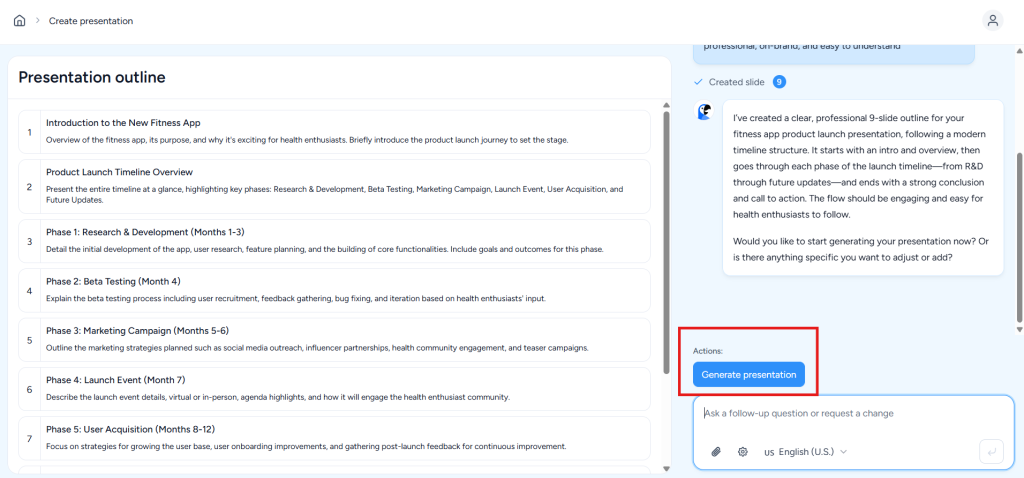
Step 4: Review the generated presentation outline and click “Generate Presentation.” Your presentation will be ready in 1-2 minutes.
If needed, you can ask a follow-up question or request changes before proceeding.
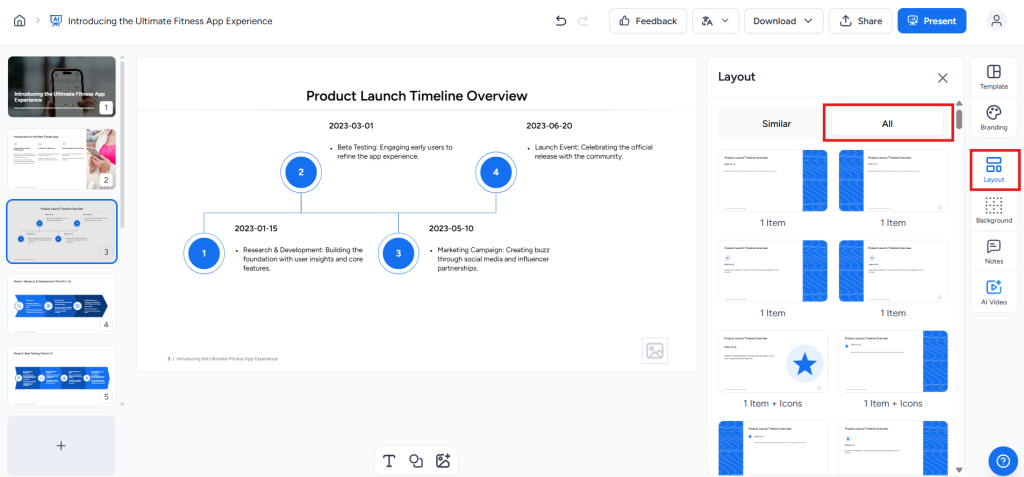
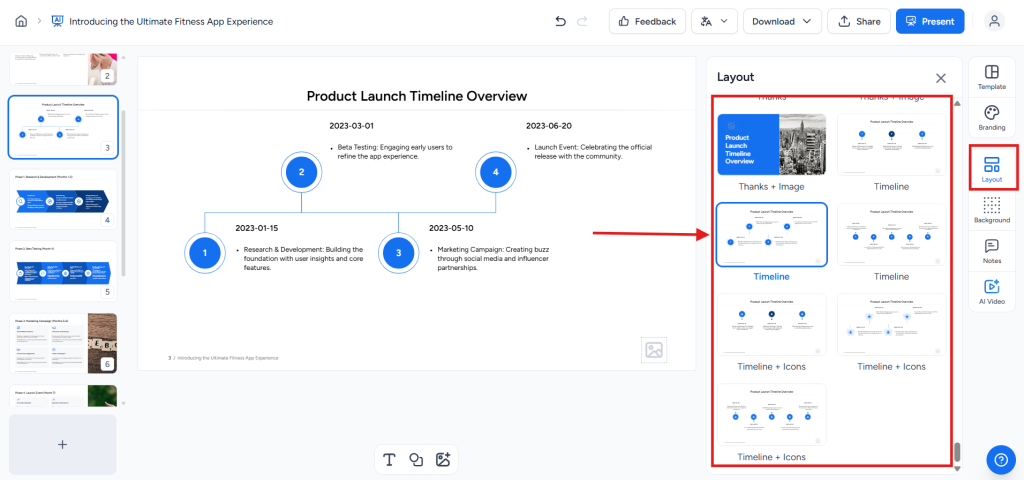
Step 5: Once your presentation is generated, go to Layout in the right panel, select All.

Step 6: Scroll down to the Timeline section and select your preferred layout.
Step 7: Satisfied with the output? You can now Download or Share your presentation. SlideSpeak offers multiple download options, including PowerPoint (PPTX), PDF, and Google Slides, to download your presentation.

Try SlideSpeak for free today and experience the fastest way to go from content to captivating timelines.
Wrapping Up
These plugins save you from endless alignment anxiety and that moment where you realize your “straight” arrow has a 12‑degree lean.
Lucidchart is like that organized friend who colour‑codes their fridge.
SuperJane is the co‑worker who somehow finishes early and still looks calm.
Project Plan is your team’s GPS, minus the “recalculating” voice.
Slides365? That’s the magic trick where you pull a polished slide out of thin air.
SlideSpeak is your AI-powered shortcut, no plugins, no fuss, just instant timelines from plain texts or prompts.
So pick your favorite, add a timeline to PowerPoint the right way, and remember: timelines are supposed to show progress, not take your entire weekend to make!
Frequently Asked Questions
Can you walk me through how to install and set up a Microsoft PowerPoint timeline plugin?
Go to the Insert tab in your PowerPoint application, select Get Add‑ins, and search for your plugin, like Office Timeline. Click Add, then follow prompts to enter any unique product key and activate the plugin on your PowerPoint ribbon.
Are there any free PowerPoint timeline plugins, and what limitations do they have compared to paid options?
Yes, Office Timeline Free offers basic timeline creation and simple SmartArt graphic templates. Free versions limit features like advanced different timeline templates, complex project management views, and subscription benefits like premium themes or export to high‑resolution formats.
How can I customize templates timeline plugin for PowerPoint using a plugin for specific projects or presentations?
Open the SmartArt Tools Design tab, choose a SmartArt graphic gallery template like Circle Accent Timeline, and edit via the Text Pane. Premium plugins let you apply a combination of effects for a professionally polished look.
What troubleshooting steps can I take if my MS PowerPoint timeline plugin fails to install or function correctly?
Check that your create a timeline in PowerPoint application is updated, verify the product key if needed, and restart Office. If issues persist, use the Microsoft Support Community or reinstall the plugin in the right place through the Insert tab.
Which PowerPoint timeline plugin is best for creating complex project schedules with milestones and dependencies?
Office Timeline Pro is the best way for project management timelines with dependencies, milestones, and own timelines. It integrates into the Office Timeline ribbon and supports advanced editing directly on the PowerPoint slide.
How do I update or edit events on a timeline in PowerPoint once it’s created with a plugin?
Best way to show a timeline in PowerPoint is – open the timeline creation process in your plugin, edit events in the Text Pane, or click elements on the PowerPoint slide. Changes automatically apply to maintain a professionally polished look and keep your own timelines accurate.
What are some visually appealing timeline styles or templates offered by top PowerPoint timeline plugins?
Popular styles include Basic Timeline, Circle Accent Timeline, and modern layouts in the SmartArt graphic gallery. Many plugins offer different timeline templates with a combination of effects to create a great way to impress with a professionally polished look.
Is there a way to export or share timelines created in PowerPoint with plugins in formats like PDF or image?
Yes. Most plugins allow exporting as PDF, image, or Microsoft Excel‑linked visuals. This is the easiest way to share your own timelines across user profiles or send them outside the PowerPoint application.
How do I create a PowerPoint timeline examples from Excel data?
Use the Insert tab, choose a SmartArt graphic or Office Timeline ribbon, and import Microsoft Excel data. The plugin maps dates and milestones into different timeline templates automatically, giving a professionally polished look with minimal manual work.
Why use PowerPoint plugin for timeline creation?
PowerPoint offers the best way for quick, visual timelines using the PowerPoint ribbon, SmartArt Tools, and plugins like Office Timeline. It’s a great way to turn raw data into engaging slides and streamline your timeline creation process.