
How to Compress All Pictures in PowerPoint
Adding images to your PowerPoint presentations can really enhance your message and help communicate ideas more effectively. However, large image files can also make your PowerPoint file size unnecessarily large. Compressing pictures before inserting them into PowerPoint is a great way to reduce file size while maintaining image quality. So you might end up wondering how can PowerPoint compress all pictures at once?
In this post, I’ll go over a few different methods you can use to compress all pictures in your PowerPoint presentation.
In PowerPoint Compress All Pictures
The simplest option is to compress pictures directly within PowerPoint using the built-in compression tool. Here’s how:
Step 1: Insert the image you want to compress into your PowerPoint presentation.
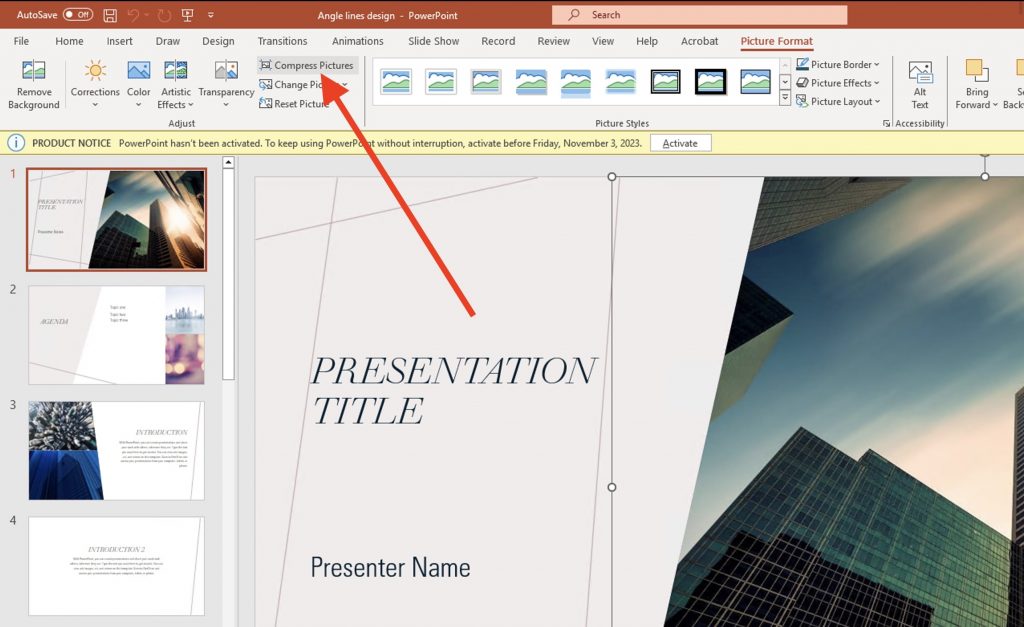
Step 2: Select the picture, then go to the Picture Tools Format tab.
Step 3: Click on “Compress Pictures”.
Step 4: In the Compress Pictures dialog box, adjust the compression options:
- Target output – choose Print (220 ppi) for images intended for print or Screen (96 ppi) for onscreen presentations. Print has a higher quality output while Screen compresses more with some loss of quality.
- Delete cropped areas of pictures – check this box to automatically remove any unused portions of your images. This removes whitespace and allows better compression.
- Apply to selected pictures only – check this to only compress the currently selected image(s). Leave unchecked to compress all images in the presentation.
Step 5: Click “OK”. PowerPoint will compress the image based on your settings.
The Compress Pictures tool allows you to easily reduce file size without sacrificing too much quality. Play around with the settings to find a good balance.
Some tips for getting the most out of PowerPoint’s built-in compression:
- Compress images one at a time to control quality on important images. Use batch compression for less important graphics.
- Try deleting cropped areas first, then use Screen compression if more reduction is needed.
- Recompress images multiple times to reduce file size incrementally.
- Use higher quality Print compression for major images you want to keep crisp.
- Test compressed images at 100% zoom to spot any degradation or artifacts.
Though limited, the Compress Pictures tool can optimize images enough to make a significant difference in file size while maintaining good quality. You can read the official help article in the PowerPoint user document about how to compress images here.
Use a Third-Party PowerPoint Image Compressor
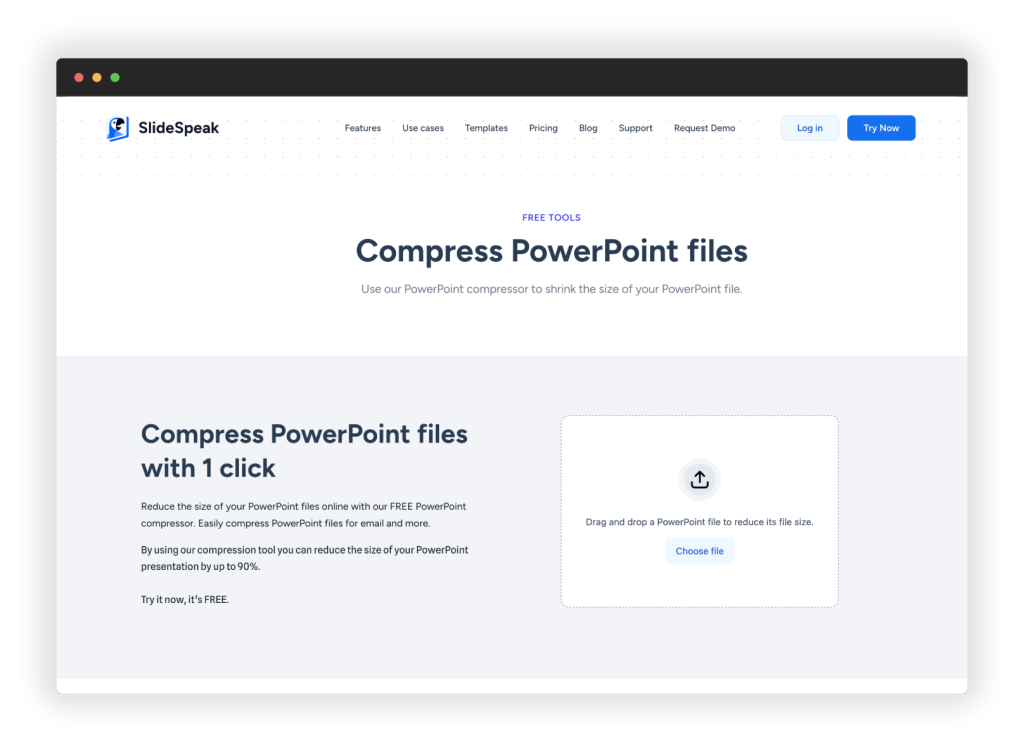
Tools like SlideSpeak offer automated free tools for PowerPoint to compress all pictures beyond what’s built into PowerPoint.
Check it out here.
Here’s how to use SlideSpeak to compress pictures in PowerPoint:
Step 1: Upload your PowerPoint file to the Slidespeak PowerPoint Compressor.
Step 2: Slidespeak will analyze your file and show you how much space you can save by compressing all pictures. This analysis helps you understand the potential for optimization.
Step 3: Choose your desired compression level:
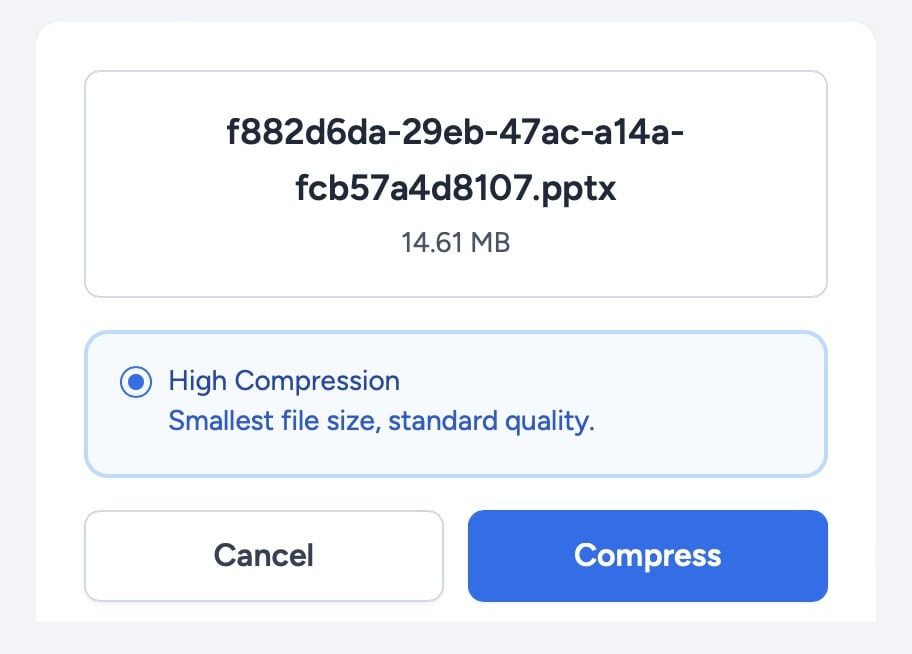
- Optimize File Size – maximum compression to reduce file size as much as possible.
- Maintain Image Quality – moderate compression focused on retaining quality.
Step 4: Download your optimized PowerPoint file with compressed images.
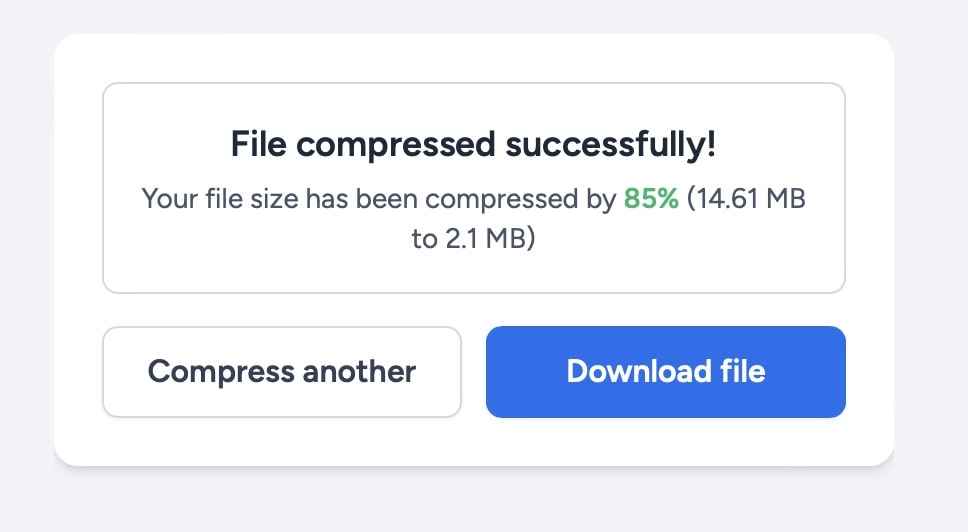
Step 5: Check the new file size – Slidespeak claims up to 90% compression is possible without noticeable quality loss.
Step 6: Double check image quality at 100% zoom in the optimized presentation.
The benefit of using Slidespeak is it looks at all images in your presentation and uniformly compresses them based on your chosen optimization level. This can provide huge file size reductions while maintaining good image quality.
Some pointers for using Slidespeak effectively:
- Try both optimization levels and compare file sizes and image quality.
- For already compressed JPEGs, Optimize File Size may show little further reduction.
- Re-run optimization several times until you stop seeing gains.
- Review important graphics closely to watch for compression artifacts.
For a hands-off approach to compressing all PowerPoint images, Slidespeak can deliver great results.
Compress Pictures Outside of PowerPoint
You can also use external image compression tools to optimize images before inserting them into PowerPoint. Here are a couple options:
Use Online Image Compressors
Web-based tools like TinyJPG can optimize JPEG images with no effort:

- Upload your image file to TinyJPG.
- It will analyze and compress the image, typically by 60-80%, while maintaining quality.
- Download the compressed image and insert it into your PowerPoint presentation.
The benefits of online image compressors:
- No software needed – use entirely within your web browser.
- Excellent compression on JPEGs with minimal quality loss.
- Allow control over each individual image’s file size and quality.
- Completely automated process.
Use Image Editing Software
When exporting images from programs like Adobe Photoshop, you can optimize compression and quality:
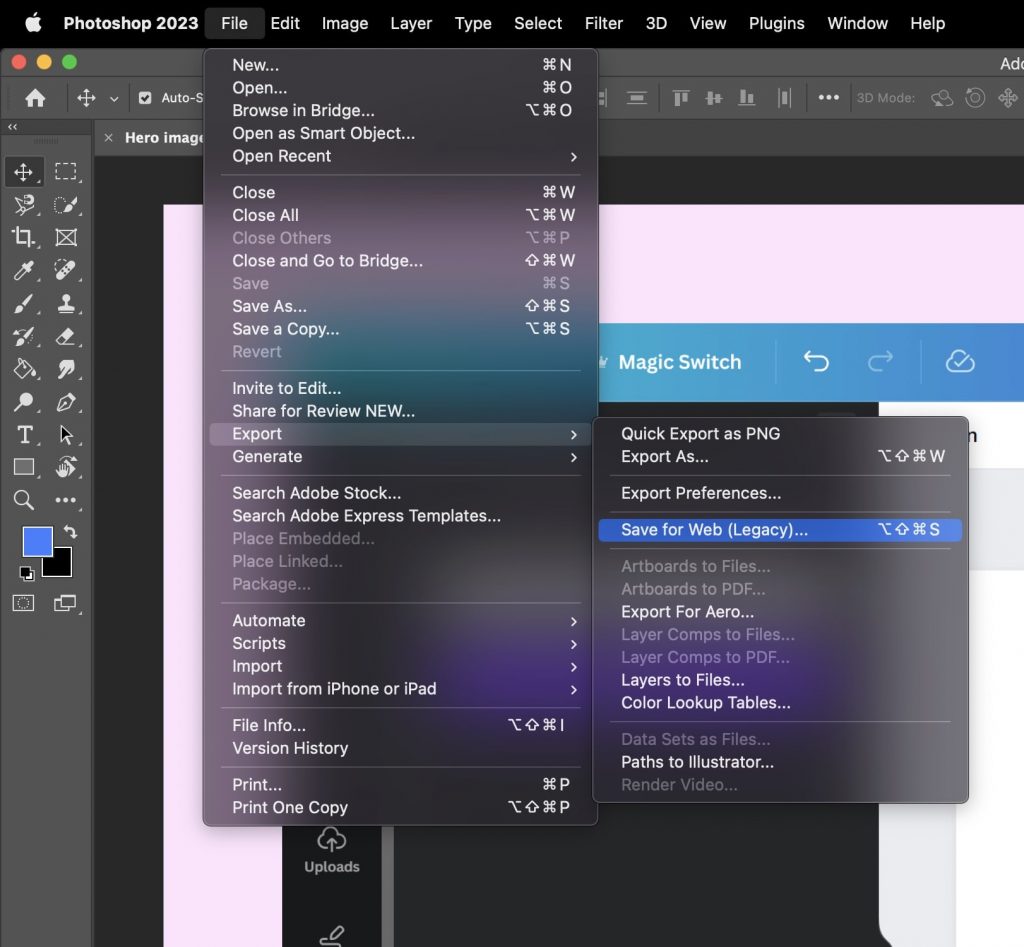
- In Photoshop, choose File > Export > Save for Web.
- Select JPEG format options to dial in image quality and compression.
- Try different settings and export repeatedly to get the smallest file size with acceptable quality.
- Export and insert the optimized image into PowerPoint.
Benefits of compressing images in editing software:
- Fine-tune compression settings for each specific image.
- Maintain maximum image quality and resolution.
- Change format to efficient Web-friendly JPEG.
- Remove EXIF data and artifacts that inflate file size.
Compressing images externally gives you more control over compression settings and ensures optimal compression on each individual image file before inserting into your PowerPoint presentation.
Other Built-In Microsoft Office Tools to compress pictures
While PowerPoint itself has robust image compression capabilities, you can also use other Microsoft Office apps to optimize images before bringing them into PowerPoint:
Microsoft Paint – The classic Paint app includes options to crop, resize, and save images in compressed JPEG format.
An other article that discusses how to crop images can be found here.
To optimize:
- Open the image in Paint
- Crop and resize as needed
- Save As JPEG, adjust quality slider for compression
Microsoft Photos – This free app can resize, crop, and compress images with batch processing capability.
To compress:
- Import your photos into the Photos app
- Select images > Resize & Compress > adjust options
- Export optimized JPEG files
The benefit of leveraging these Microsoft tools is you can achieve greater compression than PowerPoint offers, allowing you to reduce file size substantially before inserting images into your PPT presentation.
Tips for Further Reducing PowerPoint File Size
In addition to compressing images, a few other tricks can help minimize overall PowerPoint file size:
- Delete unused slides – Prune your presentation to remove unnecessary slides and hidden slides.
- Reduce animation – Limit the use of animations and transitions since these increase file size.
- Minimize slides – Use fewer slides with more concise content to present your information clearly.
- Convert videos – Change embedded videos to modern compressed formats like mp4.
- Use a minimalist template – Avoid template backgrounds and design elements that add to file size.
- Compress media – Use tools like PowerPoint Picture Compression on videos, GIFs, and other media.
- Save as PDF – Convert to PDF format for significantly smaller file size.
Following PowerPoint image compression best practices, along with these additional tips, will allow you to easily create presentations with all the visual punch but a fraction of the mega-file weight.
Conclusion
Compressing pictures before adding them to PowerPoint is an easy way to reduce file size without compromising on image quality. Use the built-in PowerPoint tools, downloadable add-ins, external services, or photo editing software to find the best compression method for your needs. With the right approach, you can make your PowerPoint presentations faster to load and share without sacrificing aesthetics. A optimized presentation with compressed graphics keeps your audience focused on your message, not waiting for your file.