

If your brand uses its own typeface, you can upload the font files to SlideSpeak. Your fonts then appear in the font lists next to the built-in fonts. You can also upload a font straight from the editor when a presentation uses a font that SlideSpeak can't show. That often happens with PowerPoint files you import.
Before you start
- File types: TTF or OTF files only, up to 20 MB each. Upload each weight or style you need, for example Regular and Bold, as its own file.
- Font names: SlideSpeak reads the full font name from the file, for example "Inter Bold". That is the name you see in the font lists.
- Your fonts belong to your account. Once uploaded, a font is available in all your presentations and brands. In a team workspace, fonts are shared with the team.
- Licensing: only upload fonts you are allowed to use. Custom fonts show in the SlideSpeak editor. They are not shown when a presentation is publicly shared, because of font licensing restrictions.
- Two ways to upload:
- In a brand, under Branding → Typography → Custom fonts. Brands need Premium Plus or Lifetime.
- In the editor, with the missing-fonts button. This works on every plan, for presentations you own.
Upload fonts to your brand
Step 1: Open Custom fonts
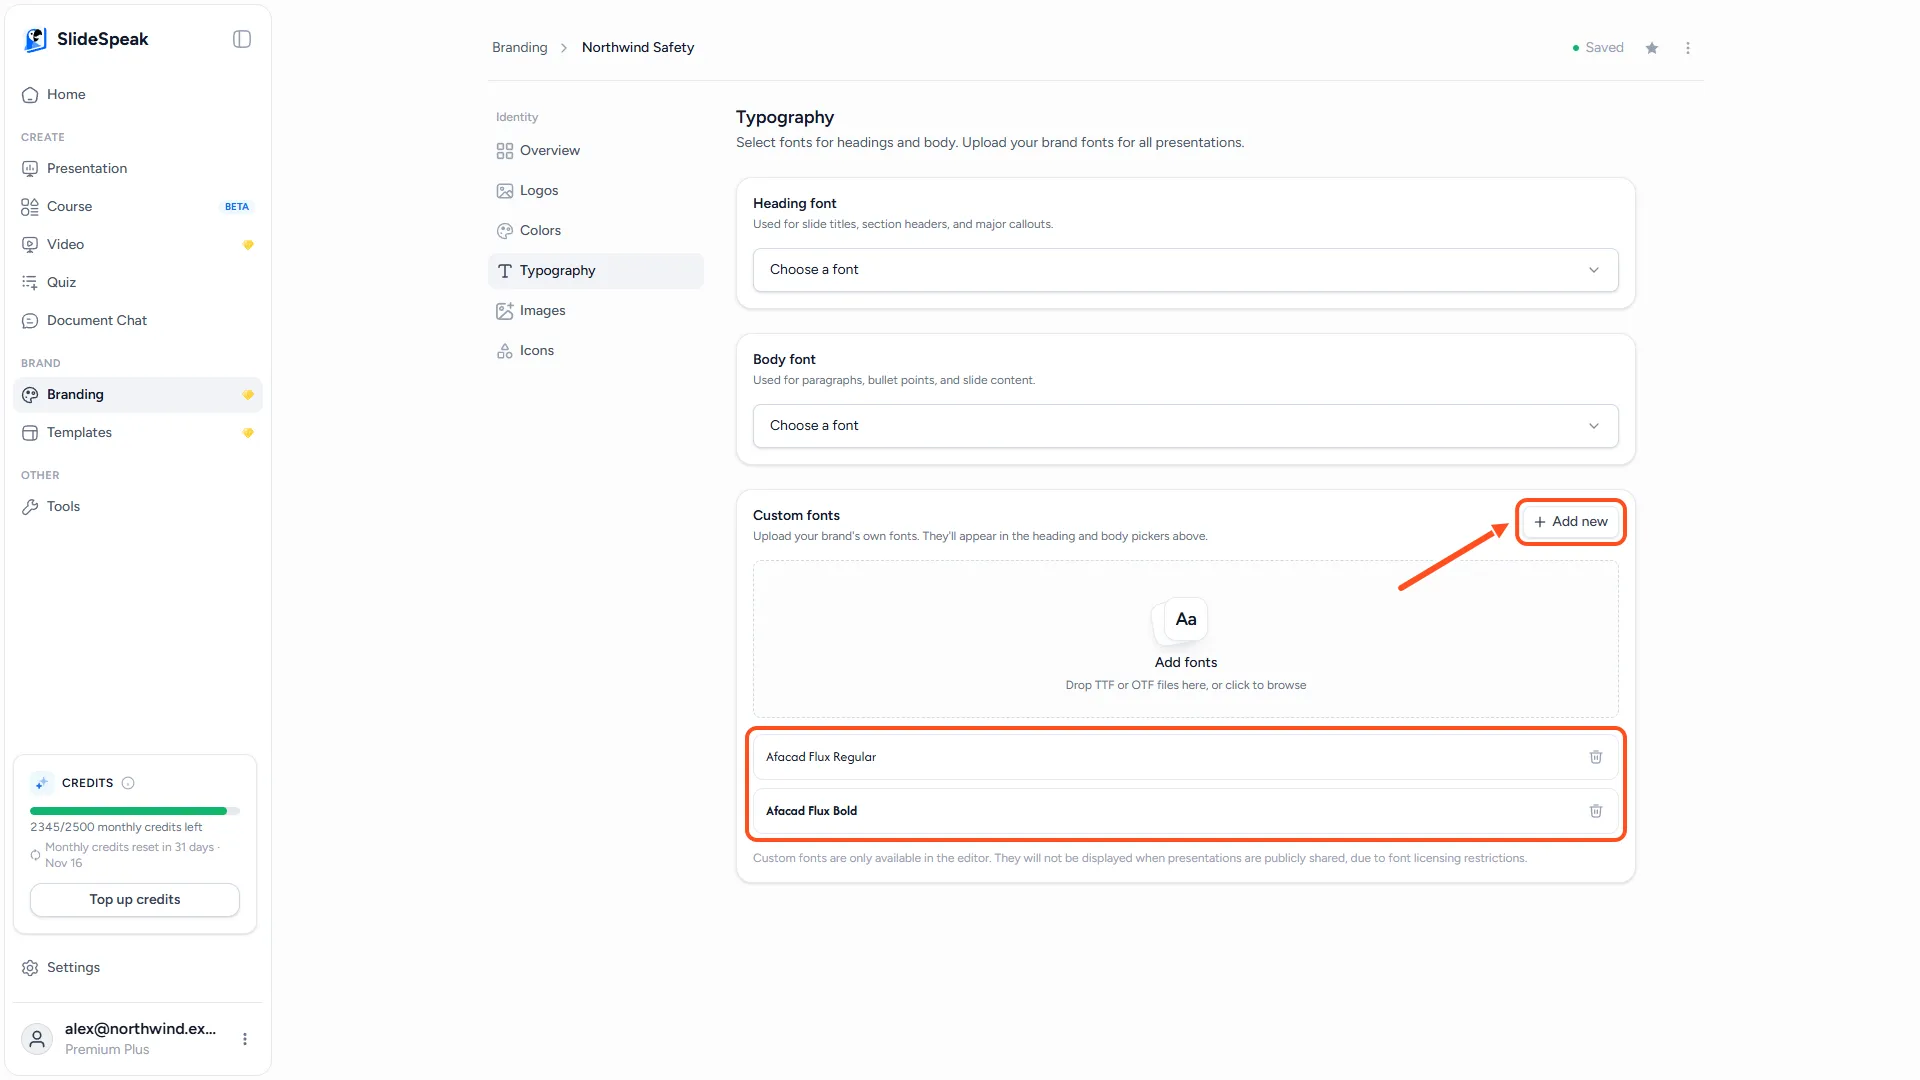
- Click Branding in the left sidebar and open a brand.
- Click Typography.
- In the Custom fonts card, click Add new and choose one or more font files. You can also drop the files onto the Add fonts area.
Each font shows up in the list below when its upload is done. To remove a font, click the trash icon next to it.
Step 2: Use the font
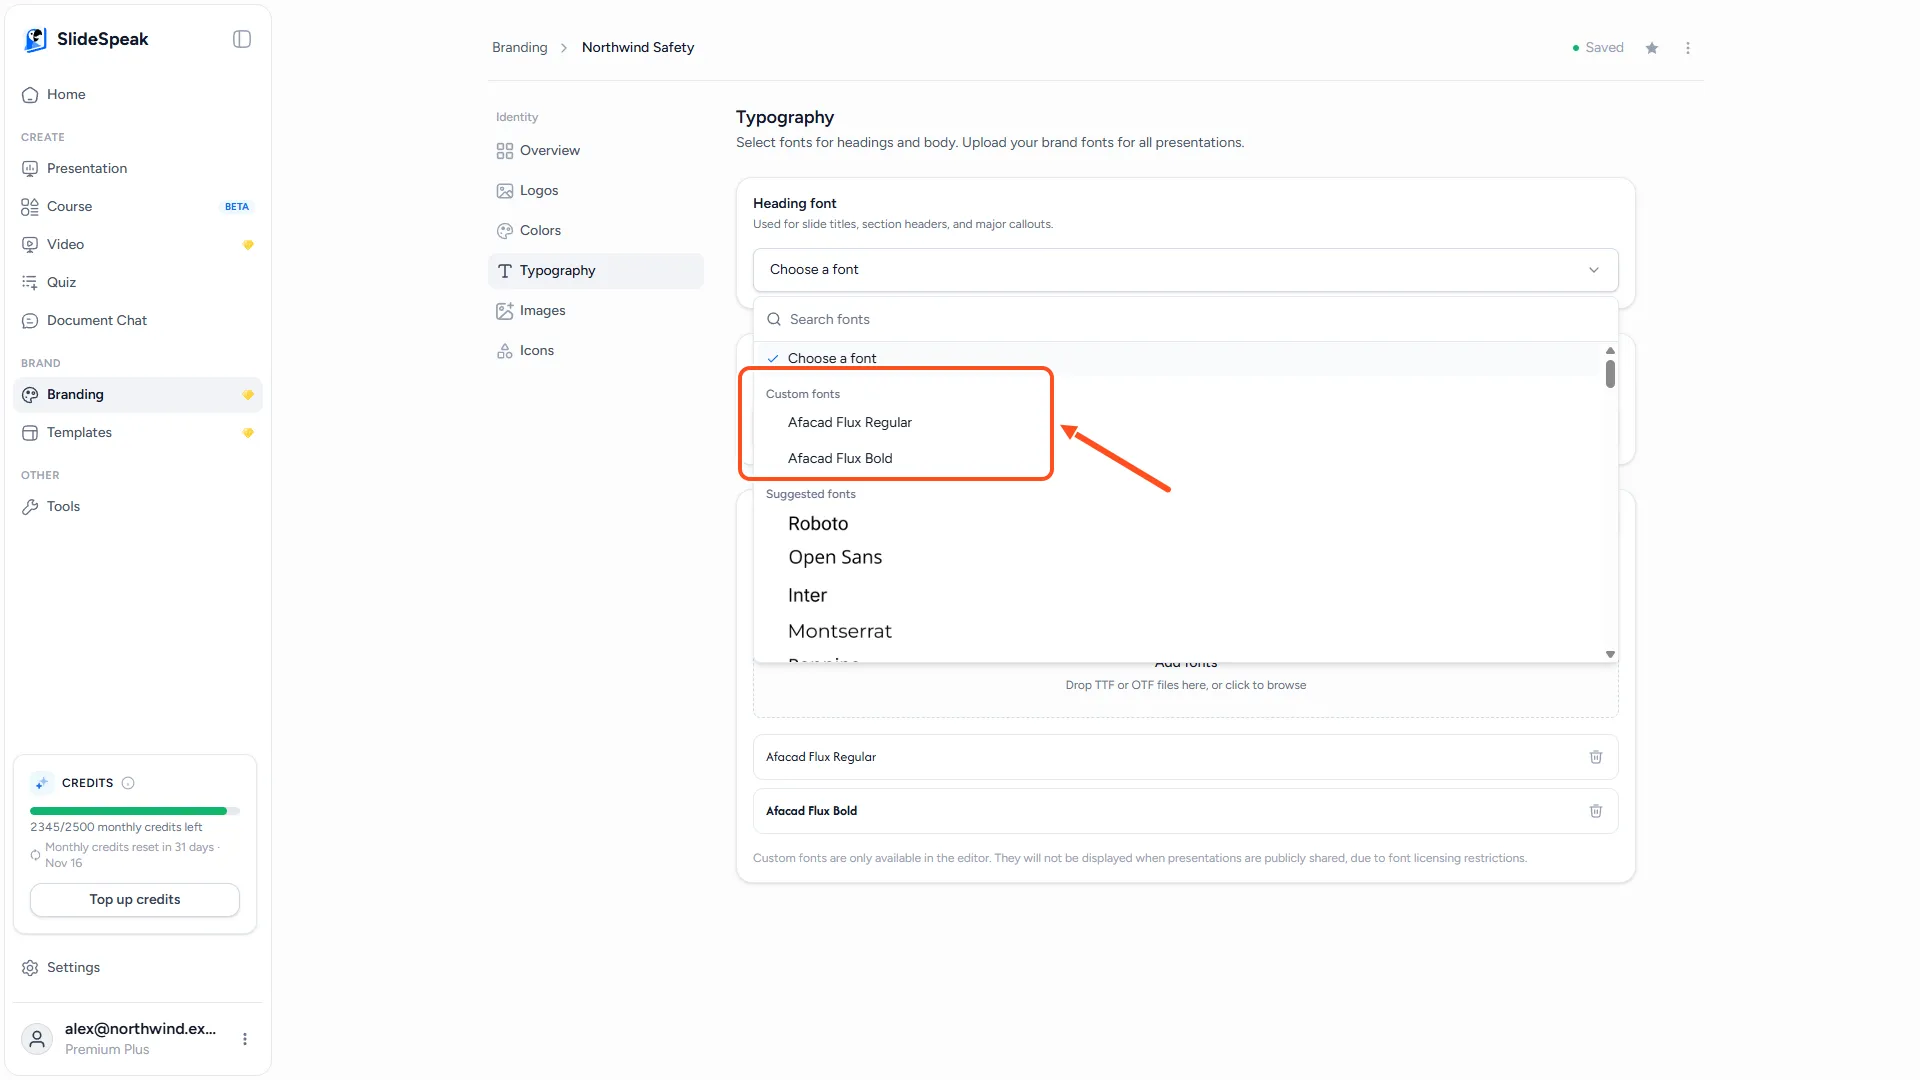
Your uploaded fonts appear under Custom fonts at the top of every font list:
- In the brand, pick them as the Heading font or Body font. SlideSpeak then uses them in new presentations made with this brand.
- In the editor, select some text, open the font list in the toolbar and pick the font under Custom fonts.
Fix missing fonts in a presentation
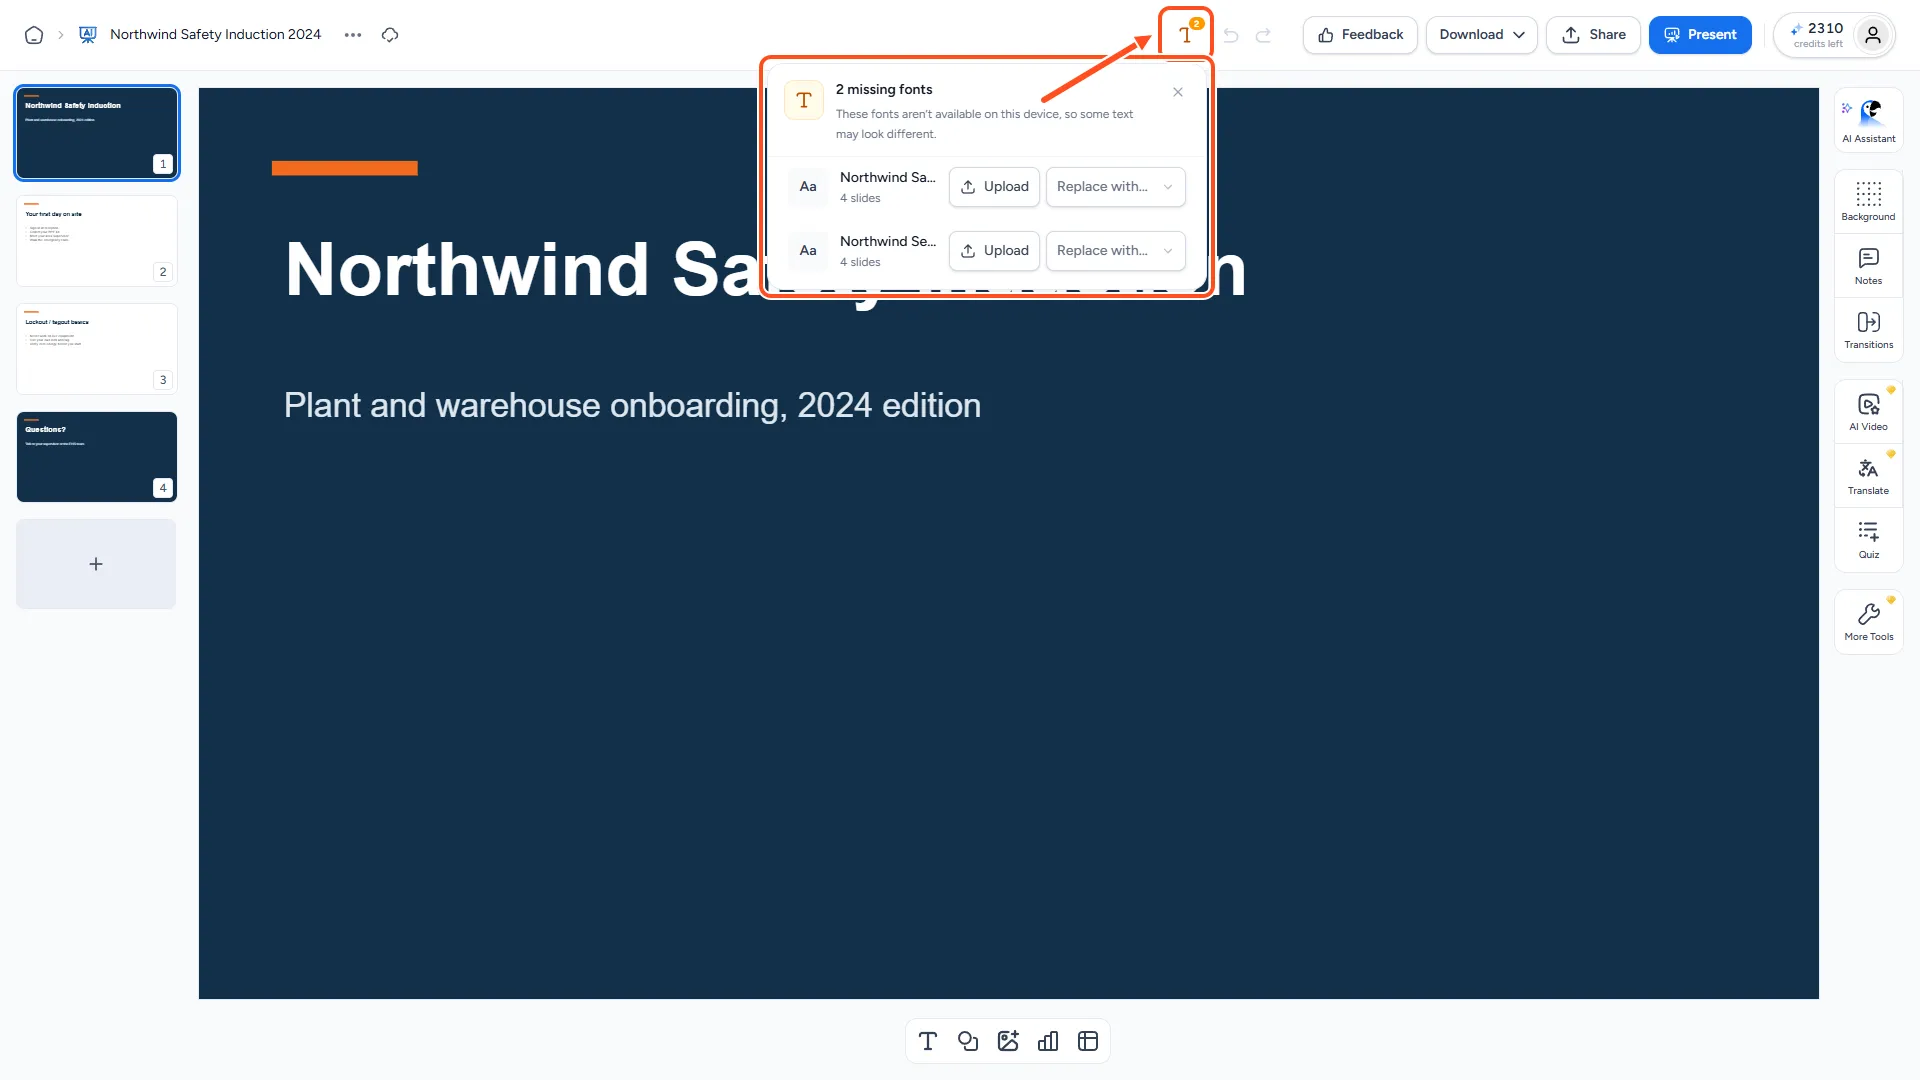
When a presentation uses a font that SlideSpeak doesn't have and your computer doesn't have installed, the text is shown in a fallback font. SlideSpeak tells you so with an amber Aa button in the top bar of the editor. A small badge on it shows how many fonts are missing. Hover over it to see a message like "2 missing fonts · Some text may look different."
Step 3: Open the list of missing fonts
Click the amber Aa button. A panel lists each missing font, with its weight or style (for example Montserrat Alt · Bold) and the number of slides that use it.
Step 4: Upload the font, or replace it
For each font, choose one of these:
Upload the original font. Click Upload, then click Choose file or drop the file. Use a .ttf or .otf file of up to 20 MB. When the upload is done, you see Font uploaded.
- If the uploaded font has the same name as the missing font, your slides use it straight away. You're done.
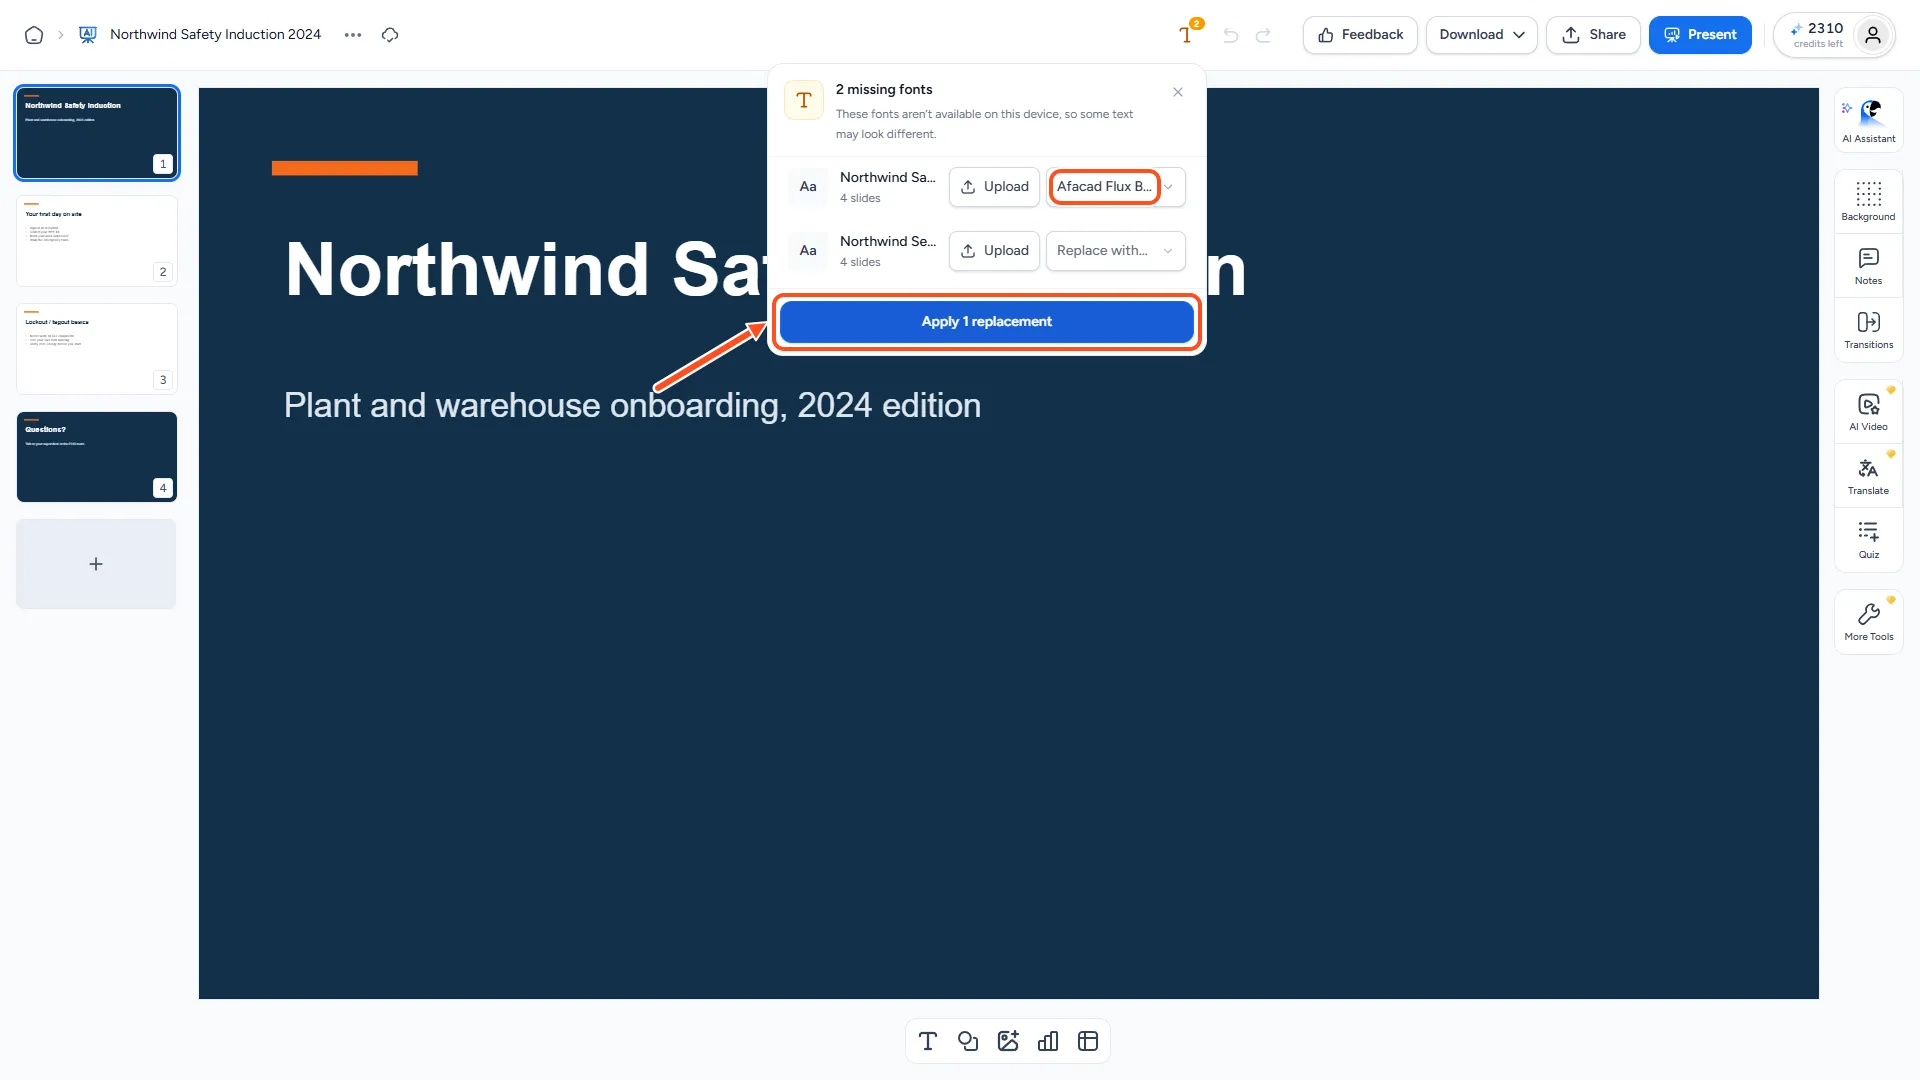
- If the name is different, SlideSpeak sets the uploaded font as the replacement for the missing one. Click Apply 1 replacement to use it.
Use a different font instead. Click Replace with… and pick a font. The list shows the fonts used elsewhere in this presentation first, then your custom fonts, then all fonts you can search. When you have picked replacements for the fonts you want to fix, click Apply 2 replacements (the number matches your choices).
The replacement changes every slide that used the missing font, in one step. If you change your mind, click undo once to bring the original font back.
Troubleshooting
- "A font named … already exists. Please delete it first before uploading a new version." You already uploaded a font with that name. Remove the old one under Branding → Typography → Custom fonts, then upload the new file.
- "Choose a .ttf or .otf file." or "Only .ttf and .otf font files are supported." SlideSpeak can't use WOFF, WOFF2 or font packages. Ask your designer for the TTF or OTF version, or unzip the font package first.
- "Invalid font file format." The file is damaged or isn't a real font file. Download the font again from its source.
- "Maximum file size is 20 MB." Upload a smaller file, for example a single weight instead of a variable or full-family file.
- I see the missing-fonts button, but no Upload button. Only the owner of a presentation can upload or replace its fonts. Ask the owner to fix them.
- A colleague sees missing fonts, but I don't. The check depends on the computer. If the font is installed on your computer, you don't see a warning. Upload the font to SlideSpeak so that everyone sees the same text.
- My custom font doesn't show on a shared link. That is expected. Custom fonts are not shown in publicly shared presentations, because of font licensing restrictions.
Need more help?
If you have any questions or need assistance, feel free to contact our support team at support@slidespeak.co