

SlideSpeak can plan an entire Course for you from a single description of what you want to teach. It works out the Course Modules, the Course Lessons inside each one, and roughly which slides each lesson needs, and shows you all of it before a single deck exists. You read the plan, change anything you disagree with, and only then generate the presentations.
Before we start
A few definitions before we dive into it:
- Course: the whole thing you are building.
- Course Module: a section of the Course, grouping related lessons.
- Course Lesson: one teaching unit inside a Course Module. Each one becomes its own presentation.
- Course Outline: the plan the AI writes first, covering the course title and description, the Course Modules, the Course Lessons, and the slides planned for each lesson.
Step 1: Open Courses and describe what you want to teach
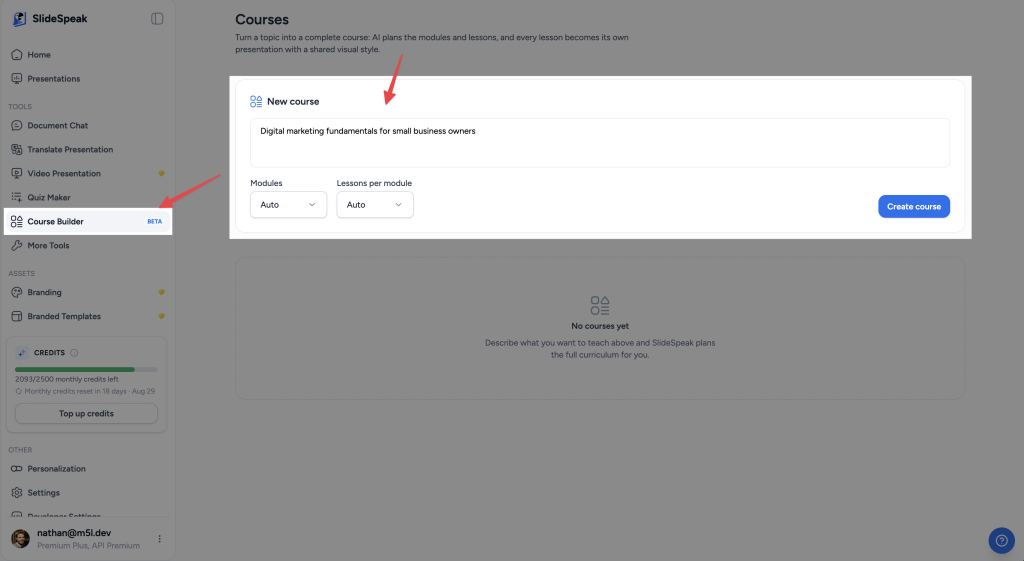
Go to app.slidespeak.co and open the Course Builder. In the New course box, describe the course in a sentence or two. Say who it is for as well as what it covers, because the plan comes out noticeably better when it knows the audience. Something like “Digital marketing fundamentals for small business owners” works better than “digital marketing”.
Step 2: Choose how big the course should be
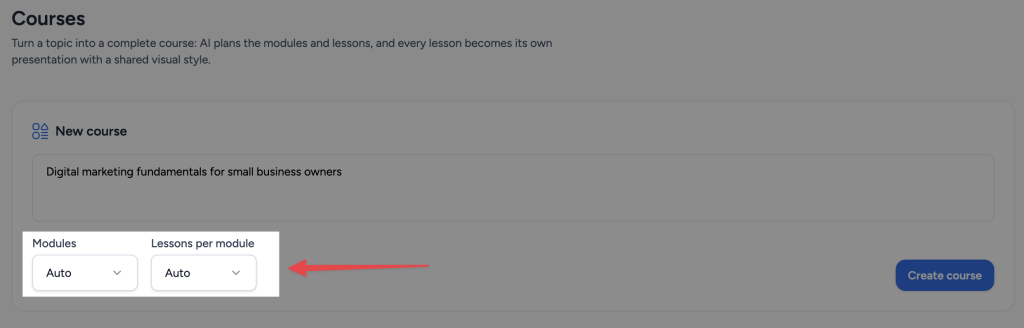
Two dropdowns sit under the description:
- Modules: how many Course Modules to plan, up to six.
- Lessons per module: how many Course Lessons in each one, up to five.
Both are set to Auto by default, which lets the AI decide based on the topic. Set a number when you have a constraint to hit, such as a four-week programme with one module a week. Remember that these numbers multiply: four modules with three lessons each is twelve lessons, and later, twelve decks.
Step 3: Pick the design for the whole course

Click Create course and you are asked to choose a design. You pick it once, here, and every deck the course generates uses it, so all your lesson materials look like one set rather than twelve unrelated presentations.
Choose a design kit for a consistent, predictable look, or let the AI come up with a design instead.
Step 4: Read the Course Outline

SlideSpeak now plans the Course. This takes a moment, and when it finishes you land on the course page with the full Course Outline laid out: a course title and description at the top, then each Course Module with its own description, and inside it each Course Lesson with a description and a note of how many slides are planned for it.
No presentations exist yet. Read it as a curriculum: is anything missing, is anything in the wrong order, does a lesson cover too much?
Planning the Course Outline does not use credits, so you can plan a course, decide the shape is wrong, and plan another one without it costing you anything.
Step 5: Edit the plan
Everything on the page can be changed:
- Rewrite any text: click the course title, a Course Module title, a Course Lesson title, or any description, and edit it in place.
- Delete a Course Lesson: use the bin icon on the lesson row.
- Delete a Course Module: use the bin icon at the top of the module. Its lessons go with it.
Get the structure right before you move on to the next step.
Step 6: Generate the lesson decks

Each Course Lesson has a Generate deck button. Click it and SlideSpeak builds that lesson as its own presentation, using the slide plan from the outline and the course design you picked in step 3. When it is ready, the lesson row shows a thumbnail and a View deck link that opens it in the normal SlideSpeak editor, where you can edit it like any other presentation.
You generate lessons one at a time rather than all at once, which is deliberate: it lets you generate the first lesson, see whether the result is what you wanted, and adjust the plan before committing to the rest. A counter at the top of the course tracks your progress, for example “3/12 decks generated”.
What a course costs in credits
Planning the Course Outline is free, but each lesson deck is charged like generating any other presentation, based on how many slides it has.
So the cost of a full course is roughly the cost of one presentation multiplied by the number of Course Lessons. A twelve-lesson course means paying for twelve decks. Generate the lessons you actually need, when you need them. See how credits work in SlideSpeak.
Using decks you already have

If you already have a presentation that covers a lesson, click Add existing deck on that Course Lesson and attach it instead of generating a new one.
One thing to expect: an attached deck keeps the design it already had. It is not restyled to match the course, so it will look different from the generated lessons around it.
Share the course
Click Share at the top of the course to turn on a public link. Anyone with the link can read the curriculum and open the lesson decks, without needing a SlideSpeak account. The shared view is read-only: people can read and view, never edit or generate.
Preview, next to it, shows you exactly what a participant sees, and it works before you have shared anything, so you can check the course looks right before anyone gets the link. Turning sharing off again immediately closes access to the lesson decks reached through it.
Turning lessons into videos
Because every Course Lesson is an ordinary presentation, you can do anything to it that you can do to a presentation, including turning it into a narrated video for people to watch in their own time. Any videos you make from a lesson deck appear on the lesson row in the course. See how to create an AI video presentation.
The same goes for quizzes: you can build one from any lesson deck and hand it out or export it to your LMS. See how to create a quiz from a presentation.
Deleting things
Deleting a Course, a Course Module, or a Course Lesson removes it from the course but leaves any generated decks in your presentation library. Removing a deck from a lesson detaches it rather than deleting it, so you can attach it again later.
Need more help?
If you have any questions or need assistance, feel free to contact our support team at support@slidespeak.co