

Some things are easier to show than to explain, like a software walkthrough or a quick demo. With screen recording you capture a browser tab, a window or your entire screen and add it to your AI video right after a slide. The AI narration on your slides stays exactly as it is.
Before you start
- Plan: Screen recording is part of AI Video, so you need a paid plan (Premium, Premium Plus or Lifetime). On the Free plan, the Record screen button asks you to upgrade.
- A video project: Open the video you want to add the recording to. If you don't have one yet, see How do I create an AI video presentation?.
- Browser: Record on a computer in Chrome, Edge or Safari. Your browser asks for permission to share your screen, and to use your microphone if you want to narrate.
- Limits: Each recording can be up to 10 minutes long and up to 500 MB.
- Credits: Recording your screen doesn't use credits.
Step 1: Pick the slide the recording should follow
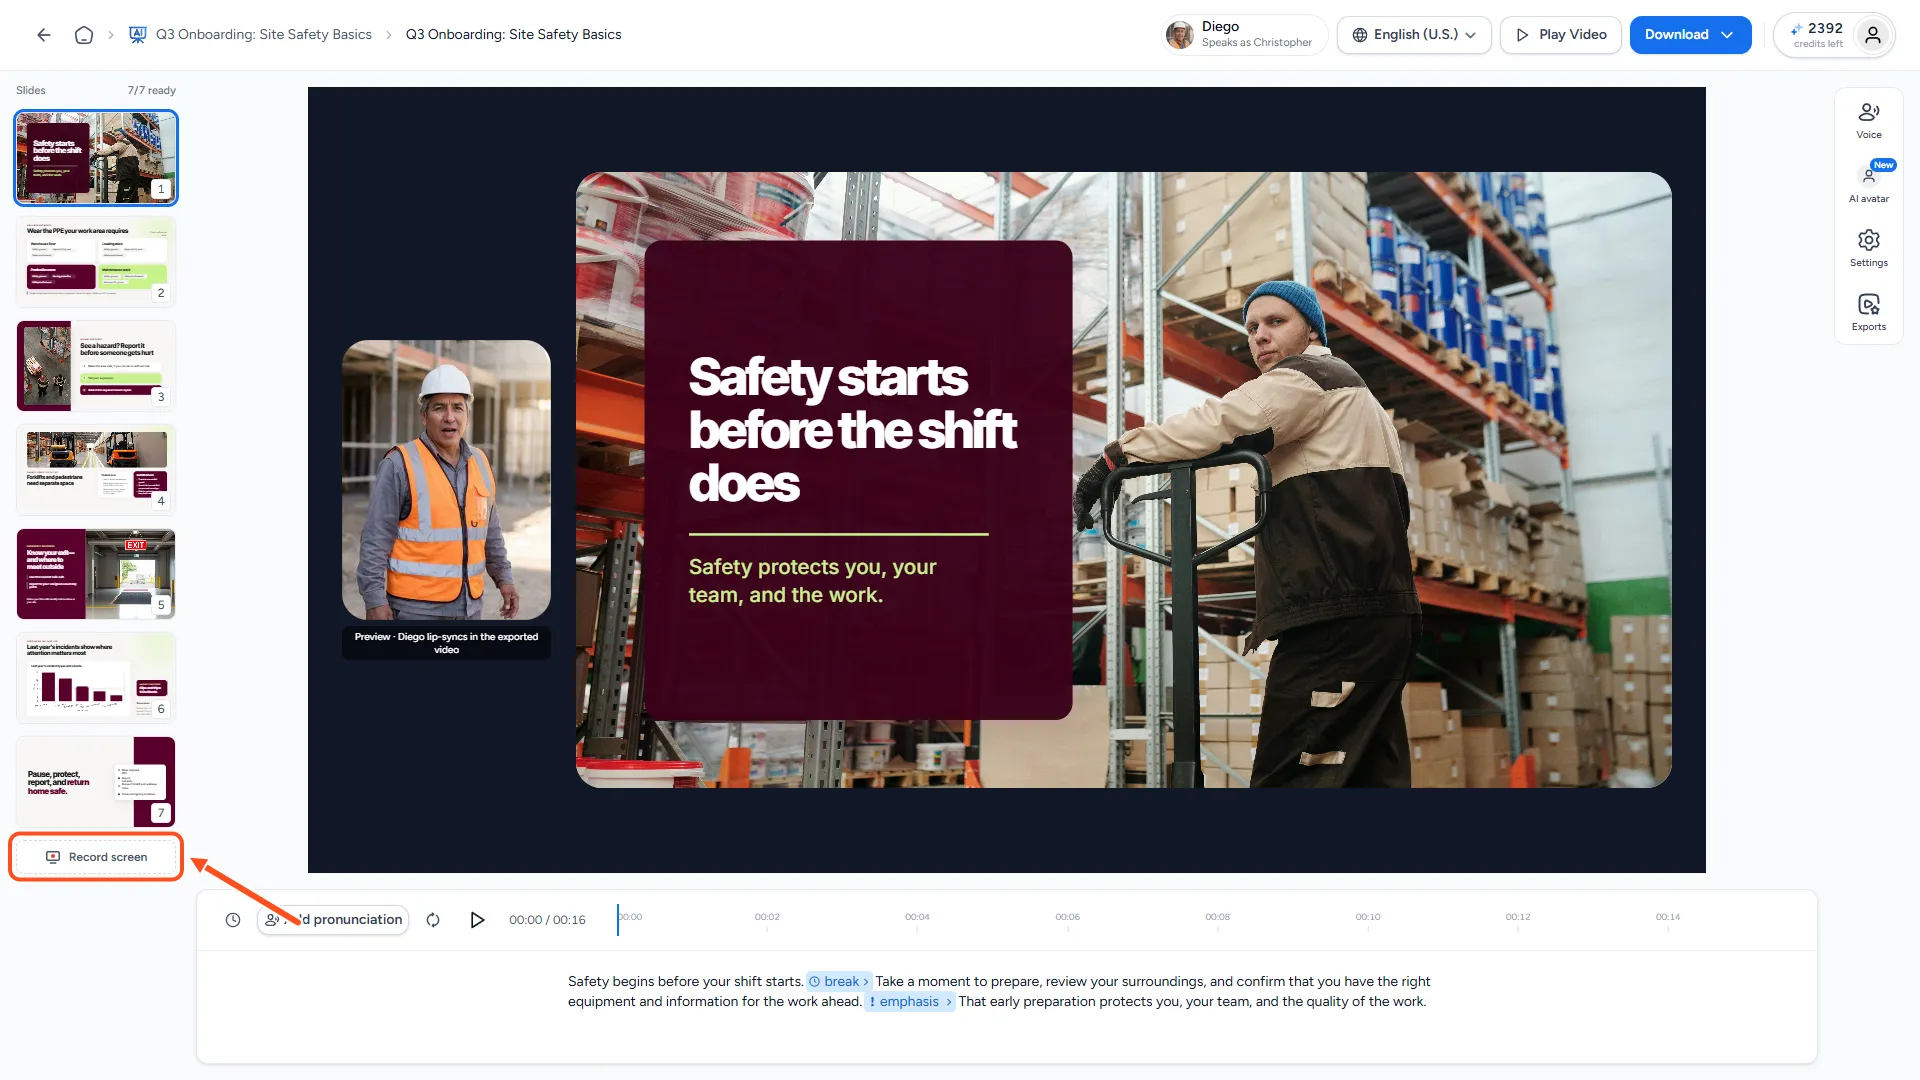
In the video editor, click the slide in the slide tray that should play right before your recording. The recording is added straight after the selected slide.
Then click Record screen at the bottom of the slide tray.
Step 2: Choose whether to narrate
The Record your screen dialog opens. Decide what sound you want:
- Talk over the recording: Turn on Microphone (Narrate while you record).
- No voice: Leave the microphone off.
Click Start recording.
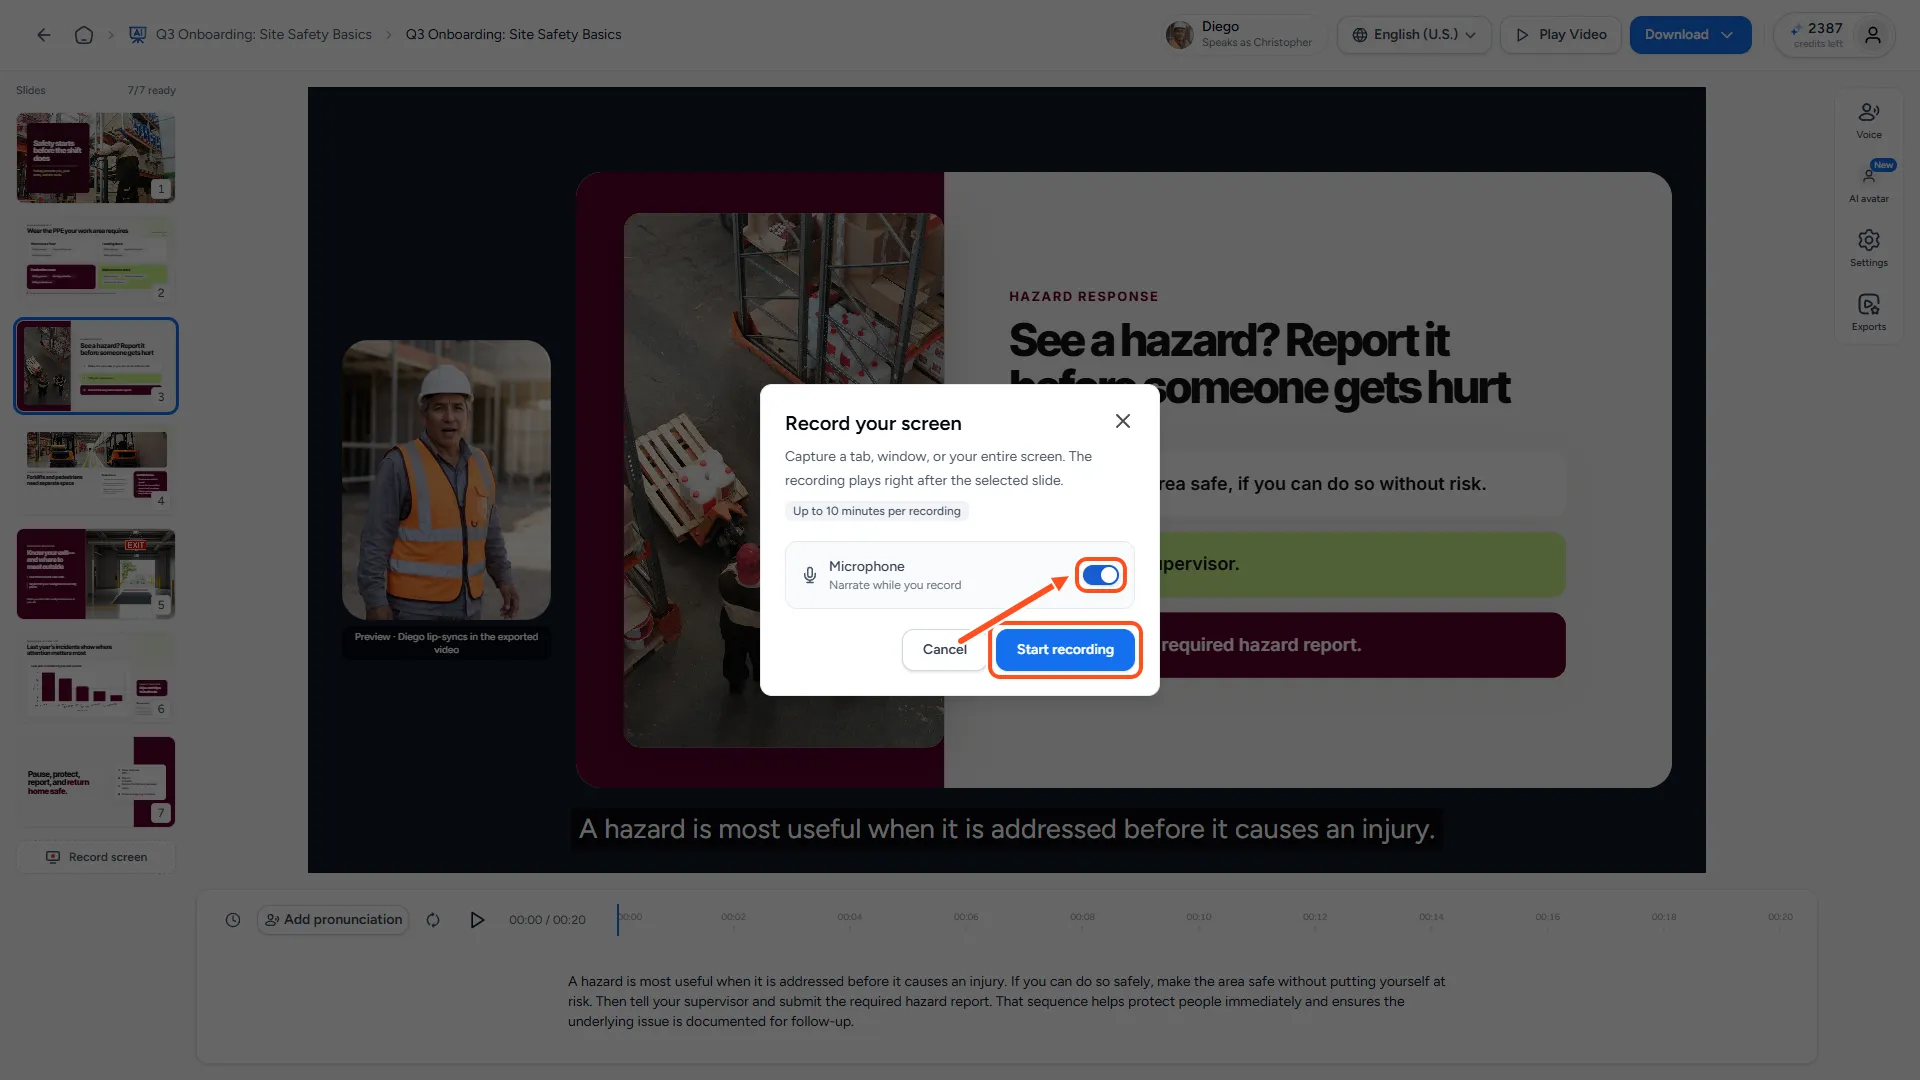
If you turned the microphone on, your browser may ask for access. Allow it in the address bar. If you don't, SlideSpeak shows "Microphone access is pending" and you can turn the microphone off to carry on without it.
Step 3: Choose what to share and record
Your browser opens its own sharing picker. Choose a tab, a window or your entire screen.
A 3-second countdown ("Get ready") follows, so you have time to switch to the screen you want to capture. Then the recording starts. The timer shows how long you've been recording, out of 10:00. At 10 minutes the recording stops by itself.
When you're done, click Stop recording in the SlideSpeak dialog, or Stop sharing in your browser's sharing bar. Both end the recording.
About sound: Your microphone records your voice. If you want the sound of what you're showing, such as a video playing in a tab, share a browser tab. SlideSpeak names a browser tab as the only option that captures its own sound.
Step 4: Review the recording and add it
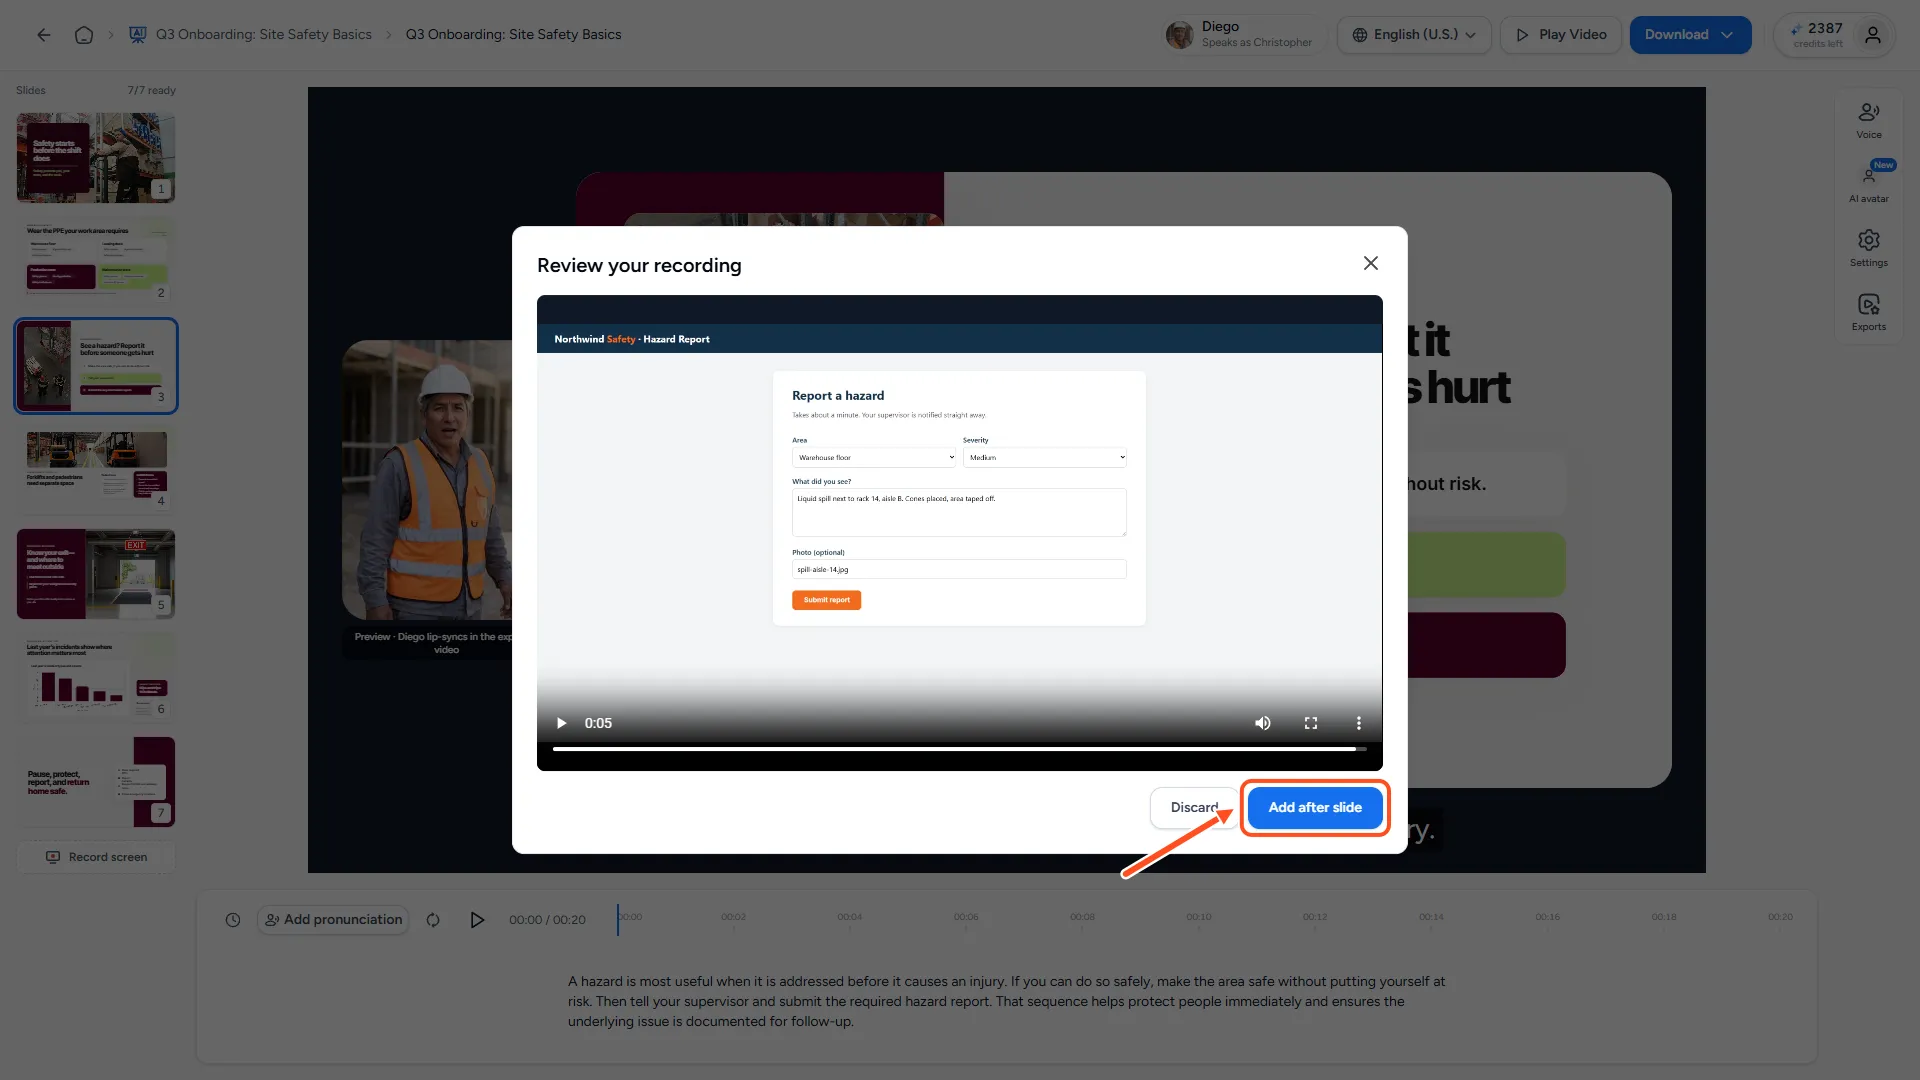
"Review your recording" shows a preview. Play it to check it.
- Click Add after slide to save it into your video.
- Click Discard to throw it away and start again.
Step 5: Check it in your video
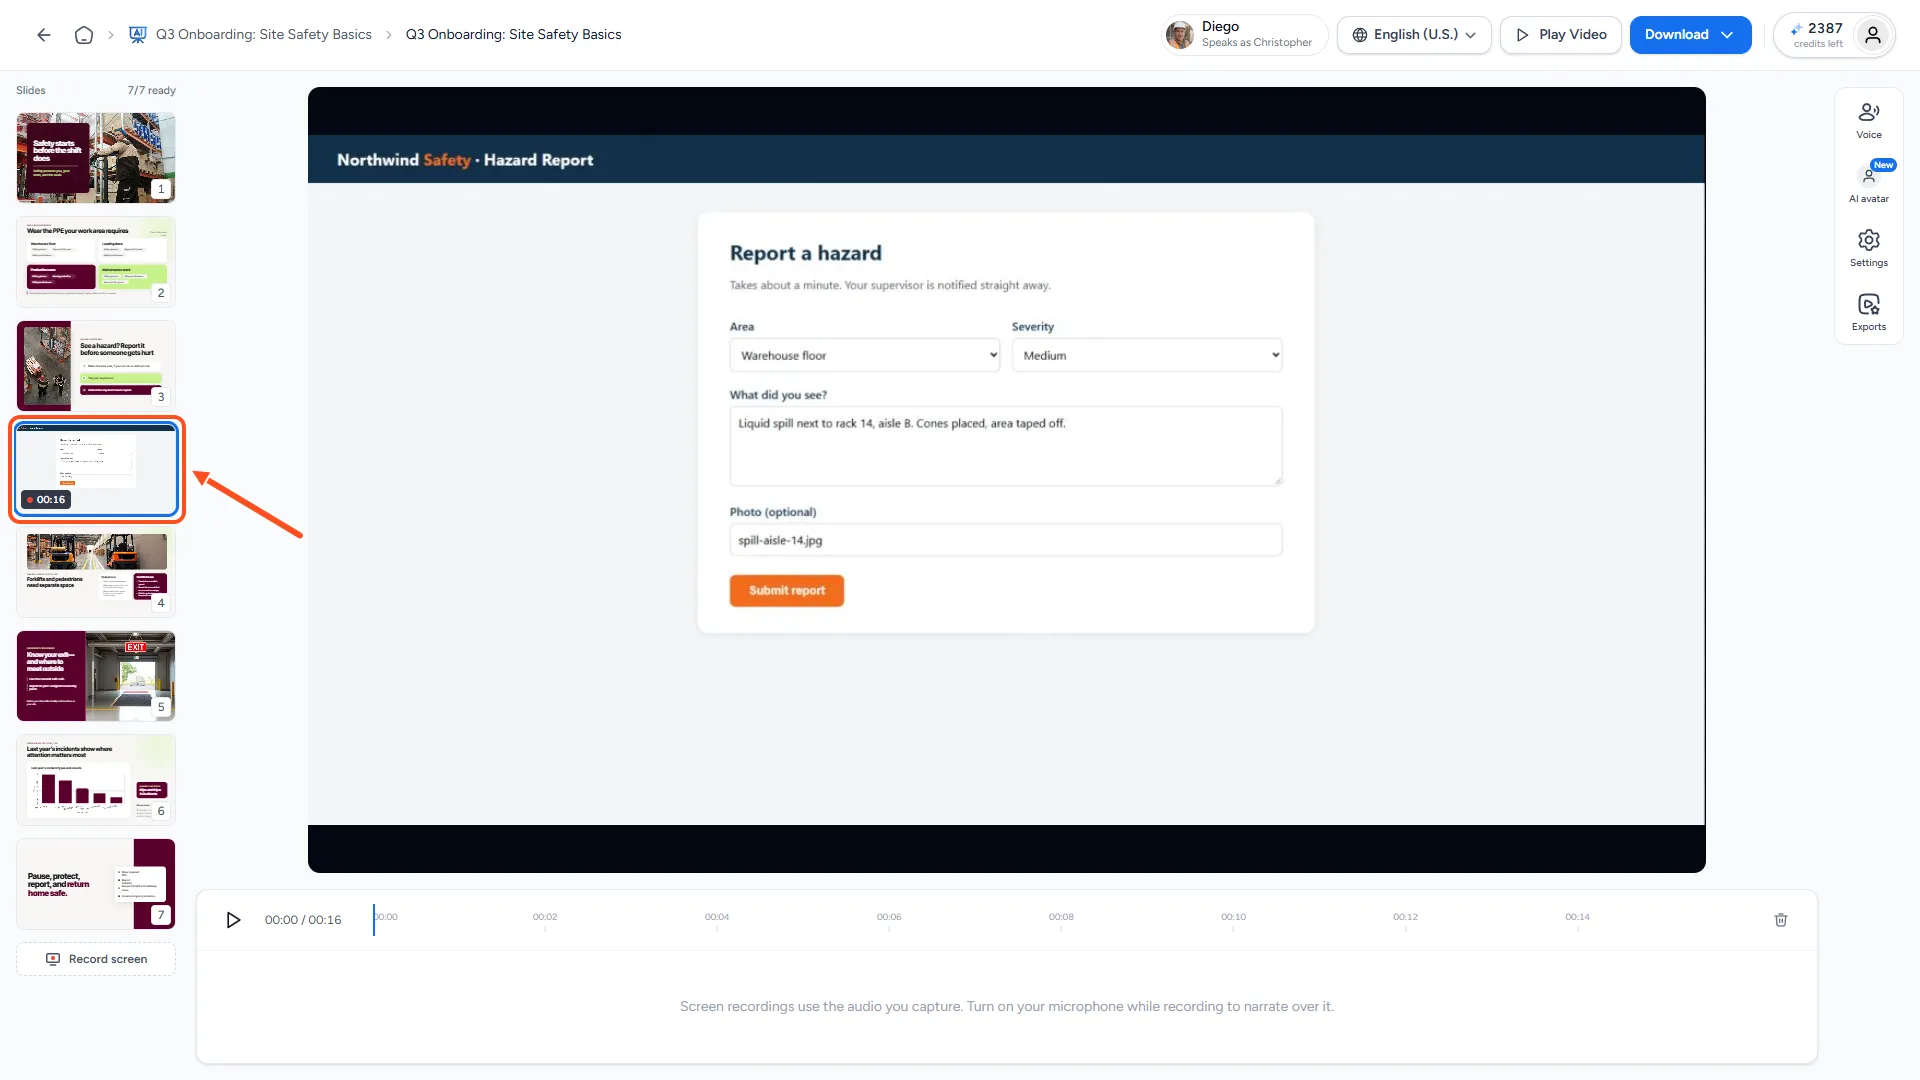
The recording now sits in the slide tray, right after the slide you picked, with its length shown. Click it to view it in the editor and play it from the timeline. Click Play Video to watch the whole video with the recording in place.
The recording is part of the MP4 the next time you export. See How do I download my AI video?.
What happens to the narration on that slide?
Nothing changes. The recording is its own segment:
- The slide before it keeps its AI narration and plays as usual.
- The recording plays after that slide, with only the sound you captured. The AI voice doesn't speak over it.
Screen recordings stay in the video you made them in. If you create a language version with Translate this video, the new version doesn't include them. See How do I translate an AI video into another language?.
Redo or remove a recording
You can't trim or move a recording once it's added. To redo one, delete it and record again with the right slide selected.
To delete a recording:
- Hover over the recording in the slide tray and click the trash icon ("Delete this recording"). You can also select the recording and click the trash icon in the timeline.
- Click Delete to confirm.
The recording and its file are deleted. This can't be undone. Export the video again to update the MP4.
Troubleshooting
- "Screen sharing was blocked." Allow screen sharing for app.slidespeak.co in your browser and try again. On a Mac, your browser may also need screen recording permission in System Settings.
- "Your microphone is blocked, so this recording has no audio." Allow microphone access for the site and record again. See Microphone not working.
- "No audio source, so this recording will be silent." The microphone is off and you didn't share a tab. That's fine for a silent demo. Otherwise turn on the microphone or share a tab.
- "Could not upload the recording." Your recording is still in the dialog. Click Add after slide again. If it keeps failing, check the recording is under 500 MB.
Need more help?
If you have any questions or need assistance, feel free to contact our support team at support@slidespeak.co