

Captions make your video easier to follow, but white text on a black box doesn't suit every brand. You can change the caption colours, make the background lighter or solid, and give captions their own space below the slide. The video editor shows a live preview, so you see the result before you export.
Before you start
- Turn captions on first. If you haven't yet, see How do I add captions to my AI video presentations?.
- Where it lives: The Settings panel in the video editor. You can also style captions while you create a new video.
- Where the words come from: Captions show the narration script. To change the words, edit the script. Script markers and pronunciation respellings never show in captions.
- Credits: Styling captions is free. The new style is used the next time you export, and your existing narration audio is reused.
Step 1: Open the caption settings
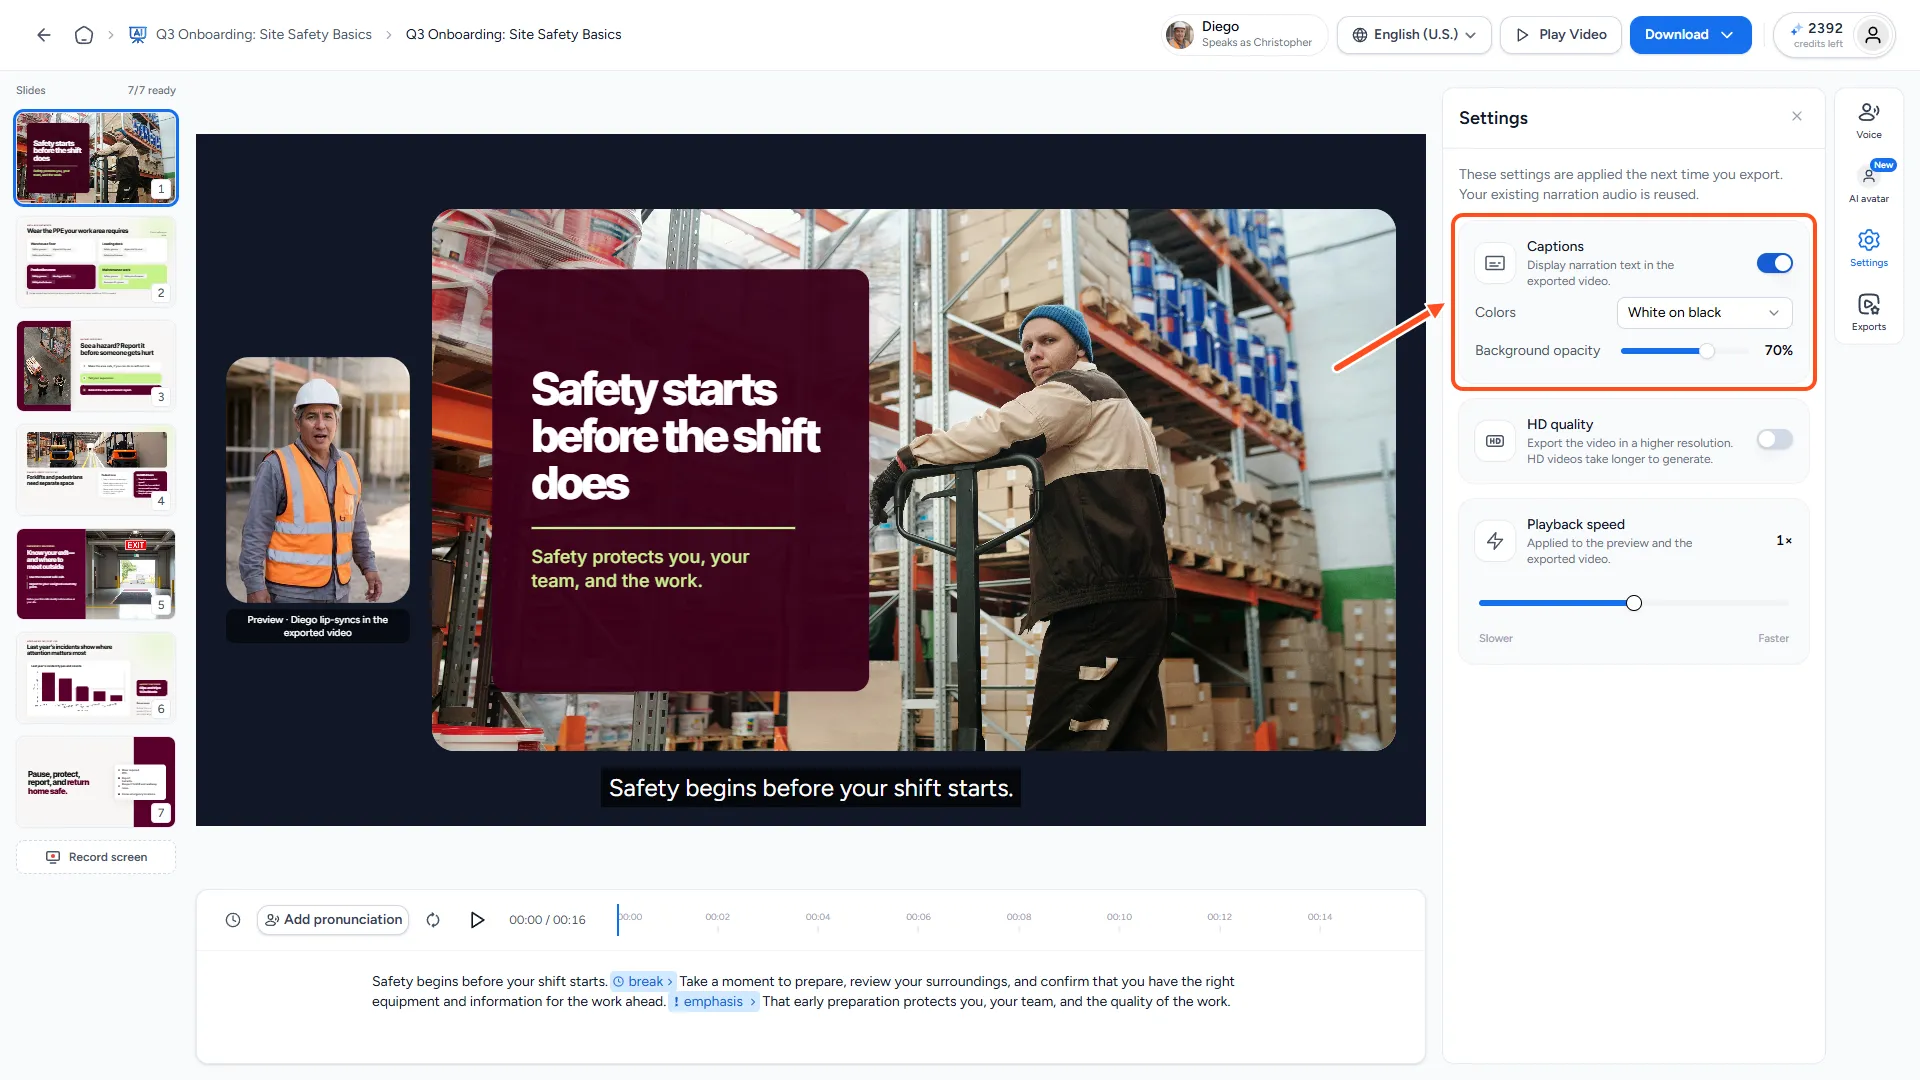
In the video editor, click the Settings icon in the side bar. Make sure Captions ("Display narration text in the exported video") is switched on. The style options appear below it.
Step 2: Pick a colour preset
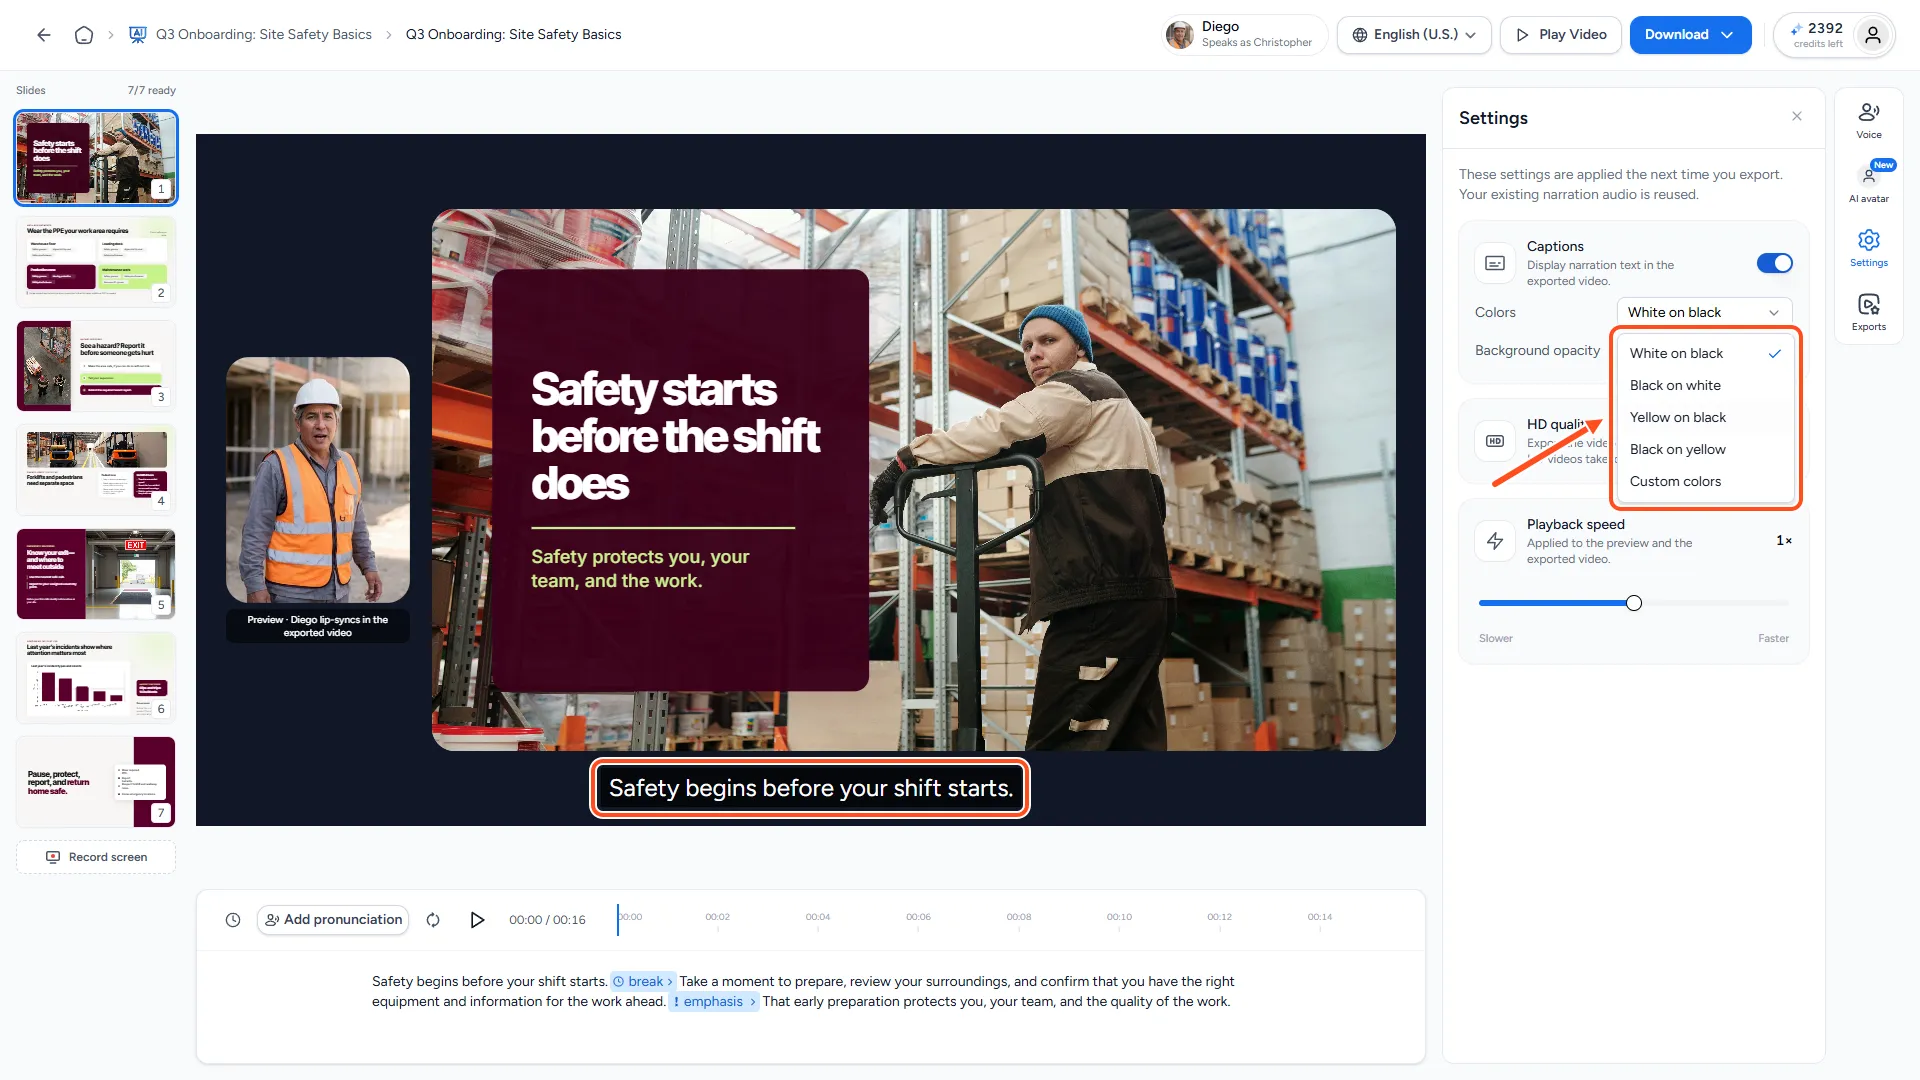
Open Colors and choose a preset:
- White on black (the default)
- Black on white
- Yellow on black
- Black on yellow
- Custom colors
Step 3: Set your own colours (optional)
Choose Custom colors to match your brand. New options appear:
- Text color: The colour of the caption text.
- Background: Turn the box behind the text on or off.
- Background color: The colour of the box. When the background is off, this becomes Outline color, a thin outline around the text that keeps it readable on busy slides.
Click a colour square to open the colour picker.
Step 4: Adjust opacity and padding
- Background opacity: Drag the slider from 0% (see-through) to 100% (solid). The default is 70%. This only shows when the background is on.
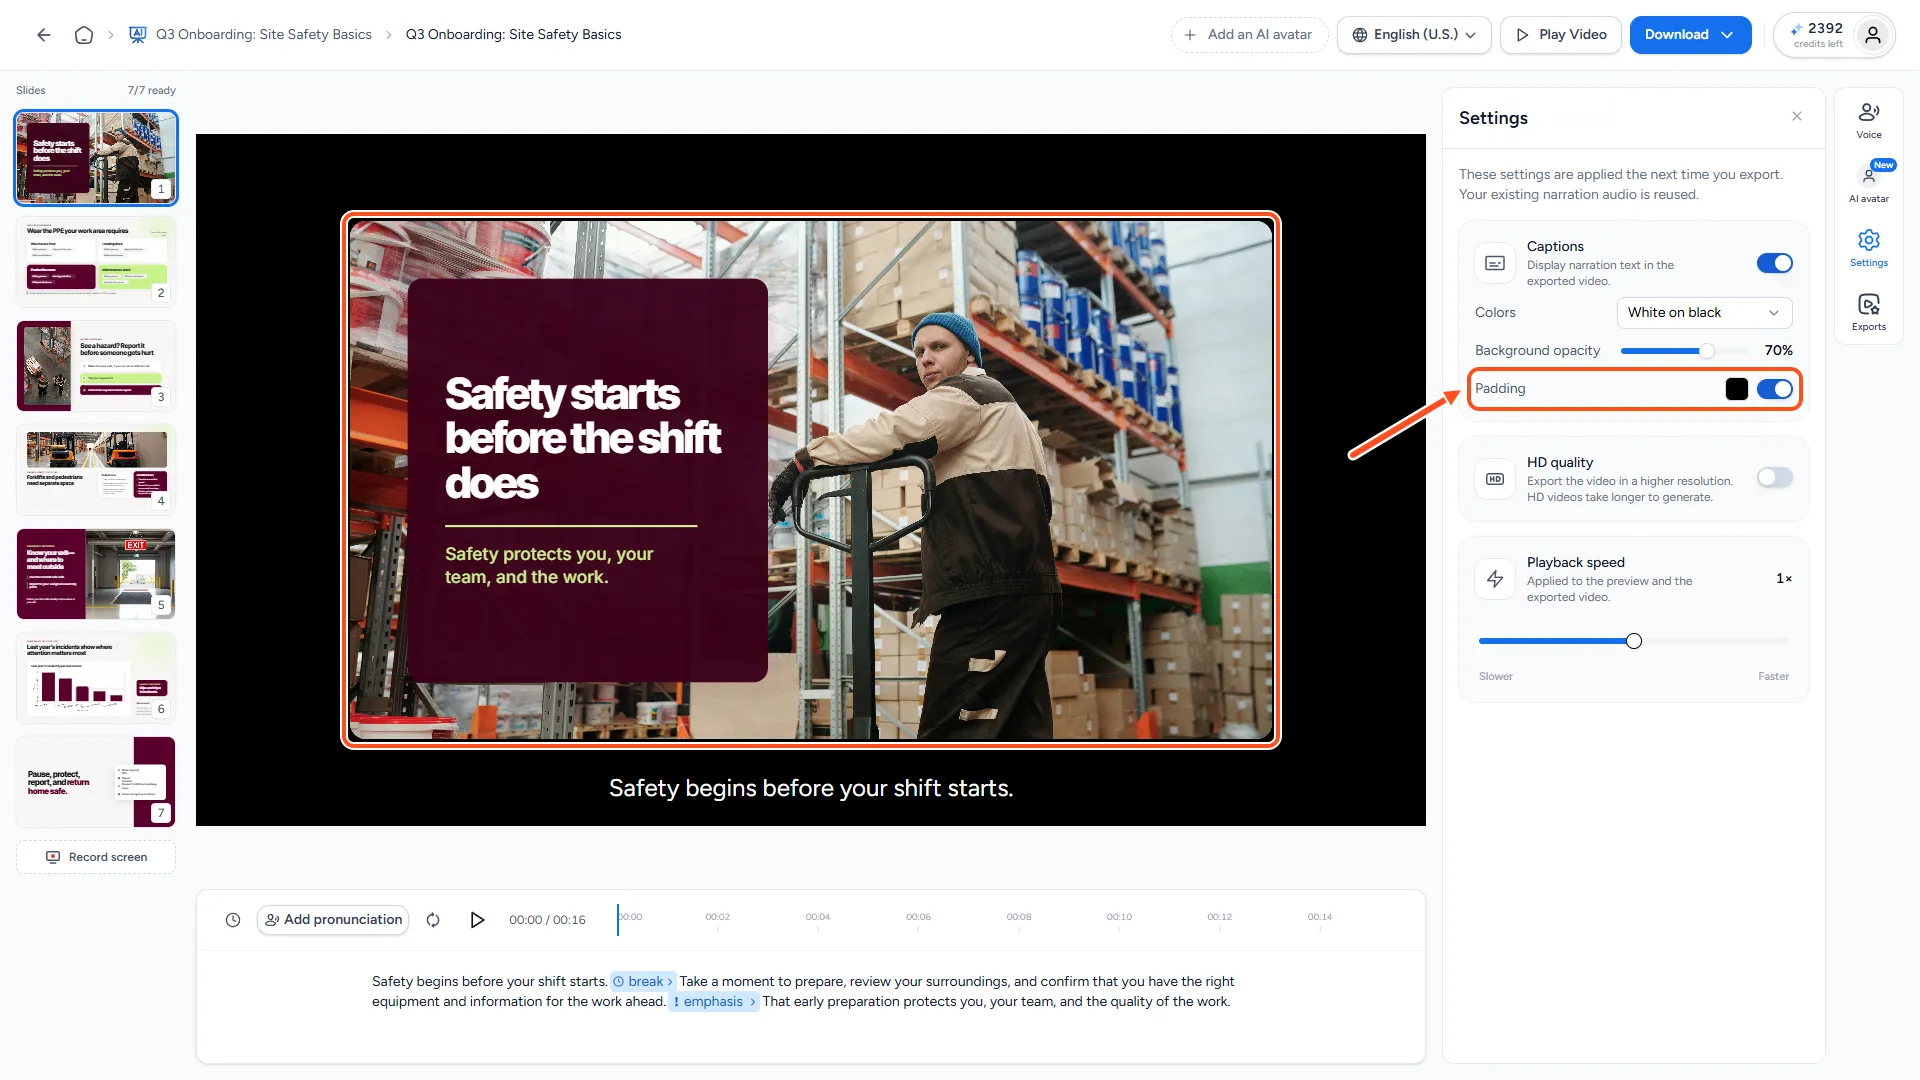
- Padding: Turn this on to give captions their own space. The slide shrinks into a frame, and the captions sit in the frame below the slide instead of over your content. Click the colour square next to the switch to pick the frame colour.
With an AI avatar: Captions always sit below the slide, so the Padding option isn't shown. See How do I add an AI avatar to my video?.
Step 5: Preview the captions
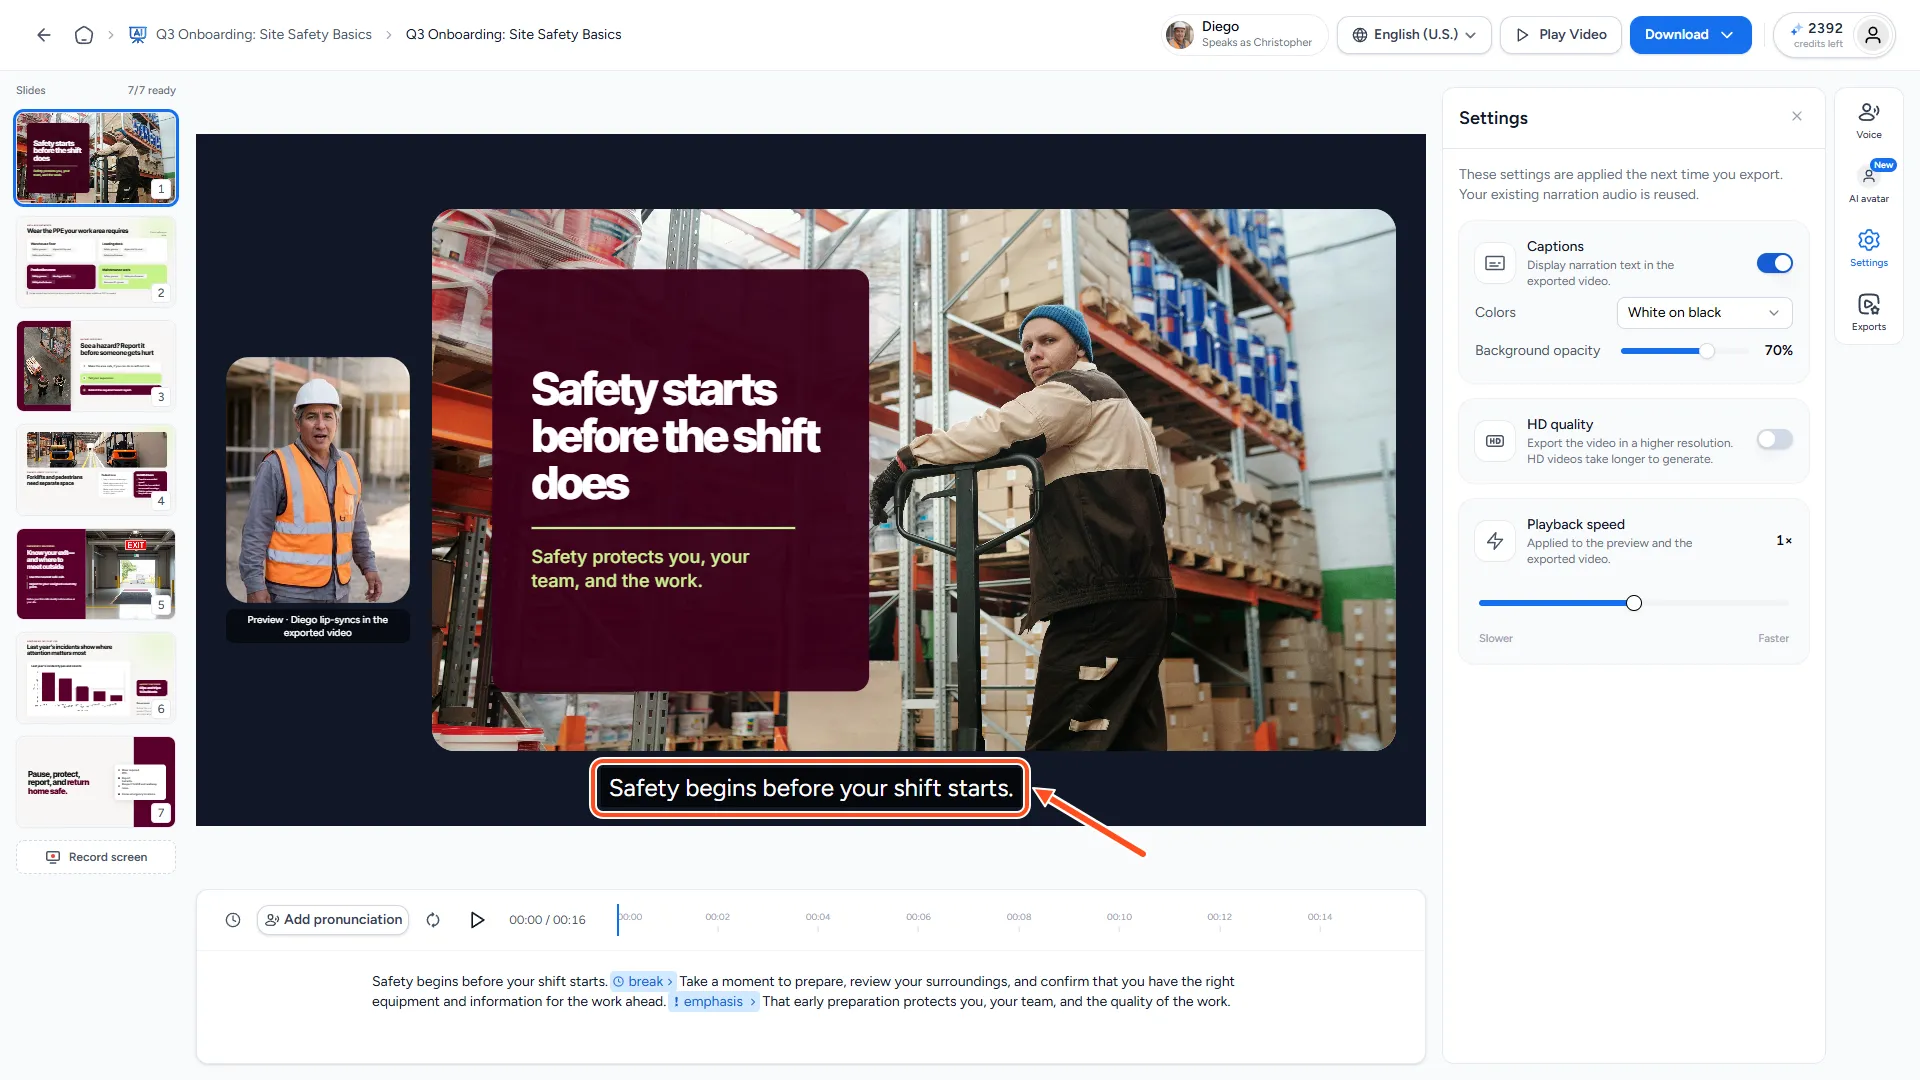
The slide in the middle of the editor shows the caption with your style. Click the play button on a slide's narration and the caption moves through the script, a line or two at a time, the way it will in the exported video.
Step 6: Export again
Your style is saved as you go. It's applied to the video the next time you export. Click Download, then Export updated video if you've exported before. See How do I download my AI video?.
Troubleshooting
- I don't see the style options. Switch on Captions in the Settings panel first.
- My downloaded video still has the old captions. Video files don't update by themselves. Export the video again.
- A word in the captions is wrong. Edit the slide's narration script. Then regenerate that slide's audio so the voice matches. See How do I fix narration that failed or is out of sync?.
- Captions cover part of my slide. Turn on Padding so they sit below the slide.
Need more help?
If you have any questions or need assistance, feel free to contact our support team at support@slidespeak.co