

A brand kit tells SlideSpeak how your presentations should look. You add your logo, your primary color and your fonts once. SlideSpeak then uses them every time it generates a presentation with that brand. In the app, brand kits live under Branding, and each one is called a brand.
Before you start
- You need Premium Plus or Lifetime. Branding is not part of the Free or Premium plans. On those plans, opening Branding shows an upgrade prompt.
- Where it lives: click Branding in the left sidebar.
- You can have as many brands as you like. For example, one per client or product line.
- Your first brand is ready for you. The first time you open Branding, SlideSpeak creates an empty brand called My Branding. You can fill it in, or create a new one.
- There is no Save button. SlideSpeak saves every change automatically. The status next to the brand name at the top shows when your changes are saved.
Step 1: Create a brand
- Click Branding in the left sidebar.
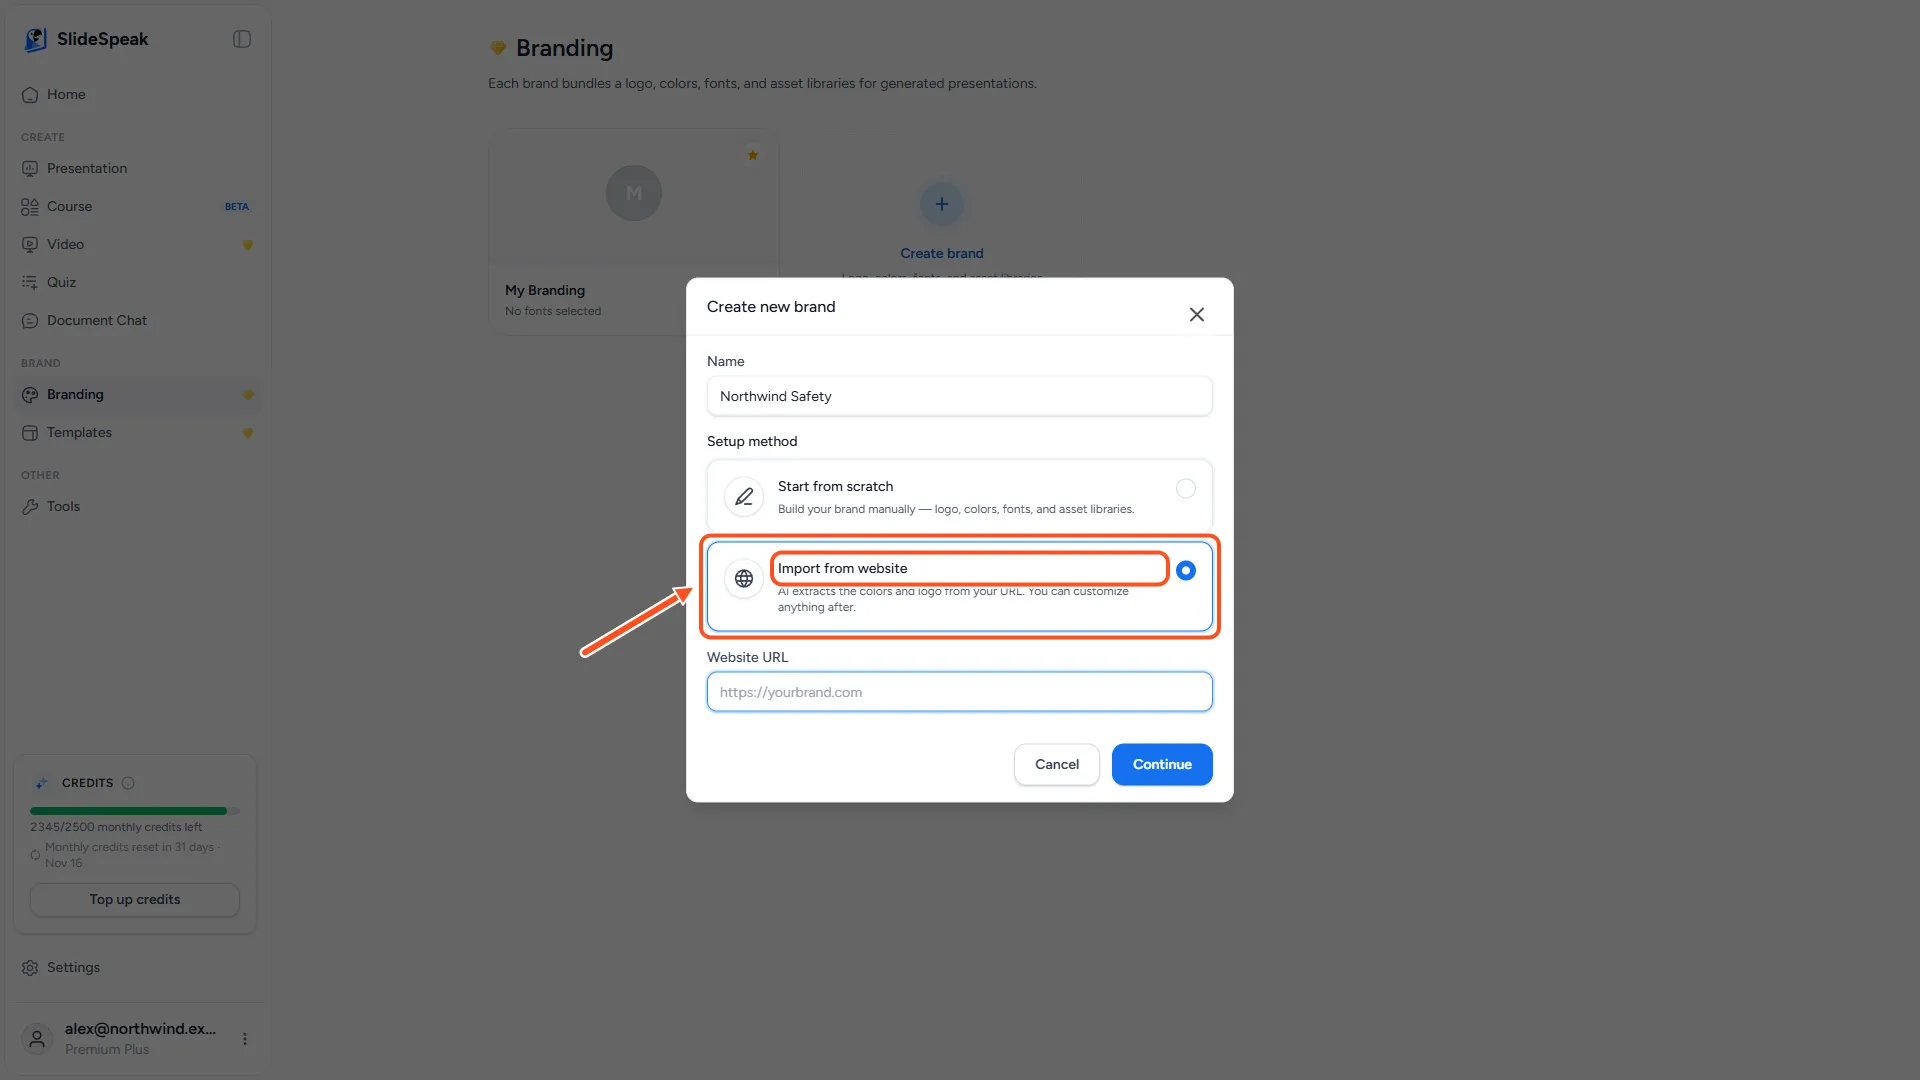
- Click the Create brand tile.
- Type a name for the brand, for example your company name.
- Under Setup method, choose Start from scratch.
- Click Continue.
The brand editor opens. On the left you see its sections: Overview, Logos, Colors, Typography, Images and Icons.
Want SlideSpeak to fill in your logo and color for you? Choose Import from website instead. See how to import your brand from your website.
Step 2: Add your logo
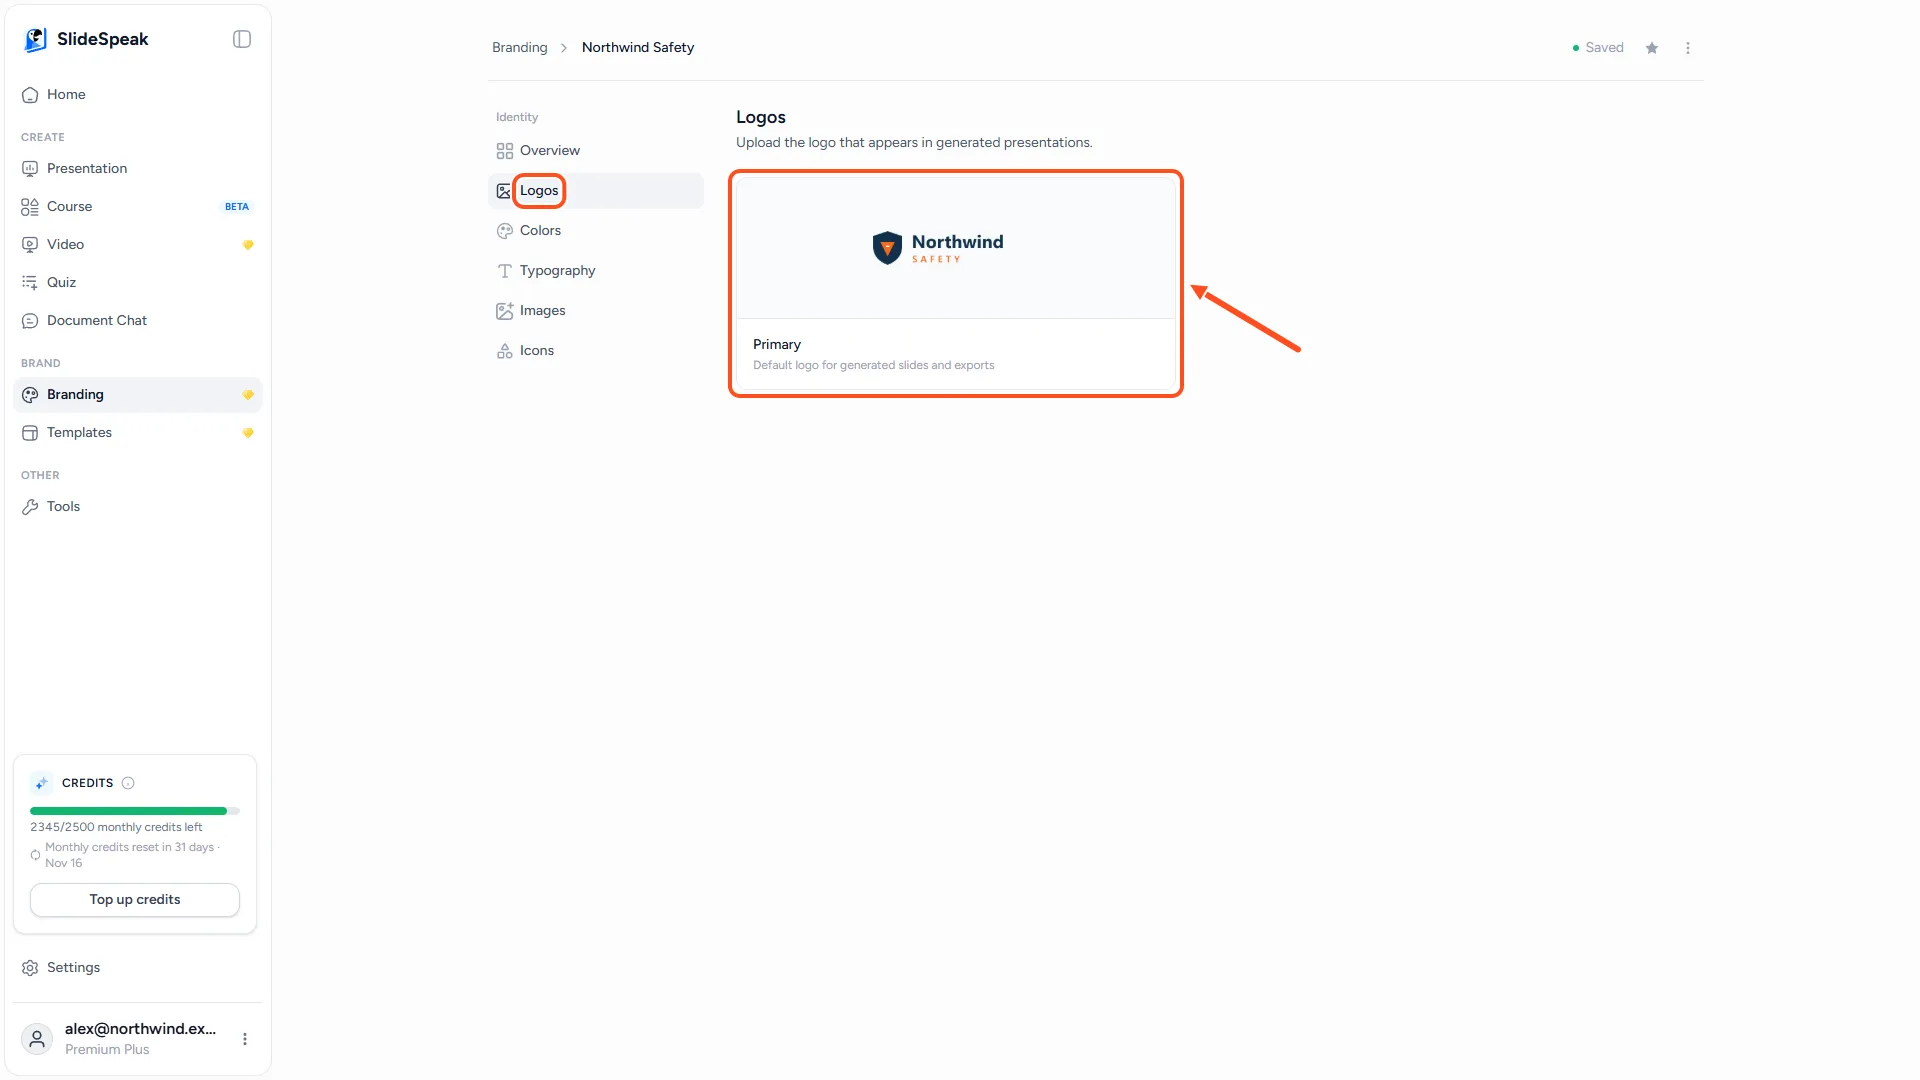
- Click Logos.
- Drop your logo file onto the upload area, or click it to browse your files.
SlideSpeak accepts SVG, PNG, JPG or WEBP files up to 3 MB. The logo appears in generated slides and exports.
To change the logo later, hover over it and click Replace. To remove it, click Remove, then confirm with Remove logo.
Step 3: Pick your primary color
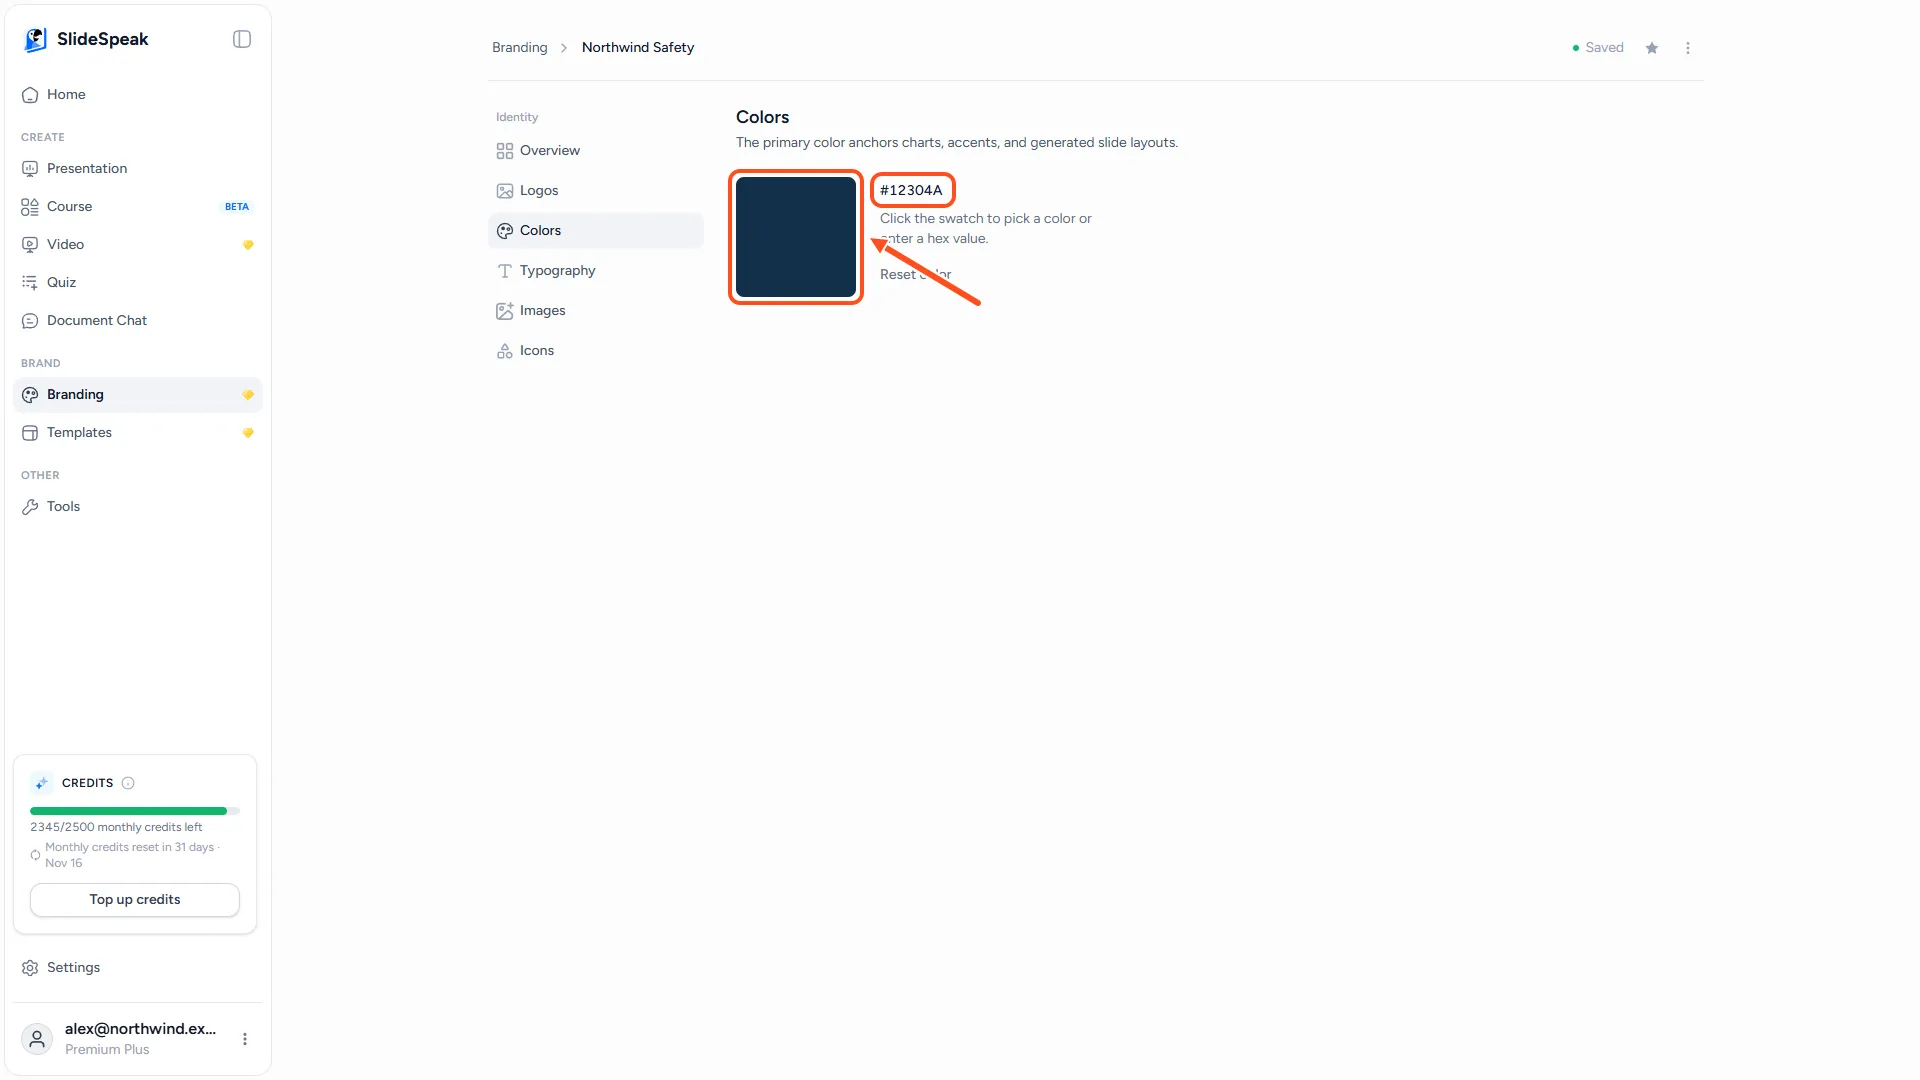
- Click Colors.
- Click the color swatch and pick a color, or enter its hex code, for example #1D4ED8.
A brand has one primary color. SlideSpeak builds the rest of the look around it: accents, charts and slide layouts. To clear the color, click Reset color.
Step 4: Choose your fonts
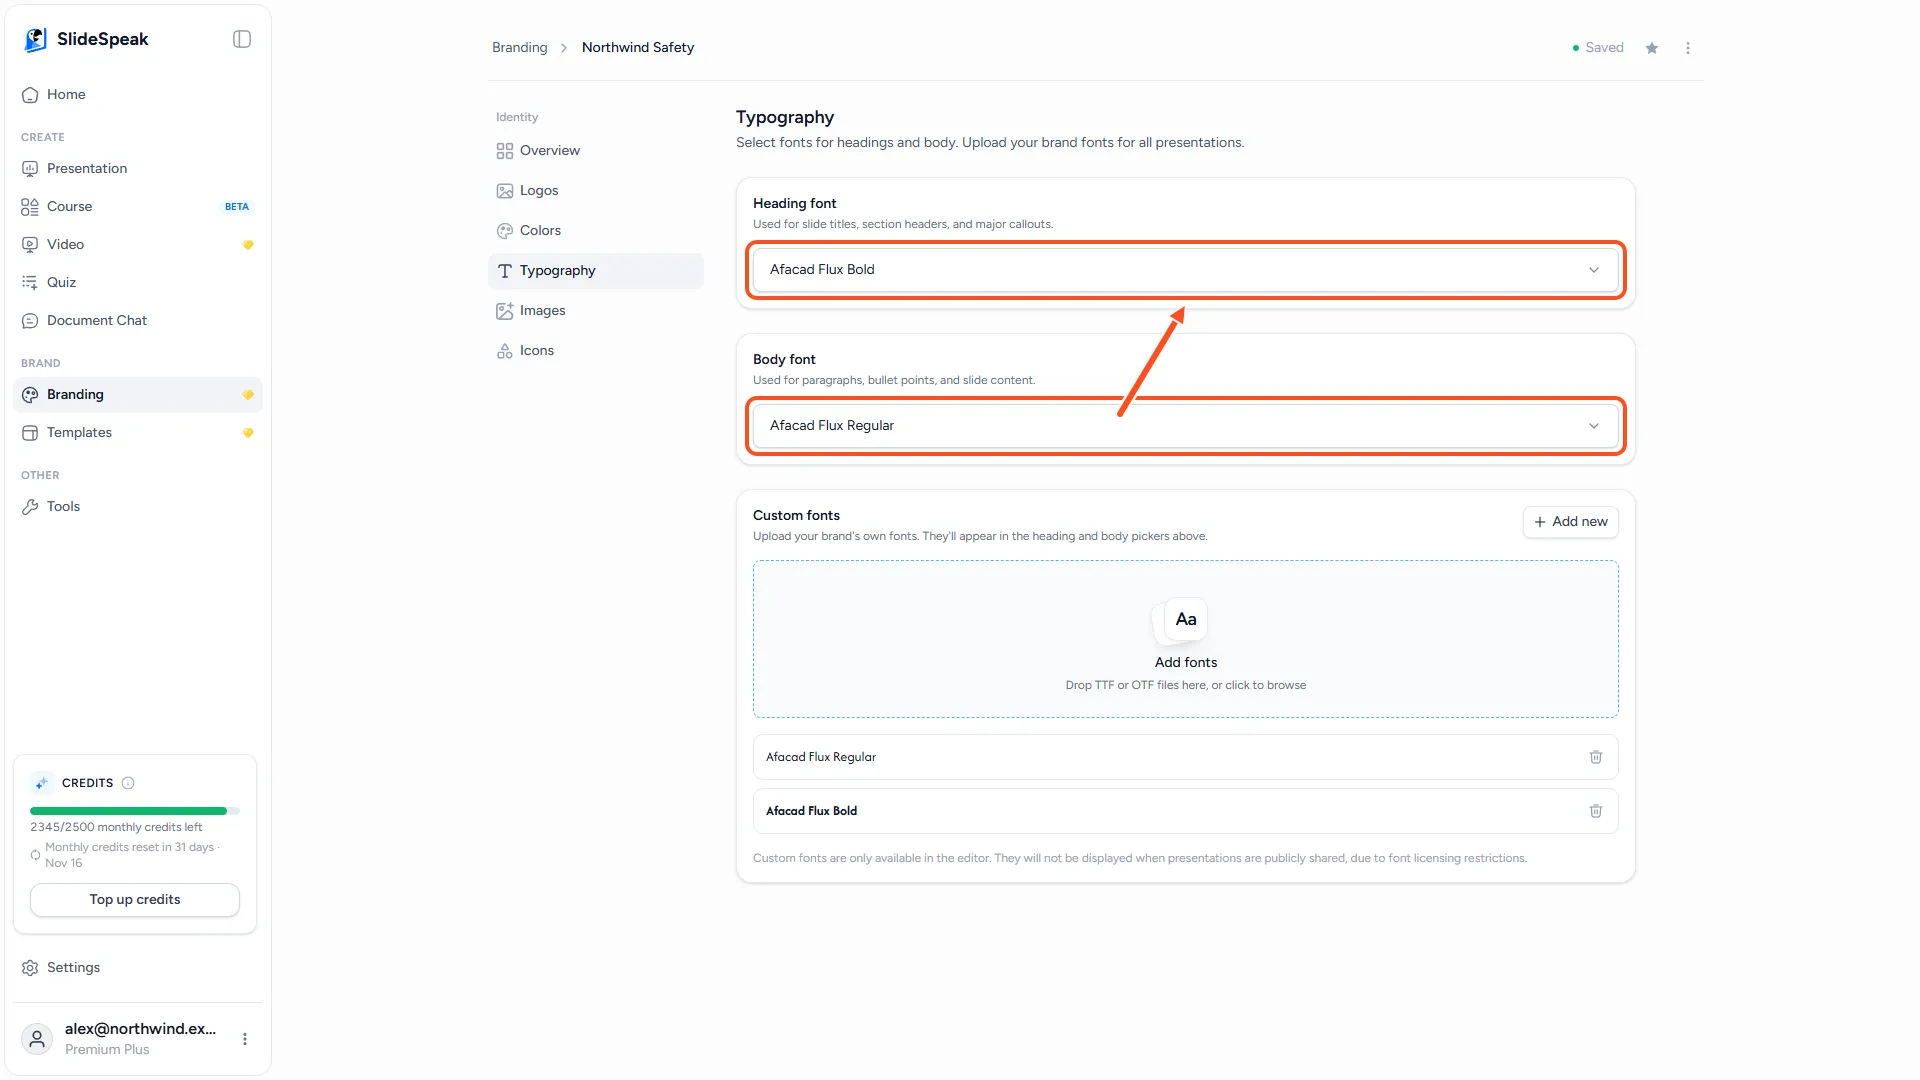
- Click Typography.
- Under Heading font, click Choose a font and pick the font for slide titles and headers.
- Under Body font, pick the font for paragraphs and bullet points.
You can search the font list. If your brand uses its own font, upload it under Custom fonts on the same page. It then appears at the top of both font lists. See how to use custom fonts.
Step 5: Make it your default brand
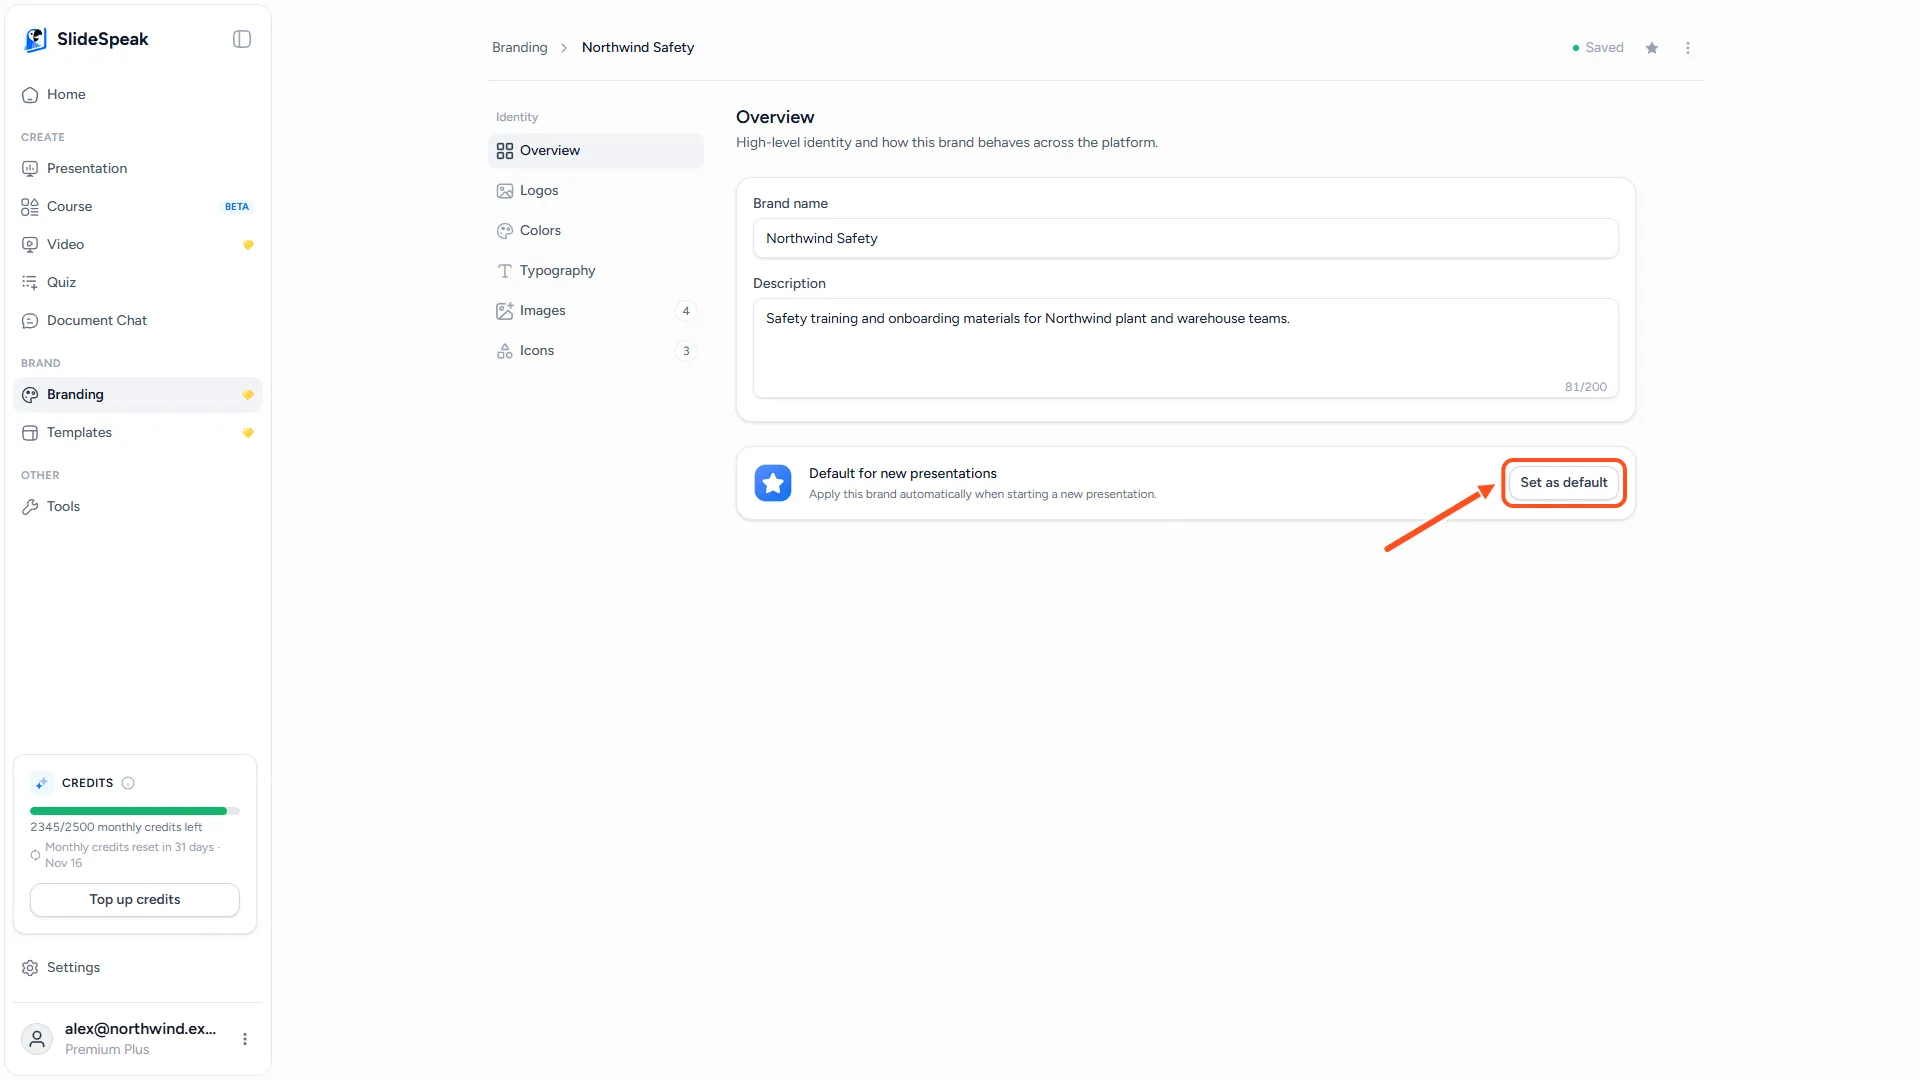
Your default brand is selected automatically whenever you start a new presentation.
- Click Overview.
- Next to Default for new presentations, click Set as default.
You can also click the star icon next to the brand name at the top of the editor. In the list of brands, your default brand has a yellow star.
Step 6: Use your brand in a new presentation
- Click Presentation in the left sidebar.
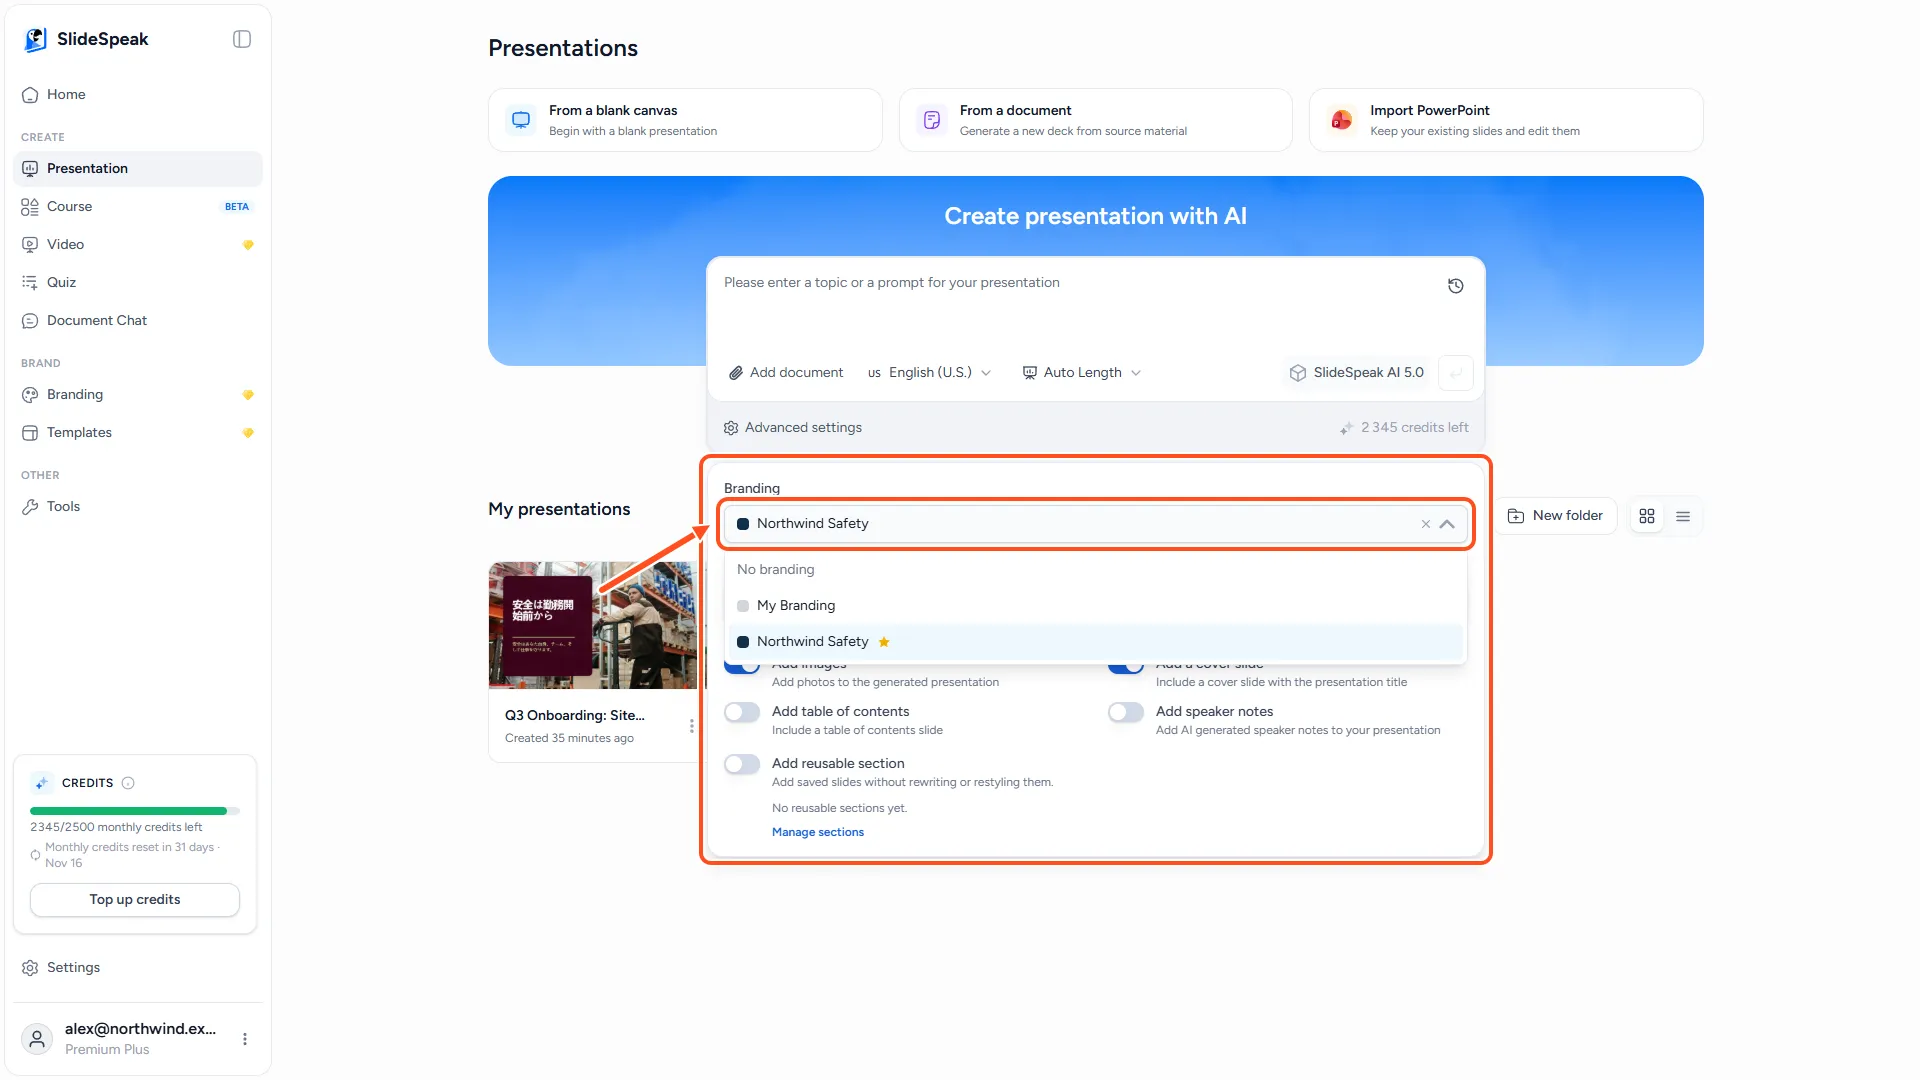
- Below the prompt box, click Advanced settings.
- Under Branding, check which brand is selected. Your default brand is selected for you. Click the field to pick another brand, or choose No branding to create a presentation without one.
- Type your topic and create the presentation as usual.
SlideSpeak uses the brand's logo, color and fonts in the slides it generates. It also uses the brand's image and icon libraries, if you added them.
Manage several brands
Open a brand and click the three-dot menu (Brand actions) in the top-right corner:
- Set as default makes this brand your default.
- Duplicate makes a copy, for example to create a variation for a sub-brand.
- Delete brand removes it. If you delete your default brand, the next brand becomes your default.
To rename a brand, click its name at the top of the editor, or change Brand name under Overview. You can also add a short Description, for example "Use for client decks".
If you work in a team workspace, the brands you create there are shared with everyone in it. See how to create a team workspace.
Go further
- Add your own photos and icons, so SlideSpeak uses them instead of stock images. See how to add your own brand images and icons.
- Capture the full look of an existing deck with a design kit. See how to create a design kit.
- Add the same intro or closing slides to every deck. See how to add the same intro or outro slides to every presentation.
Troubleshooting
- Branding shows an upgrade prompt. Brands need Premium Plus or Lifetime. Upgrade your plan to create and use brands.
- I don't see Branding in Advanced settings. The field only appears once you have at least one brand.
- My new presentation doesn't use my brand. Open Advanced settings before you create the presentation and check that your brand is selected, not No branding.
- My logo won't upload. Use an SVG, PNG, JPG or WEBP file under 3 MB.
Need more help?
If you have any questions or need assistance, feel free to contact our support team at support@slidespeak.co