

SlideSpeak can turn any presentation into a narrated video, and the narrator can be you. Record or upload a short voice sample, and SlideSpeak clones your voice and uses it to read the narration script for every slide. The result is a video presentation that sounds like you recorded it yourself, without you ever reading the full script out loud.
This guide walks through the full flow: generating the script, cloning your voice, and generating the video.
Step 1: Open AI Video and create a video
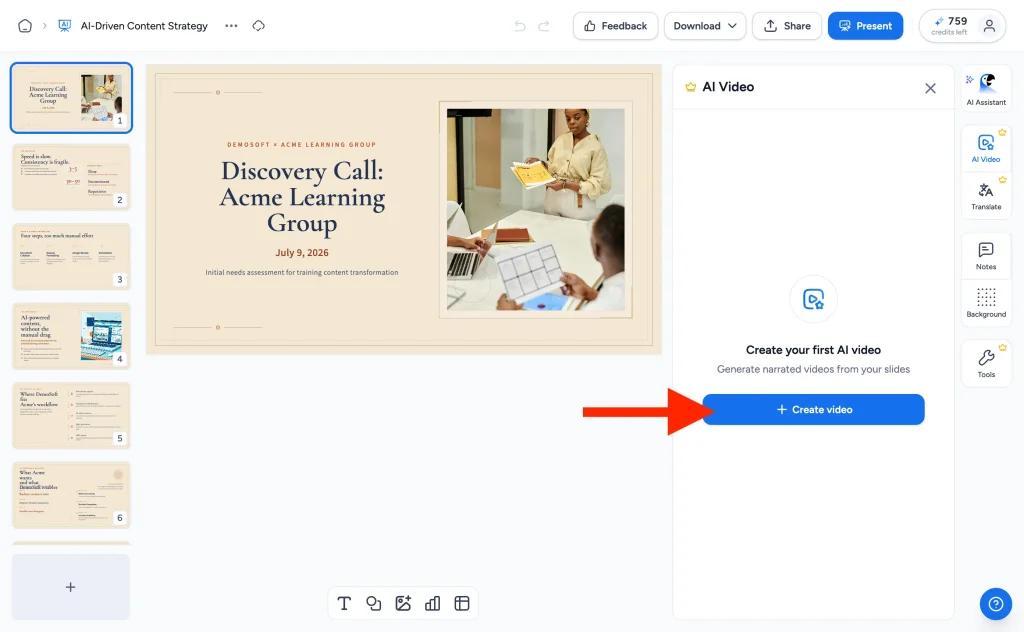
With your presentation open in the SlideSpeak editor, click AI Video in the right-hand side panel, then click + Create video.
Step 2: Set up the voiceover script
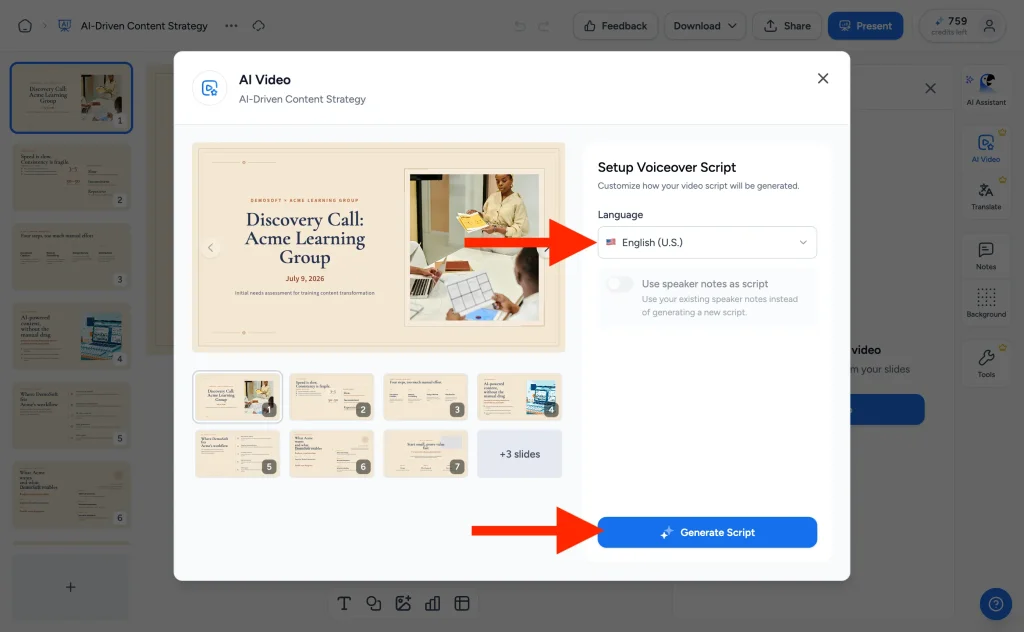
First, SlideSpeak writes a narration script for your slides. Before generating it, you can adjust two things:
- Language — the language the script (and later the narration) will be in.
- Use speaker notes as script — turn this on if you’ve already written speaker notes and want the video to use them word for word instead of a generated script.
Then click Generate Script.
Step 3: Review the script
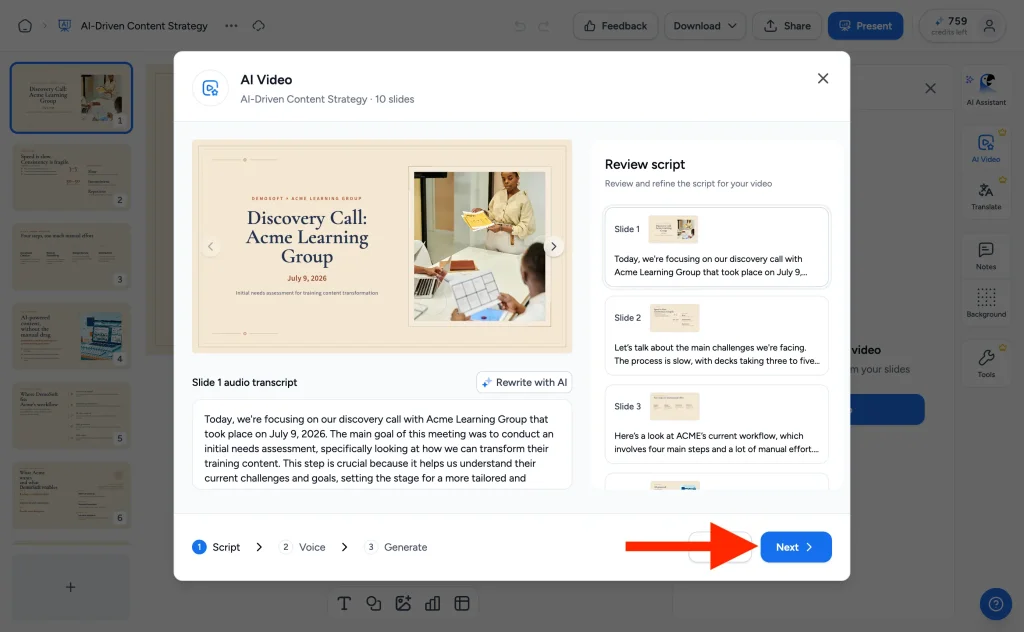
You’ll see the narration for each slide, side by side with the slide itself. Edit any slide’s transcript directly, or click Rewrite with AI to have it rephrased. When the script sounds right, click Next to move to the voice step.
Step 4: Add a custom voice
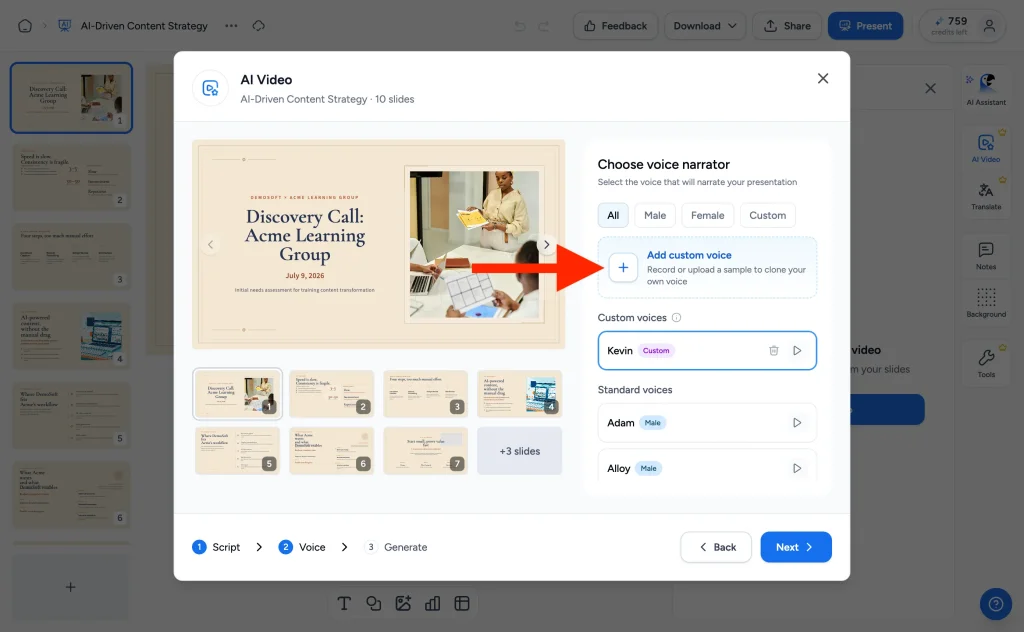
In the Choose voice narrator step you can pick one of the standard voices, but to narrate with your own voice, click Add custom voice. Voices you’ve already cloned appear under Custom voices, ready to reuse for any future video.
Step 5: Record or upload your voice sample
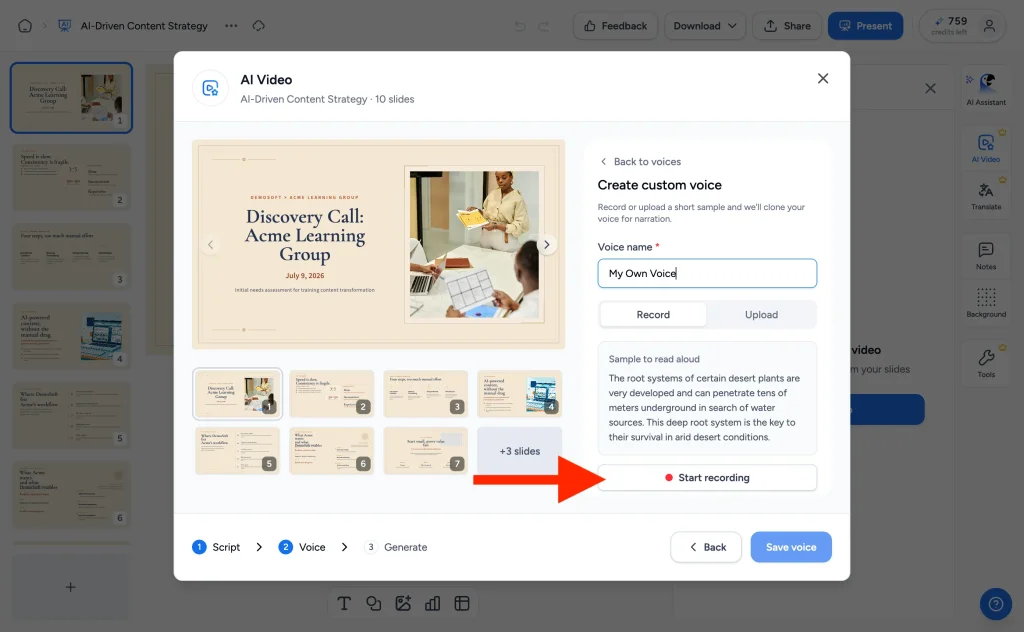
Give your voice a name, then provide a short sample:
- Record — click Start recording and read the sample text on screen out loud in a natural speaking voice.
- Upload — already have a clean recording of yourself? Upload it instead.
Click Save voice and your cloned voice appears in the narrator list, marked as Custom. You can play a preview before committing to it. For best results, record in a quiet room and speak the way you’d naturally present.
Step 6: Generate the video
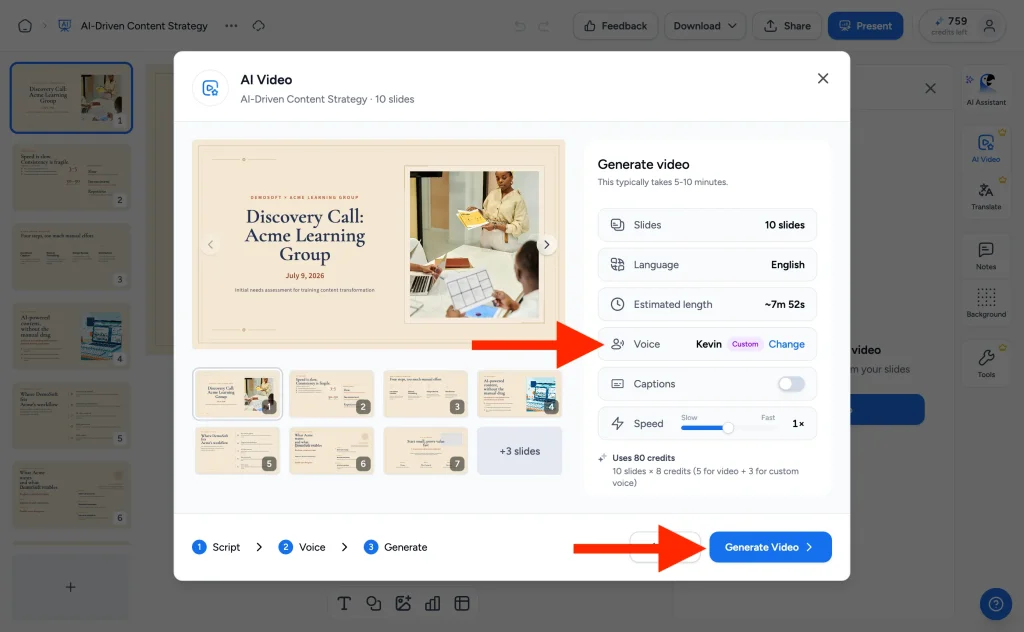
The final step shows a summary of your video: number of slides, language, estimated length, and the voice that will narrate it. Make sure your custom voice is selected next to Voice (click Change to switch). You can also toggle captions and adjust the narration speed.
Click Generate Video. Generation typically takes 5 to 10 minutes. With a custom voice, a video uses 8 credits per slide (5 for the video plus 3 for the custom voice); with a standard voice it’s 5 credits per slide.
That’s it!
Once generation finishes, you have a video presentation narrated in your own voice. Your cloned voice stays saved under Custom voices, so the next video only takes a few clicks: generate the script, pick your voice, and hit generate.
Need more help?
If you have any questions or need assistance, feel free to contact our support team at support@slidespeak.co